
User's Manual


Table Of Contents
- Product Features
- Safety and Maintenance Guidelines
- Setting Up the Monitor
- Installing the Monitor on the Stand
- Installing an HP Ultra-slim Desktop (USDT) on the Stand
- Installing an HP Thin Client on the Stand
- Adjusting the Monitor
- Turning on the Monitor
- Removing the Computer from the Stand
- Removing the Monitor from the Stand
- Monitor Mounting Alternatives
- Locating the Rating Labels
- Operating the Monitor
- Troubleshooting
- Technical Specifications
- Agency Regulatory Notices
- LCD Monitor Quality and Pixel Policy
Installing an HP Ultra-slim Desktop (USDT) on the Stand
You can install an HP USDT or Thin Client computer on the rear side of the stand. This section provides
instructions on installing the USDT.
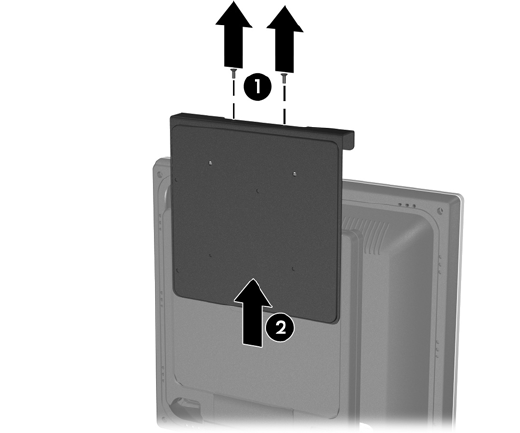
1. On the rear of the stand, remove the two screws (1) from the top of the computer mounting bracket
and lift the bracket off the stand (2).
Figure 3-4 Removing the Computer Mounting Bracket
ENWW Installing an HP Ultra-slim Desktop (USDT) on the Stand 7