Hardware reference guide
Table Of Contents
- Product Features
- Microtower (MT) Hardware Upgrades
- Serviceability Features
- Warnings and Cautions
- Removing the Computer Access Panel
- Replacing the Computer Access Panel
- Removing the Front Bezel
- Removing Bezel Blanks
- Replacing the Front Bezel
- System Board Connections
- Installing Additional Memory
- Removing or Installing an Expansion Card
- Drive Positions
- Installing and Removing Drives
- Installing a Security Lock
- Small Form Factor (SFF) Hardware Upgrades
- Serviceability Features
- Warnings and Cautions
- Removing the Computer Access Panel
- Replacing the Computer Access Panel
- Removing the Front Bezel
- Removing Bezel Blanks
- Replacing the Front Bezel
- Changing from Desktop to Tower Configuration
- System Board Connections
- Installing Additional Memory
- Removing or Installing an Expansion Card
- Drive Positions
- Installing and Removing Drives
- Installing a Security Lock
- Battery Replacement
- Removing and Replacing a Removable 3.5-inch SATA Hard Drive
- Unlocking the Smart Cover Lock
- Electrostatic Discharge
- Computer Operating Guidelines, Routine Care and Shipping Preparation
- Index

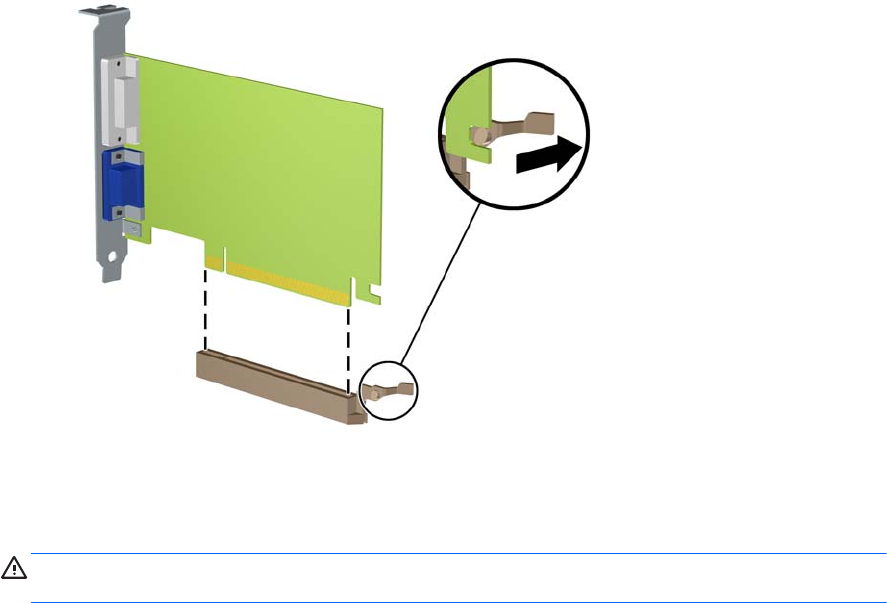
c. If you are removing a PCI Express x16 card, pull the retention arm on the back of the
expansion socket away from the card and carefully rock the card back and forth until the
connectors pull free from the socket. Pull the expansion card straight up from the socket
then away from the inside of the chassis to release it from the chassis frame. Be sure not to
scrape the card against the other components.
Figure 3-13 Removing a PCI Express x16 Expansion Card
10. Store the removed card in anti-static packaging.
11. If you are not installing a new expansion card, install an expansion slot cover to close the open
slot.
CAUTION: After removing an expansion card, you must replace it with a new card or
expansion slot cover for proper cooling of internal components during operation.
Removing or Installing an Expansion Card 57


