
User's Manual


Table Of Contents
- Notebook Features
- Pointing Devices and Keyboard
- Using a Pointing Device
- Using Hotkeys and Shortcut Keys
- Fn and Function Keys
- Hotkey and Shortcut Key Quick Reference
- Initiating Standby (Fn+F3)
- Switching Display and Image (Fn+F4)
- Viewing Battery Charge Information (Fn+F8)
- Adjusting the Screen Brightness (Fn+F9 and Fn+F10)
- Displaying System Information (Fn+esc)
- Using Hotkeys and Shortcut Keys with External Keyboards
- Using Quick Launch Buttons
- Keypads
- Battery Packs
- Inserting or Removing the Primary Battery Pack
- Using the Optional Travel Battery
- Charging a Battery Pack
- Monitoring the Charge of a Battery Pack
- Managing Low-Battery Conditions
- Calibrating a Battery Pack
- Conserving Battery Power
- Storing a Battery Pack
- Disposing of a Used Battery Pack
- Finding More Power Information
- Hard Drive
- Audio and Video
- Communication Devices
- External Devices
- Hardware Upgrades
- Adding and Upgrading Memory Modules
- Specifications
- Index
Hardware Upgrades
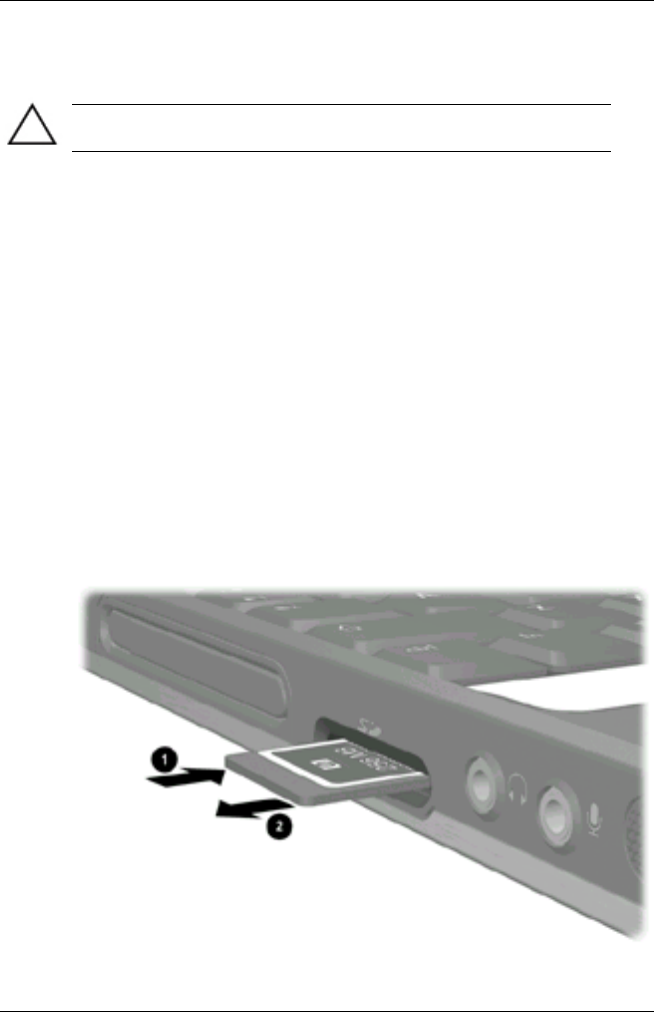
Removing an SD Card
CAUTION: To prevent loss of work or system lockup, stop the SD
card before removing it.
To remove an SD card:{xe "SD (Secure Digital) card:removing"}
1. Close all files and applications using the SD card.
2. Stop the SD card.
In Windows 2000, select the Unplug or Eject icon in the
task bar, then stop the card you plan to remove. (When the
card can be safely removed, a message is displayed.)
In Windows XP, select the Safely Remove Hardware icon
in the taskbar, then select the PC Card. (To display the
Safely Remove Hardware icon, select Show Hidden Icons in
the taskbar.)
3. Gently press in on the SD card to unlock it
1
.
4. Pull the SD card from the slot
2
.
Ejecting an SD card from the SD slot
Hardware Guide 8-5