
User's Manual
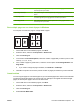

Table Of Contents
- Device basics
- Use the device
- Copy
- Fax
- Send to e-mail
- Send to a network folder
- Job Storage
- Check job status and use the job queue
- Print from a Windows computer
- Windows printer driver features
- Select a tray
- Select an output bin for print jobs
- Select a paper type
- Set the color quality
- Store jobs
- Create and use printing shortcuts
- Use watermarks
- Resize documents
- Set a custom paper size
- Print using different paper
- Insert blank or preprinted sheets
- Chapter page layout
- Print on both sides of the paper
- Print multiple pages on one sheet of paper in Windows
- Create booklets
- Shift images on the page
- Use the HP Digital Imaging Options dialog box
- Set the stapling options
- Set the color options
- Use the Services tab
- Windows printer driver features
- Print from a Macintosh computer
- Macintosh printer driver features
- Select a tray
- Select an output bin
- Select a paper type
- Set the color quality
- Store jobs
- Create and use presets
- Use watermarks
- Resize documents
- Print on a custom paper size
- Print a cover page
- Print on both sides of the paper
- Print multiple pages on one sheet of paper
- Create booklets
- Shift images on the page
- Set the stapling options
- Set the color options
- Use the Services menu
- Macintosh printer driver features
- Maintain the device
- Solve problems
- Regulatory statements
- Index
5. In the drop-down box for Booklet Layout, select either Left Edge Binding or Right Edge
Binding. The Pages per Sheet setting automatically changes to 2 pages per sheet.
6. Click OK.
Shift images on the page
You can adjust the placement of the image on the page toward any edge.
1. On the File menu in the software program, click Print.
2. Select the driver, and then click Properties or Preferences.
3. Click the Output tab.
4. Click Image shift settings....
●
You can adjust the front and back sides independently by specifying measurements for Front
side shift and Back side shift.
●
You can adjust the front and back sides by the same amount, but in opposite directions. This
is useful for creating a wider margin along the binding edge. Select Front side shift, specify
the settings, and then select Mirror front side.
●
Select Reduce to fit to shrink the image to accommodate increased margins.
Use the HP Digital Imaging Options dialog box
Use HP Digital Imaging Options to print better-quality photos and images.
Open the HP Digital Imaging Options dialog box
1. On the File menu in the software program, click Print.
2. Select the driver, and then click Properties.
3. Click the Paper/Quality tab, and then click the HP Digital Imaging button.
The following options are available on the HP Digital Imaging Options dialog box:
●
Contrast Enhancement: Enhance colors and contrast for washed-out photos. Click Automatic
to allow the printer software to brighten areas of photos that need adjustment.
●
Digital Flash: Adjust the exposure in dark areas of photos to bring out detail. Click Automatic to
allow the printer software to balance lightness and darkness.
●
SmartFocus: Enhance the image quality and clarity of low resolution images such as those
downloaded from the Internet. Click On to allow the printer software to sharpen details in the image.
●
Sharpness: Adjust the image sharpness to your preference. Click Automatic to allow the printer
software to set the level of sharpening for the image.
●
Smoothing: Soften an image. Click Automatic to allow the printer software to set the level of
smoothing for the image.
60 Chapter 2 Use the device ENWW