
User's Manual
Table Of Contents
- Device basics
- Use the device
- Copy
- Fax
- Send to e-mail
- Send to a network folder
- Job Storage
- Check job status and use the job queue
- Print from a Windows computer
- Windows printer driver features
- Select a tray
- Select an output bin for print jobs
- Select a paper type
- Set the color quality
- Store jobs
- Create and use printing shortcuts
- Use watermarks
- Resize documents
- Set a custom paper size
- Print using different paper
- Insert blank or preprinted sheets
- Chapter page layout
- Print on both sides of the paper
- Print multiple pages on one sheet of paper in Windows
- Create booklets
- Shift images on the page
- Use the HP Digital Imaging Options dialog box
- Set the stapling options
- Set the color options
- Use the Services tab
- Windows printer driver features
- Print from a Macintosh computer
- Macintosh printer driver features
- Select a tray
- Select an output bin
- Select a paper type
- Set the color quality
- Store jobs
- Create and use presets
- Use watermarks
- Resize documents
- Print on a custom paper size
- Print a cover page
- Print on both sides of the paper
- Print multiple pages on one sheet of paper
- Create booklets
- Shift images on the page
- Set the stapling options
- Set the color options
- Use the Services menu
- Macintosh printer driver features
- Maintain the device
- Solve problems
- Regulatory statements
- Index
Set the folder options
The device offers several features for optimizing files that are stored in network folders. These features
are all available on the Network Folder screen.
The Network Folder screen consists of two pages. From the first page, touch More Options to go to the
next page.
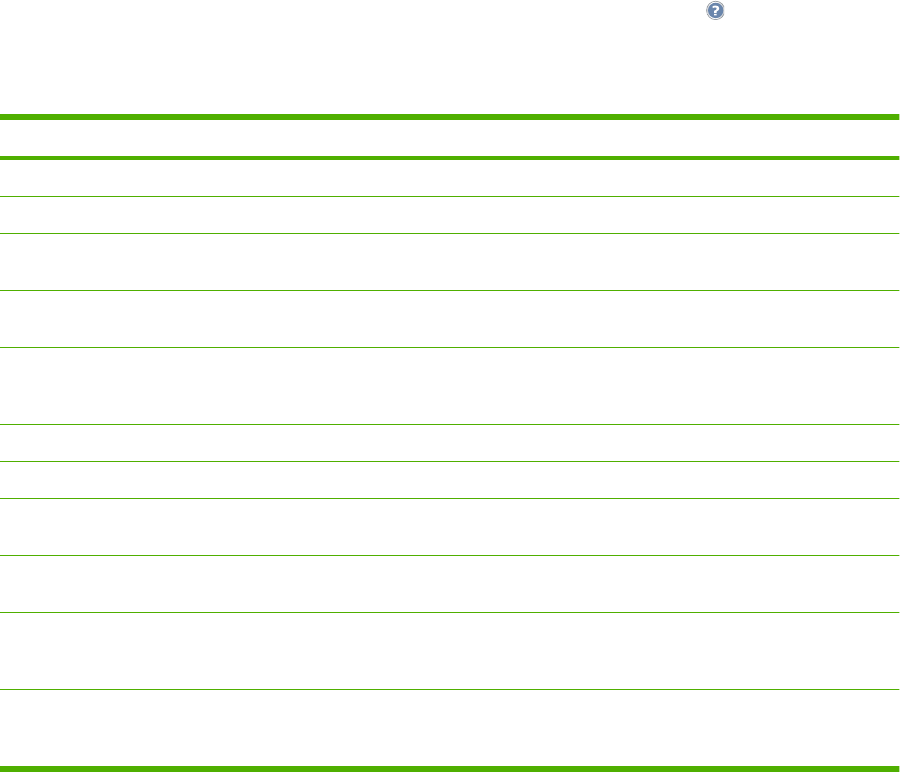
For details about how to use an option, touch the option, and then touch the help (
) button in the upper
right corner of the screen. The following table provides an overview of the options for saving a file in a
network folder.
Table 2-5 Options for network folder jobs
Option name Description
Document File Type Use this feature to select the file format for the saved file.
Original Sides Use this feature to describe the layout for each side of the original document.
Output Quality Use this feature to select the quality for the file. Higher-quality images require a larger file size
than lower-quality images, and they take more time to send.
Content Orientation Use this feature to specify the way the content of the original document is placed on the page:
portrait or landscape.
Resolution Use this feature to set the resolution for the file. Higher resolution images have more dots per
inch (dpi), so they show more detail. Lower resolution images have fewer dots per inch and
show less detail, but the file size is smaller.
Original Size Use this feature to describe the page size of the original document.
Color/Black Use this feature to select whether the file is in black & white or in color.
Optimize Text/Picture Use this feature to optimize the output for a particular type of content. You can optimize the
output for text or printed pictures, or you can manually adjust the setting.
Notification Use this feature to receive notification about the status of the file after you send it. You can
receive an e-mail notification, or you can print the notification.
Image Adjustment Use this feature to improve the overall quality of the file. For example, you can adjust the
darkness, sharpness, and contrast, and you can use the Background Cleanup setting to remove
faint images from the background or to remove a light background color.
Job Build Use this feature to combine several sets of original documents into one file. Also use this feature
to scan an original document that has more pages than the document feeder can accommodate
at one time.
ENWW Send to a network folder 45