
User's Manual
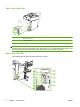


Table Of Contents
- Device basics
- Use the device
- Copy
- Fax
- Send to e-mail
- Send to a network folder
- Job Storage
- Check job status and use the job queue
- Print from a Windows computer
- Windows printer driver features
- Select a tray
- Select an output bin for print jobs
- Select a paper type
- Set the color quality
- Store jobs
- Create and use printing shortcuts
- Use watermarks
- Resize documents
- Set a custom paper size
- Print using different paper
- Insert blank or preprinted sheets
- Chapter page layout
- Print on both sides of the paper
- Print multiple pages on one sheet of paper in Windows
- Create booklets
- Shift images on the page
- Use the HP Digital Imaging Options dialog box
- Set the stapling options
- Set the color options
- Use the Services tab
- Windows printer driver features
- Print from a Macintosh computer
- Macintosh printer driver features
- Select a tray
- Select an output bin
- Select a paper type
- Set the color quality
- Store jobs
- Create and use presets
- Use watermarks
- Resize documents
- Print on a custom paper size
- Print a cover page
- Print on both sides of the paper
- Print multiple pages on one sheet of paper
- Create booklets
- Shift images on the page
- Set the stapling options
- Set the color options
- Use the Services menu
- Macintosh printer driver features
- Maintain the device
- Solve problems
- Regulatory statements
- Index
Product walkaround
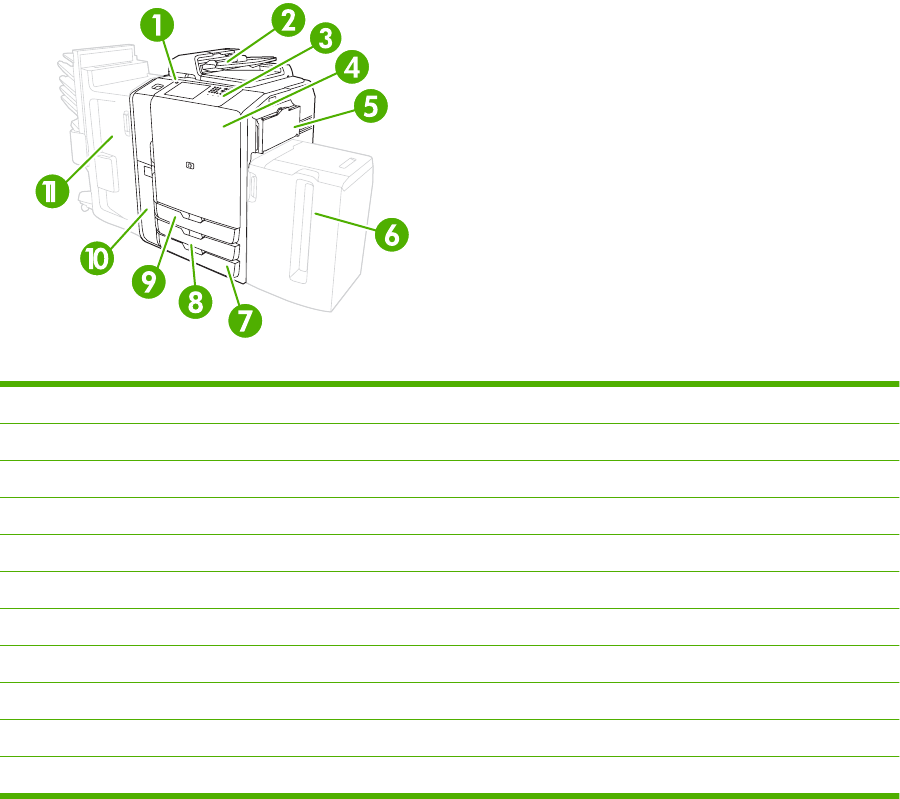
Before using the device, familiarize yourself with its major components.
Front view
1 On/off button
2 Document feeder
3 Control panel
4 Front door
5 Tray 1 (manual feed; holds 80 sheets of standard paper)
6 Tray 5 (optional high-capacity tray; holds 4,000 sheets of standard paper)
7 Tray 4 (holds 500 sheets of standard paper)
8 Tray 3 (holds 500 sheets of standard paper)
9 Tray 2 (holds 500 sheets of standard paper)
10 Ink cartridge door
11 Optional finisher
ENWW Product walkaround 3