
User's Manual

79 | Wireless configuration HP Cloud Network Manager | User Guide
1. Select Wireless Configuration > System. The System details are displayed.
2. Click the SNMP tab, and then click New under COMMUNITY STRINGS.
3. Enter the string in SNMP.
4. Click Ok.
5. To delete a community string, select the string, and click Delete.
Creating community strings for SNMPv3
To create community strings for SNMPv3:
1. Select Wireless Configuration > System. The System details are displayed.
2. Click the SNMP tab. The SNMP configuration parameters are displayed.
3. Click New in the Users for SNMPV3 box. A pane for specifying SNMPv3 user information is displayed.
4. Enter the name of the user in the NAME box.
5. From AUTH PROTOCOL, select the type of authentication protocol.
6. Enter the authentication password in the PASSWORD box and retype the password in the RETYPE
PASSWORD box.
7. From PRIVACY PROTOCOL, select the type of privacy protocol.
8. Enter the privacy protocol password in the Password box and retype the password in the RETYPE
PASSWORD box.
9. Click Ok.
10. To edit the details for a user, select the user and click Edit.
11. To delete a user, select the user and click Delete.
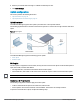
Configuring SNMP traps
Cloud Network Manager supports the configuration of external trap receivers. Only the AP acting as the VC
generates traps. The Object Identifier (OID) of the traps is 1.3.6.1.4.1.14823.2.3.3.1.200.2.X.
To configure SNMP traps:
1. Select Wireless Configuration > System > SNMP. The SNMP details are displayed.
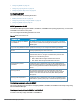
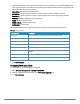
2. Under SNMP TRAPS, click New and update the following fields:
l IP ADDRESS — Enter the IP Address of the new SNMP Trap receiver.
l VERSION — Select the SNMP version. The version specifies the format of traps generated by the AP.
l COMMUNITY/USERNAME — Specify the community string for SNMPv1 and SNMPv2c traps and a
username for SNMPv3 traps.
l PORT— Enter the port number to which the traps are sent. The default value is 162.
l INFORM — When enabled, SNMPv3 traps are sent as SNMP INFORM messages. It is applicable to
SNMPv3 only. The default value is Yes.
3. Click Ok.
Configuring a syslog server
To specify a syslog server for sending syslog messages to the external servers:
1. Select Wireless Configuration > System. The System details are displayed.
2. Select the LOGGING tab.
3. In the SYSLOG SERVER box, enter the IP address of the server to which you want to send system logs.