
Software Guide


HP Classroom Manager 10.61
71
Record Replay Files at the Tutor
Activity at the local machine can be recorded and shown to Students.
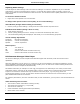
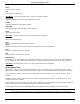
1. Choose {School}{Record} from the Control window drop down menu. The Record Local Activity dialog will
appear.
2. In Directory
Specify where you want the Replay Files stored. In order to identify each file, filenames will be prefixed with
„Local‟ and the date and time of the recording.
3. Include Audio
In addition to the screen, mouse and keyboard activity, if the workstation is configured for Audio, you can
record any microphone narration from the Tutor. Check this box to enable.
Note: Desktop sounds, music, etc, are unable to be recorded.
4. Record Physical Fonts
In order to reduce the volume of data being sent when sharing information of this nature, HP Classroom
Manager passes the font information by reference. The target workstation will refer to its own internal font
mappings to find an appropriate match to the one that has been sent. In most cases the same fonts will be
available but if there are instances where this isn‟t the case you can send the full information. Check this box to
enable.
5. Click OK to start recording. The Recording icon will appear in the task bar. To stop recording, double click the
Recording icon.
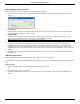
Watching Replay Files
Stored Replay Files can be watched by Tutors and, if required, shown to Students.
At a local level, the HP Classroom Manager Client program also provides a Replay option enabling Clients to launch
files.
At the Control
1. Choose {School}{Replay} from the Control window drop down menu.
Or,
Click the Replay icon on the toolbar.
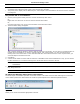
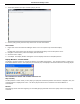
2. Navigate to the Directory where the required Student or Tutor Replay file is stored. Select the file and click
Open.