
Software Guide


HP Classroom Manager 10.61
61
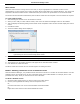
Note: To include the Whiteboard image in the Student Journal Choose {Whiteboard}{File - Add to Journal} from
the Control window drop down menu or click the File icon at the bottom of the Control window and select
Add to Journal.
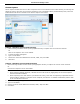
1. To switch to Whiteboard mode, choose {View}{Whiteboard View} from the Control window drop down menu.
Or,
Click the Whiteboard icon on the left hand side of the Control window.
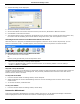
2. Use the range of annotation tools to highlight the screen and add any stored graphics. Choose {Whiteboard}
from the Control window drop down menu.
Or,
Select the relevant icons at the bottom of the Control window.
3. If required you can save the content of the Whiteboard for later use. Choose {Whiteboard}{File- Save
Whiteboard}.
Or,
Select the File icon at the bottom of the Control window and select Save Whiteboard.
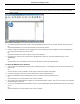
To show the Whiteboard to Students
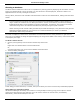
1. If showing a stored Whiteboard image select {Whiteboard}{File – Load Image} from the Control window drop
down menu.
Or,
Choose the File icon at the bottom of the Control window and select Load Image.
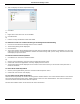
2. From the Group bar, select the Group of Students to show the Whiteboard to.
3. Choose {Whiteboard}{Show Whiteboard} from the Control window drop down menu.
Or,
Select the Show icon at the bottom of the Control window.
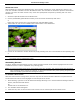
4. The content of the Whiteboard will appear on the selected Student screens. The Tutor can continue to annotate
the Whiteboard in real time.
5. To remove the Whiteboard from Student screens, select {Whiteboard}{Show Whiteboard} from the drop down
menu.
Or,
Select the Show icon at the bottom of the Control window.