
Software Guide


HP Classroom Manager 10.61
55
Screen Capture
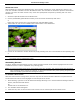
Screen Capture enables the Tutor to take a snapshot of the current Student screen whilst Viewing or Scanning and
allows the Tutor to save the current screen contents to a file. The Machine Name, Student Name, Date, Time and
Product Name will also be recorded on the Screen Capture when saved.
Capture a Students screen whilst Viewing
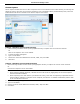
1. When Viewing a Student choose {Tools}{Capture Screen} to capture the current screen contents.
Or
Click on the “Capture” icon on the toolbar.
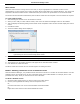
2. A “Save As” Dialog will appear.
3. Type in a File Name.
4. Choose one of the three different file formats, .BMP, .JPG, and .PNG.
5. Click Save.
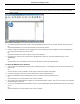
Capture a Students screen whilst Scanning
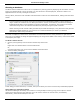
1. When Scanning Student screens choose {View}{Capture Screen} to capture the current screen contents.
Or
Click on the “Capture” icon on the toolbar.
Notes:
When Scanning Multiple Students, a Student screen must be active (highlighted) for the Screen Capture
feature to become available.
When capturing in the Scan session (one Student at a time), Auto Scan is temporarily suspended until the
Screen Capture operation is complete. Once complete, Auto Scan is re-enabled automatically and the Scan
of the next Student continues.
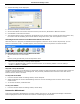
2. A “Save As” Dialog will appear.
3. Type in a File Name.
4. Choose one of the three different file formats, .BMP, .JPG, and .PNG.
5. Click Save.