
Software Guide


HP Classroom Manager 10.61
18
Note: You can specify the Clients to connect to at start-up in the Tutor Configuration, select
{School}{Configuration}{Student Selection} from the Control window drop down menu.
A useful option within HP Classroom Manager is the Lesson Plan feature enabling a Tutor to pre-plan the scope of a
lesson. A convenient Class Wizard is provided which guides you through the process and this will appear at startup.
However this can be disabled if required.
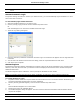
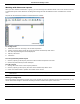
As the Tutor program loads HP Classroom Manager will then Browse the Network for the specified Students. While
it is searching the Browsing message will be displayed. A warning icon will highlight machines you have been
unable to connect to. Mouse over the icon to display the reason why the connection failed.
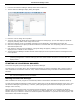
All connected Clients will have their icons displayed in the Control window. The Tutor interface can be viewed full
screen by pressing' F11' should more room be needed to view the Student thumbnails.
Note: To prevent the Tech Console from automatically connecting to the Tutor workstation, ensure the HP
Classroom Manager Client is installed and set the Enable User Acknowledge option in the Client
Configurator. You will have to confirm the connection before it can take place.
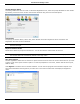
The Control Window
The Control window is the primary interface for: -
Configuring the Control;
Connecting to Student workstations;
Maintaining Client information;
Selecting which Student workstations to work with;
Selecting tasks to carry out;
The Title Bar
This indicates that you are in the Control window and displays the name of the HP Classroom Manager Control
workstation.
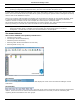
The Menu Bar
The Menu bar contains a series of drop down menus that can be used to access the various tools and configuration
utilities. These menus can be used to select Student workstations to work with, as well as maintaining and
organizing Student workstations into work groups.