HP Classroom Manager Software Guide
HP Classroom Manager 10.61 © Copyright 2012 Hewlett-Packard Development Company, L.P. The information contained herein is subject to change without notice. This document contains proprietary information that is protected by copyright. No part of this document may be photocopied, reproduced, or translated to another language without the prior written consent of Hewlett-Packard Company. Windows, Windows Vista, and MultiPoint are trademarks of Microsoft Corporation in the U.S. and other countries.
HP Classroom Manager 10.61 Table of Contents Conventions Used ...................................................................................................................................... vi Terminology Used ...................................................................................................................................... vi Useful Links ...............................................................................................................................................
HP Classroom Manager 10.61 Blanking the Clients screen while Viewing ................................................................................................. 44 Sending Ctrl+Alt+Delete while viewing ..................................................................................................... 44 Viewing multiple screens simultaneously................................................................................................... 44 Blank All Client Screens ...............................
HP Classroom Manager 10.61 Using the Co-Browser ............................................................................................................................. 97 Lock/Unlock Students in the Co-browser ................................................................................................... 98 Application Control Module .........................................................................................................................
HP Classroom Manager 10.61 Conventions Used The following logical and easy to understand conventions are used in this manual: Step-by-step instructions, which should be performed in sequence, are shown as numbered paragraphs, beneath a clearly stated, „How to do‟ heading. As there is often more than one way of carrying out a task you will find „Or‟ options also included. Additional tips or explanatory notes regarding these instructions are enclosed in a border under the heading „Note‟.
HP Classroom Manager 10.61 INSTALLATION Installing HP Classroom Manager is exceptionally easy and provided you follow a few simple rules you should be up and running within a very short time. Features Not Available on HP MultiSeat In a shared computing environment, like HP MultiSeat, some of the HP Classroom Manager features listed in this document are not available. For example, options such as shutting down a student system would not make sense since multiple students are sharing one host PC.
HP Classroom Manager 10.61 System Pre-Requisites Some areas of HP Classroom Manager‟s functionality rely on the presence of certain files/applications, please ensure these are available before installing HP Classroom Manager. General Internet Explorer 5 service pack 2 or above. Windows XP/Windows Vista™, Windows 7, Windows MultiPoint Server 2011. 35Mbytes free disk space for Student only installation. 90Mbytes free disk space for full installation. TCP/IP.
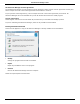
HP Classroom Manager 10.61 HP Classroom Manager License Agreement The HP Classroom Manager License Agreement will be displayed. Please read the License Agreement carefully and select I accept the terms in the license agreement and click Next to continue. If you reject the License Agreement, (I do not accept the terms in the license agreement) click Cancel. HP Classroom Manager will not be installed and you will be directed to Exit from the install program.
HP Classroom Manager 10.61 Select Setup Type Choose the setup type to install on the workstation. Student Installs the Student software. This feature, sometimes called the Client, should be installed on workstations that will be remote controlled. Tutor Installs the Tutor software. This feature, sometimes called the Control, should be installed on workstations which will be used to remote control other PCs. IT Technician Installs the Tech Console.
HP Classroom Manager 10.61 Custom Setup Select the component(s) to install on the workstation. Student Install this component, sometimes called the Client, on workstations that will be remote controlled. By installing this component, you are enabling a Tutor machine to establish a link with the Student. The features available to students are limited to those that enable them to communicate with the teacher, for example sending a help request.
HP Classroom Manager 10.61 Remote Deployment Utility The Remote Deploy Utility enables you to perform multiple HP Classroom Manager installations without the need to visit each individual workstation. Tech Console (includes remote deployment utility) This component should be installed on workstations that will be managing and maintaining computers. It provides Lab Technicians and Network Managers with the main HP Classroom Manager features.
HP Classroom Manager 10.61 Once created, the distribution copy can be used when performing a standard install, a Silent Installation or as part of a remote deployment. To Setup a distribution copy of HP Classroom Manager on a Server 1. Create a folder on the network that is accessible to all PCs that you may want to install on. 2. Copy, from your original source media (CD or download) the file SETUP.EXE. 3. Create and copy a valid NSM.LIC file to this folder.
HP Classroom Manager 10.61 Install Configuration Options Dialog When performing a Silent Installation or using HP Classroom Manager Deploy, you can customize the installation to suit individual requirements. This dialog, accessed by running INSTCFG.EXE /S from the HP Classroom Manager program folder if performing a Silent Installation or if using HP Classroom Manager Deploy, via the Install Properties General Tab, enables you to specify the variables for the installation.
HP Classroom Manager 10.61 Installing the Deploy Utility When installing HP Classroom Manager you decide which combination of components to include. To install HP Classroom Manager Deploy, select the Remote Deployment Utility along with any other components you require. Note: HP Classroom Manager Deploy is currently supported on Windows XP and above. Planning HP Classroom Manager Deploy is a powerful utility that makes installing packages on multiple workstations a quick and easy process.
HP Classroom Manager 10.61 Left Hand Pane Contains three tabs, Network, Log Files and Security. Network and Security Tabs List, in a Tree view, the available Networks, Domains and Workgroups that can be selected for a deploy routine. Log Files Tab Lists, in a Tree view, a history of previous deployments. Right Hand Pane With the Network Tab selected, you are provided with a range of general information, machine name and platform for example, about the workstations located on the selected Network/Domain.
HP Classroom Manager 10.61 2. The Deploy Summary dialog will appear. This dialog provides a summary of the options you have selected for the deployment. If a first time deployment, the text will appear in red to indicate that required information has not been entered. To enter or amend the information for the deployment, click Properties. 3. The Install Properties dialog will appear. 4. Enter the properties for the deployment by selecting the five tabs in turn.
HP Classroom Manager 10.61 Note: Because of the way HP Classroom Manager Deploy handles restarting workstations, leave the Restart Machine box un-checked. This is only relevant when performing a Silent Install where The Install Configuration Options dialog is also used for specifying the options to install. When you have completed this dialog choose {File}{Save} to save the NSS.ini file to the folder containing the distribution copy of HP Classroom Manager.
HP Classroom Manager 10.61 The dialog has two tabs: Log tab enables you to monitor the deployment as it reaches each workstation. Status tab lists the stage the deployment has reached on each workstation. For example, the installation may be complete on one machine but still in progress on another. 7. Click Close to return to the Deploy Main window when the installation is complete.
HP Classroom Manager 10.61 3. The Deploy Summary dialog will appear. 4. Click Properties to enter the details for the deployment. 5. Click Browse to specify the folder containing the license file that is to be deployed. The default file is NSM.LIC. 6. For the new settings to take effect immediately, by default the Client Service will be automatically restarted after the deployment. If not required, clear the Restart the HP Classroom Manager Client service box. 7. Click OK to return to the Summary dialog.
HP Classroom Manager 10.61 Message Tab You can specify a custom message to be displayed at each workstation while the uninstall is in progress. Restart Tab To completely remove all HP Classroom Manager files, the workstations must be restarted. Insist user restarts machine. A message will be displayed at workstations, advising the user to restart the PC to complete the process. Force restart. At the end of the deployment, a message is displayed advising users that the workstation will be restarted.
HP Classroom Manager 10.61 To view Log Files 1. From the HP Classroom Manager Deploy Main window, select the Log Files tab. 2. In the left hand pane of the Main window, increase or decrease the Tree view to see a description of each type of deployment, the date and time the deployment took place and the workstations that were deployed to. 3. As you select an item from the left hand pane, itemized information about that deployment will appear in the right hand pane. Printing a Log File 1.
HP Classroom Manager 10.61 1. From the HP Classroom Manager Startup Wizard select Classroom 2. The HP Classroom Manager Deploy dialog will appear. 3. Enter the room to assign the computers. 4. The drop down list will display all the available Domains and workgroups, you can also deploy to specific IP ranges by selecting Add a new IP range from the list. 5. Select the required group, the available computers will be displayed in the Available Computers list. 6.
HP Classroom Manager 10.61 Note: You can specify the Clients to connect to at start-up in the Tutor Configuration, select {School}{Configuration}{Student Selection} from the Control window drop down menu. A useful option within HP Classroom Manager is the Lesson Plan feature enabling a Tutor to pre-plan the scope of a lesson. A convenient Class Wizard is provided which guides you through the process and this will appear at startup. However this can be disabled if required.
HP Classroom Manager 10.61 The Toolbar The toolbar contains shortcuts to many of the most frequently used tasks and tools. Clicking on an individual item takes you straight to that task or function, eliminating the need to work through the drop down menus. Positioning the pointer over an icon will display a brief description of its function. For convenience, features that are of a similar nature, Show, Show Video, Show Replay Files for example, are grouped within the same toolbar icon.
HP Classroom Manager 10.61 Client Properties, such as the displayed name and icon image, can be changed by selecting {Client}{Customize} or {Client}{Properties} from the Control window drop down menu. Note: Student names can also be customized using the Student Register function.
HP Classroom Manager 10.61 Note: There is also a Student Toolbar that can be activated at the Student, providing feedback on the current lesson. Student Automatic Login If a generic naming convention is used for your classroom PCs, you can automatically log the Students in to save time at the start of a lesson. To automatically login Student machines 1. Select the Student machine(s) you wish to login. 2. Choose {Client}{Login} from the Control window drop down menu.
HP Classroom Manager 10.61 Student Register Dialog This dialog enables the Tutor to create a customized Registration form, which will prompt Students for their details. By selecting a name the Tutor can also interact with Students using the View and Chat options. Class Details If required, the Teacher Name, Lesson Title, Room Number and Lesson objectives can be included on the Registration form that is sent to Students.
HP Classroom Manager 10.61 Sign Out At the end of a lesson you can reset the Client Names using the Sign Out option. 1. 2. Choose {School}{Student Register} from the Control window drop down menu. Or Click the Student Register icon on the toolbar. Select Sign Out from the available options. Confirm that you want to unregister the Students. Registration Report Student registration and Printer usage details can be viewed in a report but this will be lost when the Control disconnects. 1. 2.
HP Classroom Manager 10.61 Working with Classroom Layouts Once you have selected a classroom or group, you can rearrange the individual Client icons in the Control List view to reflect the layout of the classroom. A background image can also be added to further customize the Control view. Layouts can be saved and included in customized Tutor Profiles. To 1. 2. 3. 4. 5. arrange icons Select the Client icon and drag it to the desired position.
HP Classroom Manager 10.61 To set a background 1. Choose {Layout – Set Background) from the Control window drop down menu. 2. The Set Background dialog will appear. 3. 4. 5. 6. 7. Select the location of the image you wish to use. The default BMP files are stored in the HP Classroom Manager program folder. A preview of the selected image is provided. Choose Image position on display to select the position of the image. If you select Tile you can also choose to centre the Client icons on the image.
HP Classroom Manager 10.61 To Power On an HP Classroom Manager Client 1. Select the icon(s) of the Clients you wish to Power On. 2. Choose {Client}{Power Management – Power On} from the Control window drop down menu. Or, Click the Manage icon on the Control toolbar and choose Power On. 3. The Client workstations will now Power On.
HP Classroom Manager 10.61 Notes: If a workstation was not available at the time the Control initialized, you can subsequently connect to it by double clicking the "Refresh" icon in the toolbar. This will re-search the network and connect any additional Clients meeting the criteria. It is essential that you have a logical naming convention for the Client workstations. If you need to change the names of any Client workstations see Configuring the Client workstations.
HP Classroom Manager 10.61 To add Available Clients to the Known List 1. Choose {School}{Modify Known List} from the Control window drop down menu. 2. The Modify Known List dialog will appear. 3. Enter a prefix for the Clients Computer Name in the text box beside the Browse button. 4. Click Browse. 5. The Browsing message will appear. 6. All Clients matching the prefix will appear in the Available Students list. 7. Select the Client icon and click Add. 8. The Client is now part of the Known List. 9.
HP Classroom Manager 10.61 Creating a class for Students to join 1. To change the default methods of connection choose {School}{Configuration – Student Selection} from the Control window drop down menu. 2. Select „Publish Class and allow Students to Join‟. 3. Enter a name and description for the class. (This is the name that will appear at the Student machine when they try to connect) 4. Click OK. 5. To apply the changes immediately, click Yes. 6. The Class Wizard will appear.
HP Classroom Manager 10.61 Note: A complementary feature to „Join Class‟ is „Class Lists‟. This enables the Tutor to create and save multiple known lists of Students, the Tutor can then load the relevant list at the start of a lesson and automatically connect to the Student machines. Client Disconnects from an Active Session During an active session you may find that Students inadvertently disconnect, for example, when they reboot their machine.
HP Classroom Manager 10.61 Notes: When adding the address of a remote subnet, you must ensure that the broadcast address for the local subnet is also present. If not, the Control will not find any local clients when you perform a browse. Some network Routers will suppress broadcast packets from being transmitted across WAN links. If this is the case then even if the Control is correctly configured you will not be able to browse the remote subnet.
HP Classroom Manager 10.61 Connecting to an HP Classroom Manager Student running in a Terminal server session The preferred method to connect to the Students running in the Terminal Server Sessions is using the "Connect via Room Mode" option. Using this method it's possible to configure the Students running in the Terminal Server sessions to be located in a particular room depending on the User logged onto the Session.
HP Classroom Manager 10.61 The Gateway/Name Server is configured with the IP Address of the Gateway machine and a Security Key. This same information must also be entered at both the Tutor and Student machine thus validating connections between the various components. Once the Tutor and Student connectivity options are set to use the designated Name Server, each time the Student machine starts up, its current IP Address will be registered with the Server.
HP Classroom Manager 10.61 Listening Port and Interfaces Listen on all IP interfaces By default, the installed Gateway component uses the local IP Address(es) and communicates through Port 443. Listen on specified IP interfaces If the Gateway machine has multiple network cards installed, you can add the specific IP Address to use. Click Add and enter the required address. Note: The IP address of the Gateway machine and key will also need to be configured at both the Tutor and Student workstation. Comms.
HP Classroom Manager 10.61 The Gateway will not accept connections from a Tutor or Student unless a "Gateway key" is specified, and that same key is also configured at both the Tutor and Student end. The Gateway can support multiple keys, at least one key must be specified. Select Add to specify the key. The Key must be at least 8 characters.
HP Classroom Manager 10.61 Gateway Configuration Utility - Licenses Tab Displays all licenses stored in the HP Classroom Manager directory, if you do not have an Internet connection you can manually activate your HP Classroom Manager license here. An activation code is required, contact HP Classroom Manager or your Reseller for this. Click Requires Activation and enter the code. You will then need to restart the Name Server.
HP Classroom Manager 10.61 Gateway Configuration Utility - Security Tab The HP Classroom Manager Gateway provides support for an enhanced level of encryption to be used when initiating communications from remote computers. Enable encryption of communications to remote computers When enabled all communications in the connection process are encrypted. Note: The remote computers (Controls and Clients) need to be running version 10.61 or later.
HP Classroom Manager 10.61 To create a Group 1. Choose {Group}{New} from the Control window drop down menu. Or, Click the new Group icon on the Group bar. Or, Right-click on selected Client icons and choose Add to Group and select New. 2. A Group Wizard dialog box appears that asks you to provide a name and brief description of the group. It will then assist you in creating your group. Your newly created Group will appear as a tab on the Group bar for quick access. To change the members of a Group 1.
HP Classroom Manager 10.61 All Group Leader features are enabled by default but can be removed by un-checking the appropriate box. Assigning a Group Leader 1. Select the required Group from the Group bar. 2. Select the required Client icon. 3. Choose {Client}{Group Leader} from the Control window drop down menu. Or, Right click on the required Client and select Group Leader. The Client icon in the Control window will be highlighted to indicate that they are a Group Leader.
HP Classroom Manager 10.61 Suspend Group Leaders During a Control session where Group Leaders are in place, the Tutor may want to perform a task without conflicting with something the Group Leaders are doing. Rather than remove and reinstate each Group Leader individually, you can globally suspend and reinstate Group Leader access as required. To Suspend Group Leaders 1. Choose {School}{Suspend Group Leaders} from the Control window drop down menu. 2. All Group Leaders will be suspended.
HP Classroom Manager 10.61 USING HP CLASSROOM MANAGER In this chapter… You will discover how to use the wealth of features available to a Control User. From how to initiate a remote control session to how you then monitor and manage activity at the end-users desktop. Lock/Unlock Students Mouse and Keyboard When you perform a Show, the Clients mouse and keyboard are automatically locked. There may, however, be other occasions when you want to lock a Clients keyboard and mouse.
HP Classroom Manager 10.61 1. 2. 3. 4. 5. Choose {View}{Current Settings – User Interface - Student} from the Control window drop down menu. Select “Display image when locking mouse and keyboard”. Click OK. Select the Client(s) or Groups of Clients you wish to Lock. From the Control window drop down menu, choose {Client}{Lock Keyboard/Mouse}. Or, From the toolbar, press the Lock icon. Notes: If you View a locked Client, the display graphic on a Client screen will no longer apply.
HP Classroom Manager 10.61 To View a Client 1. Double click the required Client icon in the List view. Or, With the required Client icon selected, choose {Client}{View} from the Control window drop down menu. Or, Click the View Client icon on the Control toolbar. Or, Right click on the Client icon and choose View. Or, Click the required Client name on the Quick view toolbar. 2. The View window for that Client will appear at the Control.
HP Classroom Manager 10.61 Switching to Full Screen Alternatively, you might choose to use the whole of the Control‟s screen to display the Client‟s screen. This is known as the Full Screen Viewing. While Viewing a Client in Full Screen a floating toolbar will also be displayed. If you close this down, remember to use the hot keys, usually CTRL+RSHIFT+LSHIFT, to get back to the Control window or press to display the drop down menus.
HP Classroom Manager 10.61 Remote Clipboard During a View Session you can copy the content of the clipboard between Control and Client PCs. The Clipboard icon, available on the View window toolbar, provides the following options: Send Clipboard Used when copying from the Control to a Client and using the {edit}{cut/copy} menu option. Retrieve Clipboard Used when copying from the Client to the Control and using the {edit}{cut/copy} menu option.
HP Classroom Manager 10.61 2. The Scan dialog will appear. 3. Specify which Clients to Scan by removing or including the check mark next to the Client name. Note: If you want to start scanning from a particular Client, select their icon in the Scan dialog. 4. 5. 6. 7. Select the Scan interval. Select Display one Client at a time. Click Scan The Scan window will appear and immediately show you the first Client in the sequence.
HP Classroom Manager 10.61 Scaling to Fit It may be that the Client is running in a higher resolution than the Control. In this case choosing the Scale to Fit button, will re-size its screen to fit the window in which it is displayed. Full Screen When Scanning in full screen mode, you can use the Scan Floating toolbar to Control the operation. Capture A snapshot of the current Client view window will be taken. You will then have the option to name and save the current screen contents to a file.
HP Classroom Manager 10.61 Scaling to Fit It may be that the Client is running in a higher resolution than the Control. In this case choosing the Scale to Fit button, will re-size its screen to fit the window in which it is displayed. Maximize To enlarge a Client View window. This button will be grayed out until you select a Client View window. To maximize the Client View window, click the Maximize button or click the box in the top right hand corner of the Client View window.
HP Classroom Manager 10.61 The List view will display each Student thumbnail. By moving the pointer over a thumbnail you can zoom into that screen. Double-clicking on a thumbnail will open a view session to the selected Student, right-click and you can select from the full range of available Client features. For example, by selecting multiple thumbnails you can invite those Students into a Chat session.
HP Classroom Manager 10.61 Show Help Requests If enabled, this option highlights when a Student has outstanding help requests. A flashing Question Mark icon appears in the top right of the relevant thumbnail. To enable/disable, choose {Monitor}{Show Help Requests} from the Control window drop down menu. Messenger Monitoring HP Classroom Manager extends its application control features with the availability of Messenger Monitoring.
HP Classroom Manager 10.61 Note: If monitoring is enabled and you switch modes, an icon will be displayed on the Messenger tab to acknowledge that Messenger monitoring is currently switched on. Block Instant Messenger 1. Choose {IM}{Block} from the Control window drop down menu. Or, Click the Block icon at the bottom of the Control window. 2. The Messenger Status for the Students will now show as blocked. Clear Instant Messenger History Allows you to clear the Instant Messenger data from the List view.
HP Classroom Manager 10.61 Save To keep a permanent record of the displayed items, you can save the details to a text file before disconnecting. Export Exports data to a CSV file allowing the data to be imported if needed. Print Prints details of the currently displayed items. Close Closes the History dialog but details will continue to be recorded while the Control is connected.
HP Classroom Manager 10.61 Monitoring Activity 1. Choose {View}{Typing View} from the Control window drop down menu. 2. Choose {Typing}{Monitor} from the Control window drop down menu. Or, Click the Monitor icon from the bottom of the Control window. 3. An icon showing the current application running on the Student workstation will be displayed next to each Student along with any typed content and any Target/Inappropriate words will be identified.
HP Classroom Manager 10.61 Notes: Any changes that have been made to the new or existing Word list will be automatically saved when a new Word list is created or when you have exited from the HP Classroom Manager program. The default Word list is saved as HP Classroom Manager.wdl. View Typing History This feature of Keyboard Monitoring enables you to monitor the Keyboard usage of connected Students and if required, store or print a permanent record. 1.
HP Classroom Manager 10.61 Screen Capture Screen Capture enables the Tutor to take a snapshot of the current Student screen whilst Viewing or Scanning and allows the Tutor to save the current screen contents to a file. The Machine Name, Student Name, Date, Time and Product Name will also be recorded on the Screen Capture when saved. Capture a Students screen whilst Viewing 1. 2. 3. 4. 5. When Viewing a Student choose {Tools}{Capture Screen} to capture the current screen contents.
HP Classroom Manager 10.61 Showing to Students The Show feature enables the Control user to emphasize key learning points by displaying the information on their screen to a selected Client or group of Clients. You can also show a stored Replay file, Audio file a Video or an Application that is currently running at the Control. During a Show, the Control can nominate a selected Client to take over the demonstration, making them the Show Leader.
HP Classroom Manager 10.61 Select Recipients Select the Client or Clients that you will Show your screen to. Show Options Restrict Internet access to approved sites only during a show Allows the Tutor to only access websites that are on the Approved Site List, preventing inappropriate websites being displayed to Students during a Show.
HP Classroom Manager 10.61 2. This will display the Show Suspended dialog. 3. Click End. Or, 1. Right click on the Show icon on the taskbar. 2. Click End Show. Or, 1. Use the hot key combination CTRL+ALT+END. To enable the Control to Continue working in the background while Showing 1. Click on the HP Classroom Manager button on the taskbar. 2. The Showing dialog will be displayed. 3. Click Continue. 4. The Control window will be displayed and the Title bar will indicate that the Show is Suspended.
HP Classroom Manager 10.61 Show Leader While the Control screen is being shown to the class, it may be appropriate for a Student to take over the demonstration. For this purpose, the Control can assign Show Leader status to a selected Student. The mouse and keyboard of the Show Leader‟s PC are unlocked and they can continue the presentation on the Control‟s behalf. The Control can still interact simultaneously with the Show Leader and can suspend or end the session as required. To create a Show Leader 1.
HP Classroom Manager 10.61 3. The Exhibit dialog will be displayed. 4. Select the Clients you wish to include. 5. Set the Show Mode to be used at the Client screens, Full Screen, Windowed or Maximize window. 6. Click Exhibit to commence the Show. 7. The selected Client‟s screen will be then be displayed on the screens of the Control and the other Clients. Only the Control and the Exhibiting Client will be able to change the screen, with the keyboard or mouse.
HP Classroom Manager 10.61 Note: To include the Whiteboard image in the Student Journal Choose {Whiteboard}{File - Add to Journal} from the Control window drop down menu or click the File icon at the bottom of the Control window and select Add to Journal. 1. To switch to Whiteboard mode, choose {View}{Whiteboard View} from the Control window drop down menu. Or, Click the Whiteboard icon on the left hand side of the Control window. 2.
HP Classroom Manager 10.61 Whiteboard Leader When Students are viewing the Whiteboard they cannot initially annotate the screen themselves. However, the Tutor can nominate a Student to be the „Whiteboard Leader‟. This activates the annotation options at the selected machine. The Tutor can switch control to any of the other participants as required by selecting their icon in the Student List. 1. Select the required Student from the Student List. 2.
HP Classroom Manager 10.61 If you do not want the Student‟s to see the screen being annotated in real-time, click Suspend. This freezes the Show enabling the Tutor to continue working in the background. Click Suspend again to restart the Show, this refreshes the display at the Student screens. To include a screenshot of the Show in the Student Journal, select Send to Journal from the Annotate Options menu or use shortcut keys CTRL+ALT+Print Screen, you can also add notes to accompany the image.
HP Classroom Manager 10.61 Tool Choose from a range of tools with which to annotate the screen. For example, freehand draw, draw arrow, select region. Color Sets the pen color. Width Sets the width of the line. Fill Sets the color and fill style. Font Sets text font. Suspend Suspends the Show allowing you to go back to the Control View window. (Not available when Viewing or Exhibiting) End Ends the Show, and takes you back to Control View window.
HP Classroom Manager 10.61 Audio Monitoring can be setup at startup. Choose {School}{Configuration}{Start Options} from the Control window drop down menu. Listen to Student Audio 1. Select the required Student in the List view. 2. Select {Audio}{Listen to Student} from the Control window drop down menu. Or, Click the Listen icon on the required Student thumbnail. Or, Click the Listen icon at the bottom of the Control window. 3.
HP Classroom Manager 10.61 Notes: You can send an audio announcement to Students headphones or speakers. Click the Announce icon at the bottom of the Control window. The Announce dialog will appear. Recordings can be played back to Students using the Show function. Using Audio Support HP Classroom Manager allows you to use audible communications to connected Clients, via microphones, headphones and speakers during View and Show.
HP Classroom Manager 10.61 Adjusting Audio settings You can adjust the audio settings within HP Classroom Manager to match the capabilities of your multimedia workstations or to fine tune performance. However, you should note that the higher the quality of sound you select, the greater the volume of data that needs to be sent. This can affect screen update performance on slower workstations. To Access the Volume Controls 1. Right click on the speaker icon in the task bar.
HP Classroom Manager 10.61 If a Client workstation is required to retrieve files from a Server, for smooth operation, ensure that the Client workstation has sufficient access rights to the relevant drive and files. The quality of the display will be affected by the video adapter of the workstation and how the screen resolution is configured. Play a Video file on a workstation 1. Choose {Client}{Show Video} from the Control window drop down menu.
HP Classroom Manager 10.61 Close Closes the open video file. Exit Shuts down the Video Player. View Menu - The View drop down menu contains the following options: Text Labels Hides and displays text labels on the Video Player toolbar. Toolbar Hides and displays the Video Player toolbar. Status Bar Hides and displays the Status bar of the Video Player. Zoom Resizes the video screen Play Menu - The Play drop down menu contains the following options: Play Starts the loaded video file.
HP Classroom Manager 10.61 Record Replay Files For All Students This procedure enables the Tutor to create a Replay file at any Student workstation that it remote controls. 1. Choose {View}{Current Settings-Replay Files} from the Control window drop down menu. The Replay Files dialog will appear. 2. Enable the Record Replay Files check box. A Replay file will be created each time the Tutor opens a view session at any Student machine. 3.
HP Classroom Manager 10.61 Record Replay Files at the Tutor Activity at the local machine can be recorded and shown to Students. 1. Choose {School}{Record} from the Control window drop down menu. The Record Local Activity dialog will appear. 2. In Directory Specify where you want the Replay Files stored. In order to identify each file, filenames will be prefixed with „Local‟ and the date and time of the recording. 3.
HP Classroom Manager 10.61 3. The Replay Window will open and start playing the file. 4. Choose {File}{Close} from the drop down menu to close the window. At the Client 1. Right-click on the HP Classroom Manager Client icon in the system tray and choose Replay. Or, Double-click on the Client Icon and choose {Commands}{Replay} from the drop down menu. 2. Navigate to the Directory where the Replay Files are stored. 3. Select the file to replay. 4. Click Open. The Replay Window will appear.
HP Classroom Manager 10.61 Skip to Previous marker Moves the replay index to the previous activity marker or to the beginning of the file if there isn‟t one. These markers are added at points when lots of activity was recorded at the Client. Frame Advance Advance the replay index to the next frame. Press and hold this button to Fast-Forward though the replay file. Skip to Next marker Moves the replay index to the next activity marker or to the end of the file if there isn‟t one.
HP Classroom Manager 10.61 Show Application The Show feature enables you to display the Control screen to Students. However, if a number of programs are open at the Control, there may be occasions when you want to show a single application in isolation. To Show an Application 1. Choose {Client}{Show Application} from the Control window drop down menu. Or, Right-click on a selected Client icon and choose Show Application. Or, Click the „Show Menu‟ icon on the Control toolbar and choose Show Application. 2.
HP Classroom Manager 10.61 Chatting to Students HP Classroom Manager allows you to Chat to any number of connected Clients simultaneously, via a scrolling text window. To Chat to Clients 1. Select the Clients or Group of Clients you want to Chat to in the List View. If you do not select a Student icon, all connected Clients will be included. 2. Choose {Client}{Chat} from the Control window drop down menu. Or, Click the Communicate icon on the Control toolbar and choose Chat.
HP Classroom Manager 10.61 4. The Chat window will appear at the Control and Client workstations. The Chat Window This window is displayed at each participating member‟s machine and lists the progress of the Chat session. Only the Control or Group Leader can add or remove Clients from the session. Unless the option is disabled in the Chat Properties dialog, Clients can choose to Leave the session.
HP Classroom Manager 10.61 Members Members currently included in the Chat session are listed here. The Tutor can add or remove Students from the Chat session as required. Unless disabled, Clients have the option to Leave the session of their own accord. Invite The Chat Properties dialog is initially used to select the Clients to include/exclude from the Chat session. To add Clients when the Chat session is in progress, click Invite.
HP Classroom Manager 10.61 4. Click Send. The Message will be displayed in a dialog at the Client screens and will remain until the User closes the dialog or the specified time limit expires. Send a message whilst Viewing 1. 2. 3. 4. Choose {Client}{Message} from the View window drop down menu. The Send Message dialog box will appear. Enter your message. Click Send. The message will be displayed on the Student screen currently being viewed by the Tutor and will remain until the Student clicks OK.
HP Classroom Manager 10.61 3. Set any additional properties for each of the messages. Indicate how long the message should remain on the Students screen. Choose an icon to be displayed alongside the message. This can be used to quickly identify the type of message, Information, Question, Warning, and Stop. You can further highlight the message by playing a sound at the Student machine. The sound varies depending on the icon selected. 4. Click OK when ready. To Send a Pre-Defined Message 1.
HP Classroom Manager 10.61 If a Student raises a Help Request an alert will be raised at the Tutor provided it currently has that Student connected. Any outstanding Help Requests will be visible to the Tutor with a Help Request icon displayed next to the Student icon. This will show until that Help Request has been cleared. To display current Help Requests 1. 2. 3. Choose {School}{Help Requests} from the Control window drop down menu bar. The Help request window will open and list the Requests.
HP Classroom Manager 10.61 4. From the Client Tree view, select the destination drive or directory into which the items will be copied. 5. From the Control List select the item(s) to be copied to the Client. 6. Click on the toolbar Copy File button. 7. A confirmation dialog will be displayed, click Yes. Note: The required item(s) can also be „dragged‟ from the Control view and „dropped‟ into the appropriate directory in the Client view. To copy files and Directories from a Client to a Control 1.
HP Classroom Manager 10.61 Distributing Files As well as enabling you to Transfer Files to and from individual Clients, HP Classroom Manager also allows you to Distribute Files to multiple Clients simultaneously. You can Distribute Files to: All connected Clients; Selected Clients; A pre-defined Group of Clients. To Distribute Files to a defined Group of Clients 1. Select the appropriate Tab from the Group bar in the Control window. 2.
HP Classroom Manager 10.61 5. The location on the Client workstations where the files/directories are copied to is called the Destination Directory. Unless otherwise specified, the Client Destination Directory will be the same as the item(s) location on the Control workstation. If the Client does not have the same Directory available, the item(s) will be copied to the C Drive by default and the folders automatically created.
HP Classroom Manager 10.61 To Send Work Using Advanced Send 1. Decide which Students to send work to, All or a defined Group. You will have the opportunity to exclude Students if required. 2. Choose {School}{Send/Collect Work - Advanced} from the Control window drop down menu bar. Or, Click the Send/Collect icon on the Control toolbar and select Send/Collect. 3. The Send/Collect Work wizard will open. 4. Select an operation from the list and click Send Work. The Select Students dialog will appear.
HP Classroom Manager 10.61 2. The Quick Collect dialog will appear. 3. Specify the name of the file(s) to collect. e.g. *.* or Test1.TXT;Test2.TXT 4. Specify the folder that the file(s) are stored in, e.g.: C:\TEMP, and whether you want to remove the file from the Student workstation after it has been collected. 5. Specify the folder on the Control workstation to collect the file(s) in, e.g.: C:\ TEMP 6. Click Collect. 7.
HP Classroom Manager 10.61 To change the Properties of an Operation 1. Choose {School}{Send/Collect Work - Advanced} from the Control window drop down menu bar. Or, Click the Send/Collect icon on the Control toolbar and select Send/Collect. 2. The Send/Collect Work wizard will open. 3. Select an operation from the list and click Properties. 4. The Properties dialog will appear. 5. Adjust as necessary.
HP Classroom Manager 10.61 If you want to launch a specific file with the application, you must separate the two instructions with quotes. For example, “C:\Program Files\Microsoft Office\Excel.exe” “C:\My Documents\Accounts.xls”. 6. Click on the Add to List button, to save it for future use in the Saved List Tab. 7. Confirm the description and path. 8. Click OK. Note: If you only want to execute applications to Clients that are logged on select the option “Execute Only if the Client is Logged on”. 9.
HP Classroom Manager 10.61 4. Click Add to List button. 5. The Add/Edit Program details dialog will appear. 6. Confirm the description and path of the executable application. 7. Click OK. 8. Select the Saved List Tab. 9. Check the Show toolbar box to execute from the Control window toolbar. 10. Click Close. A short cut button for easy launching of an application will appear on the Quick Execute toolbar. To edit a saved Executable application 1. Open the Execute Application dialog. 2.
HP Classroom Manager 10.61 To run a Tool 1. Choose {School}{Tools} from the Control window drop down menus. 2. Select the tool you wish to run. The Tool will automatically run. To Edit a Tool 1. 2. 3. 4. 5. 6. Choose {School}{Tools – Edit} from the Control window drop down menus. The User Defined Tool dialog will appear. Select the tool you wish to edit or delete. Click on the Edit button. The Edit dialog will appear. Edit the appropriate information, click OK. To 1. 2. 3. 4. 5.
HP Classroom Manager 10.61 Web Control Module The Web Control Module is used to monitor and control the websites visited by connected Students. A record of sites visited in a session can be stored and, if required, the Tutor can restrict or approve the use of specific URLs. In addition the Tutor can temporarily suspend all Internet access. Note: Supported Internet Browsers for Internet metering and restrictions are IE 5.5 or above, Firefox 2, Netscape 8.1, Netscape 8.2*, Opera 9.1*, Opera 9.2*.
HP Classroom Manager 10.61 Block all access to the Internet. Activate "Safe Search" mode. Stops inappropriate web sites being displayed while Students are using search engines. Activate "Block FTP" sites. Block Students from accessing FTP sites. Notes: To temporarily block web access for all Students, select the Block All icon on the Control toolbar. An indicator will appear next to the Student icons to confirm Internet usage is suspended. This feature only works with IE based browsers.
HP Classroom Manager 10.61 Close the current/running Website on a Student workstation 1. 2. 3. 4. 5. To close a URL on a Student workstation, choose {View}{Details}. The Details List view will appear. Right click on a URL icon under “Current Web Site” or “All Web Sites”. Choose Close Browser. The URL will be closed at the Student machine and the URL icon will disappear from the List view.
HP Classroom Manager 10.61 www.bbc.co.uk/learning can be restricted but www.bbc.co.uk/learning/history can be approved. Students will only be able to view pages relating to history and not view pages relating to Science or English. Web restrictions can be applied at start-up. Choose {School}{Configuration}{Start Options} from the Control window drop down menu. Add a Website to your Approved or Restricted List 1. Click on + to add a URL to your Approved or Restricted list.
HP Classroom Manager 10.61 Click on the relevant restriction icon at the bottom of the Control window. Or, Click the 'Web Access' icon on the Control toolbar and choose Approved Only or Block Restricted. 3. To acknowledge which restriction has been activated an appropriate indicator will appear next to the Student icons. (When viewing Large icons only). Red for restricted, green for approved. 4.
HP Classroom Manager 10.61 Include Proxy Overrides Allows you to include websites that have been added to the Proxy Settings Exceptions list, when using the Approved Website list. 1. Choose {Web}{Include Proxy Overrides} from the Control window drop down menu. 2. Apply the Approved Websites Only list. 3. Students will only be able to view websites from the Approved list and the Proxy Settings Exception list.
HP Classroom Manager 10.61 View Web History This feature of the Web Control Module enables you to monitor the websites being visited by connected Students and, if required, store or print a permanent record. 1. In Web View choose {Web}{History} from the Control window drop down menu. 2. The Web History dialog will appear. This provides details of the sites visited by the Student(s) during the currently connected session.
HP Classroom Manager 10.61 If displayed, click the Co-Browse icon on the toolbar. 3. The Co-Browse window will open and also appear on the selected Student machines. From here you can open web pages and create new tabs that allow you to navigate between web pages. Using the Co-Browser Using the Co-Browser is a very straightforward process with a simple to use interface.
HP Classroom Manager 10.61 Lock/Unlock Students in the Co-browser There are several different modes you can apply to the Students when using the Co-Browser. Lock Students, lets you guide Students through a selection of web pages with Students having no control over what they are viewing. Restrict Students, enables Students to have some control but only view web pages that you have selected. Free Students, allows Students have full control over what websites they can access.
HP Classroom Manager 10.61 Application Control Module The Application Control Module is used to monitor and control the applications used by connected Students. A record of applications used in a session can be stored and, if required, the Tutor can restrict or approve the use of applications. 1. Choose {View}{Application View} from the Control window drop down menu. Or, Click the Application Control icon on the left hand side of the Control window.
HP Classroom Manager 10.61 An icon is displayed next to the Student icon informing the Tutor of the current application in use. Large Icons Details If the application is currently listed in the Approved or Restricted lists, then a visual Green (Approved) or Red (Restricted) identifier is shown surrounding the application icon to make identification easier. If the List view is in “Details” layout then a list of all other applications running on the Student workstation is also displayed.
HP Classroom Manager 10.61 Kill 1. 2. 3. 4. 5. Force the application to close, without any application prompts. To close an application running on a Student workstation choose {View}{Details). The Details List view will appear. Right click on an application icon listed under “Current Application” or “Running Application” in the List view. Choose Close Application or Kill Process. The application will be closed at the Student workstation and the icon will disappear from the List view.
HP Classroom Manager 10.61 Add an application to your Approved or Restricted List 1. Click on + to add an application to your List. Or, Right click in the List boxes and select “Add Application”. Or, Drag and drop applications from your desktop or Start Menu into the Approved or Restricted List box. 2. The Add Application Dialog will appear. 3. 4. Type in the .exe file name (e.g. winword.exe) under Application or Browse for your chosen application. Type in the Description e.g. Microsoft® Word. 5. 6.
HP Classroom Manager 10.61 4. If a Student is currently running an application included in your activated restriction list, an “Application Blocked” dialog will appear on their screen, stating the application that has been blocked by the Tutor. This will also appear if a Student attempts to run any of the applications included on the restriction list. End Approved or Restricted Applications 1. To remove the restrictions for individual Students, select their icons in the List view. 2.
HP Classroom Manager 10.61 View Application History This feature of the Application Control Module enables you to monitor the Applications being used by connected Students and, if required, store or print a permanent record. 1. In Applications View choose {Applications}{History} from the Control window drop down menu. 2. The Application History dialog will appear. This provides details of any application used by the Student(s) during the currently connected session.
HP Classroom Manager 10.61 Student Surveys The Student Survey tool enables the Tutor to get instant feedback from Students during or at the end of a session. The Tutor sends connected Students a question together with a selection of pre-defined responses. Student responses are gathered at the Tutor with the results shown as an overall percentage and by individual Student. Results can be shown to Students in the form of a pie chart, Students must respond before they can view the results.
HP Classroom Manager 10.61 Click the Send icon displayed at the bottom of the Survey pane. A dialog will open at the Student machines displaying the question and responses. Students choose the appropriate response and submit the answer. 6. As Students submit their answers the Survey Results pane will display the percentage response for each option. The Client icon will also flag how the individual Student answered.
HP Classroom Manager 10.61 Note: The Student results can be added to the Student Journal, choose {Survey}{Add Results to Journal} from the Control window drop down menu or click the 'Add Survey Results to Journal' icon. Survey Lists Surveys can be re-used by adding them to a Survey List. HP Classroom Manager provides a default list, HP Classroom Manager.sul, into which questions and responses are automatically stored, but you can create custom lists if you want to categorize different types of question.
HP Classroom Manager 10.61 Manage Questions and Responses As well as enabling you to choose an existing Survey, the Select Survey dialog can be used to add new questions/responses and edit questions/responses if the current examples are not appropriate. 1. If the Survey list does not currently include the required question, enter the new question along with the responses in the boxes provided and click Add.
HP Classroom Manager 10.61 When viewing the "Large Icons" layout, an icon is displayed next to the Student icon informing the Tutor of the current print activity. If the List View is in "Details" layout, a summary of the print activity for each Student is displayed. To keep track of print usage while in other areas of the Tutor program, select {Print}{Show Printers} from the Control window drop down menu.
HP Classroom Manager 10.61 1. Select the required printer in the Printer list. 2. Right click and choose Block. 3. Printing will be blocked for the selected printer. Delete Print Jobs You can delete all print jobs, selected print jobs or all print jobs for a Student. 1. Select the required print job(s) in the Print Queue. 2. Right click and choose Delete/ Delete All/ Delete All jobs for Test20. 3. The selected print job(s) will be deleted. Deleting Duplicate Print Jobs 1.
HP Classroom Manager 10.61 View Print History This feature of Print Management enables you to monitor the print usage of connected Students and if required, store or print a permanent record. 1. In Print view choose {Print}{History} from the Control window drop down menu. 2. The Print History dialog will appear. This provides details of the Students print activity during the currently connected session.
HP Classroom Manager 10.61 Device Control The Device Control feature allows the Tutor to protect against external sources during a Lesson. The Tutor can prevent data from being copied to or from USB devices and CD/DVD drives. In addition the Tutor can provide read only access, allowing Students to view files from devices but prevents copying files from them. 1. Choose {View}{Device View} from the Control window drop down menu. Or, Click the Device Control icon on the left hand side of the Control window.
HP Classroom Manager 10.61 2. Choose {Device}{CD/ USB - Unrestricted} from the Control window drop down menu. Or, Click the CD/DVD icon or USB icon at the bottom of the Control window and choose Unrestricted. Disable Execute Prevent Students from running programs from CD/DVD or USB devices. 1. Select the required Students in the List view 2. Choose {Device}{CD/ USB - Prevent Execute} from the Control window drop down menu.
HP Classroom Manager 10.61 Manage Student Resources Students can now easily access any resources required during a lesson. The Tutor can create a resource list and add links to websites, applications and documents, this list is then displayed in the Student toolbar providing Students with a quick and easy way to access the required resources. To Create a resource list 1. Select {School}{Manage Student Resources} from the Control window drop down menu. 2. The Resources List window will appear. 3.
HP Classroom Manager 10.61 Items that can be included within the Journal are: Lesson details and objectives; URLs of websites used during the lesson; Copies of any class Chat transcripts; Class or group Survey Results; Individual Student Test results; Virtual Whiteboard screens; Screenshots from within a Presentation (and supporting explanation); Teacher Notes; Individual Student Notes.
HP Classroom Manager 10.61 Lesson Planner An HP Classroom Manager Lesson Plan enables a Tutor to structure a session around a pre-defined set of tasks with appropriate timings and prompts allocated to each part of the plan. Common HP Classroom Manager functionality can be built into the plan, such as run test, send/collect work, scan and show. To create a Lesson Plan 1. Choose {Planner}{Manage Planner} from the Control window drop down menu.
HP Classroom Manager 10.61 Lesson Details You have the option to input the Teacher Name, Lesson Title, Room Number and Lesson objectives. If these details are completed they will form part of the Student Register should you require one. What time does this Lesson finish? Enter the time you want the class to finish, a timer will appear while the lesson is in progress. If you do not want the lesson to be timed enable the Open Lesson option.
HP Classroom Manager 10.61 Class Lists With HP Classroom Manager you have the option to create Class Lists, this provides you with a quick and convenient way of saving multiple Student lists for all your different classes. The Class List can then be loaded at the start of a lesson and you can quickly connect to the Student machines. Note: Class Lists are only available when using the Fixed List connection mode or Publish Class connection mode.
HP Classroom Manager 10.61 To End a Class List 1. Choose {School}{End Class} from the Control window drop down menu. 2. Your current class will be ended and the Class Wizard will appear allowing you to start a new lesson. Notes: If the Tutor machine does not have write access to the Class Lists folder, the Tutor will not be able to create new Class Lists or edit existing ones.
HP Classroom Manager 10.61 To select the features to be made available on the Toolbar choose {View}{Current Settings – Student Toolbar} from the Control window drop down menu. Enable the Toolbar and decide whether to make it always visible. Alternatively, if the Toolbar is minimized the Student can mouse over the top of their screen to make it appear. If the Tutor changes a setting that affects a toolbar option, a message will appear. For example, enabling Internet restrictions.
HP Classroom Manager 10.61 Allow the Student to Initiate a Chat Enables the Student to initiate a Chat session. Allow the Student to send a request for help Enables the Student to send a Help Request to the Tutor. Show Clock Show Rewards Displays a clock Shows any rewards that have been given to the Student. Show Objectives If Lesson Objectives have been set they will be displayed. Allows Students to access their USB memory stick from the Toolbar.
HP Classroom Manager 10.61 CONFIGURING THE STUDENT WORKSTATION HP Classroom Manager Clients are configured using the HP Classroom Manager Student Configurator from the HP Classroom Manager Program Group. The Student Configurator has eight options: Network Settings Set the Network transport that the Client will use for communicating with the Control program. It must be the same as that set at the Control. Room Specify where to connect the Client when using Room mode.
HP Classroom Manager 10.61 TCP/IP Port The TCP/IP protocol requires that a port number be allocated for applications to communicate through. The defaultregistered port for HP Classroom Manager is 5405. Send Keep Alive Packets Some TCP stacks send Keep Alive Packets. In some circumstances, it may be desirable to disable this. For example on an ISDN line where a TCP/IP client is loaded a symptom may occur where the ISDN line is brought up unintentionally.
HP Classroom Manager 10.61 Security Settings This property sheet is used to set security at the Client. Student Security Security Key This sets a security key that must be the same as that set at the Control, before the Control will be allowed to connect. This setting is optional. If there is no security key set here any Control may connect, regardless of the security key set at the Control.
HP Classroom Manager 10.61 Audio Settings Set the Audio settings for the Client. Both the Client and Control workstations must have Audio hardware installed in order to use HP Classroom Manager‟s audio features. Volume Threshold microphone sensitivity Microphone volume of microphone Speaker volume of speakers Hook audio acceleration Sets the Hardware acceleration level for the Students. Never Leaves the acceleration level at full.
HP Classroom Manager 10.61 User Interface Settings This property sheet is used for customizing the interface between the Client and Control. Student Icon Quiet Mode If this box is checked there will be no indication at the Client workstation, that the Client program is loaded. This is useful for preventing Students from manually unloading or otherwise misusing the Client program. Request Help Disable Request help Prevents the Client User from being able to use the request Help Function.
HP Classroom Manager 10.61 Advanced Settings This property sheet enables further personalization of the Client‟s configuration. A meaningful Client name can be used rather than the machine name, or you can specify a particular image to load when the Client‟s keyboard and mouse are locked rather than use HP Classroom Manager‟s default. Student Identification Student Name This is the name that the Client will be known as on the network for HP Classroom Manager purposes.
HP Classroom Manager 10.61 Performance Cache size Screen data that has been recently sent to the Control by the Client is cached to improve performance. A larger cache improves performance, at the expense of using more memory at both the Client and the Control. Setting this option enables you to tailor the cache size used for maximum performance. The lower of the cache size set at the Client and Control will be used so you must set at both ends for this to be effective.
HP Classroom Manager 10.61 Font Size (points) Set the font size to be used in the Journal. Jpeg Quality (0-100) Allows you to set the quality of images in the Journal, this is set to 100 by default. Journal Folder Specify where you want the Student Journal to be stored. Terminal Services Settings You can configure the settings for the Student Terminal Server here.
HP Classroom Manager 10.61 Using the connect to Room option or the Connect to known list option, the Tutor will be able to Browse and locate the Students running in the Terminal Server sessions. CONFIGURING THE TUTOR WORKSTATION To configure the HP Classroom Manager Control, choose {School} {Configuration} from the Control window drop down menu.
HP Classroom Manager 10.61 At Startup Start Viewing If this box is checked, when the Control initializes, it will connect to all Clients and immediately start Viewing them. Start Showing If this box is checked, when the Control initializes, it will connect to all Clients and immediately start Showing the Controls screen to them. Start Scanning If this box is checked, when the Control initializes, it will connect to all Clients and immediately start Scanning them.
HP Classroom Manager 10.61 Network Settings This is primarily used for setting the Network transport that the Control will use for communicating with the Clients. It must be the same as that set at the Clients. You can also set the name and description for the Tutor. Tutor Identification Use these options to personalize the Tutor machines configuration. Name This is the name by which the Tutor will be known on the network. Setting it to an asterisk defaults to the machine or Computer Name.
HP Classroom Manager 10.61 Accelerate Browse Increases the browse and connection speed to Clients, this is set by default. Note: A warning icon will highlight machines you have been unable to connect to. Mouse over the icon to display the reason why the connection failed. Broadcast Show When showing the Control screen to clients, the screen information is sent to each client machine in turn. Enabling Broadcast Show results in the screen information being sent to all machines simultaneously.
HP Classroom Manager 10.61 Performance Settings Allows you to set low bandwidth and color reduction settings to lower data sent across the network. Low bandwidth mode This mode is designed for network environments where low data usage is a priority. When enabled, video performance and quality will be reduced and limit network activity. Color reduction When enabled, the color palette will be reduced from full color to 256 colors.
HP Classroom Manager 10.61 Room Mode Connect to Students in Room(s) Allows you to connect to the machines in a given room. Specify the room you wish to connect to. Prompt at startup You will be prompted to specify a room when the Tutor program starts. Acknowledge Roaming Students Allows roaming Students to connect to your room. Note: The Room settings can be configured at the Student in the HP Classroom Manager Student Configurator.
HP Classroom Manager 10.61 Administration - Security Settings Protect the Configuration The Control Configuration can be protected by setting a password. This acts independently of the Control Password if set. Check the Protect box to set the password. Each time a Control User subsequently wants to make changes to the Configuration, they will be prompted to enter the password.
HP Classroom Manager 10.61 Administration - Profiles This property sheet enables you to Add, Edit or Delete Tutor Profiles. After creating, for example, an approved or restricted list of websites and applications, you can add the files containing this information to a Tutor Profile. On entering the Tutor program, the user simply selects the required profile to load the pre-defined settings. See the Tutor Profiles section of this manual for more information. Click Add to create a new Tutor Profile.
HP Classroom Manager 10.61 Folder Testing Console Report Folder Specify a location for storing test results. If left blank the reports will default to \HP Classroom Manager\tests\reports. Testing Console Exam Folder Specify a location for storing Exams. Class List Folder Specify a location for storing Class Lists. Journal Folder Specify the location for storing Student Journals. Audio Recordings Folder Specify the location for storing Audio recordings.
HP Classroom Manager 10.61 TECH CONSOLE A classroom management solution is not simply about providing the right tools for each teacher, equally important are tools to ensure all computers in the school can be managed and maintained so they are always available for teaching. With this in mind, HP Classroom Manager also provides a unique "Tech Console" specifically for Lab Technicians and Network Managers.
HP Classroom Manager 10.
HP Classroom Manager 10.61 To Retrieve a Client Inventory 1. Select the required Client icon in the Control window List view 2. Choose {Tools}{Inventory} from the Control window drop down menu Or, Right click on the Client icon and choose Inventory. Or, Click the Inventory icon on the toolbar. 3. The Inventory window for the selected Client will appear.
HP Classroom Manager 10.61 The Test Designer User Interface The Designer comprises two modes of operation, Questions and Exams. You navigate the two interfaces using the drop down menus or the icons displayed above each tree view. Stored Questions grouped by Subject are shown in the top pane and Exams at the bottom. The right-hand pane shows a preview of the currently selected Question or Exam.
HP Classroom Manager 10.61 Create Questions A choice of eight question styles are available, each with a Question Wizard which steps you through the required process. To create a question, choose {Questions}{Create Question} from the drop down menu, click the Create New Question icon or right-click on a question and select Create Question. Select the required Question Type and click Create. Note: Questions can also be created in the Exam Editor at the time you compile a test.
HP Classroom Manager 10.61 The first stage, of three, is to set the question followed by the correct answer and up to three false answers. When the question is run at Student machines, the answers are randomly arranged. Once you have completed part one of the wizard, click Next. Drag and Drop Text The Student is presented with four partially completed statements. They must complete the statement by dragging and dropping the appropriate word or phrase from a list.
HP Classroom Manager 10.61 Drag and Drop Image The Student is presented with up to four statements or questions, and a selection of images. They must match the image with the correct statement. The first stage, of three, is to enter the instructions along with up to four statements or phrases. Alongside each statement you add the appropriate image. Click Browse to search for the images. The list of pictures currently stored in the Images database will appear.
HP Classroom Manager 10.61 Once you have completed part one of the wizard, click Next. Label Image Students are presented with a picture that has up to four areas marked, each with an adjacent blank‟ text box. At the bottom of their screen will be up to four text labels which they must drag and drop into the correct text box. The first stage, of five, is to enter the question along with up to four text labels. You then select the image that the Students will need to label.
HP Classroom Manager 10.61 Use this preview window to position the answers on the image, select the type of arrow you wish to use and choose an appropriate color scheme for the „pointer‟ lines and background. 1. 2. 3. 4. Drag the end of each „pointer‟ to the correct region of the image. Drag the associated text box to an appropriate area. Select the pointer style you wish to use and choose a color for the pointers and background. Click Next when ready.
HP Classroom Manager 10.61 Multi True or False Students are provided with up to four statements and they must decide whether they are true or false. The first stage of three is to enter instructions for the questions along with up to four statements. Alongside each of the statements choose whether they are true or false, by selecting the appropriate button. Once you have completed part one of the wizard, click Next.
HP Classroom Manager 10.61 Adding Additional Resources to Questions The Resources Database Imagery in the form of pictures, videos and sound clips are often an integral part of any question you create. Question types such as Label Image and Drag and Drop Image are graphical by nature but any question type can have an additional supporting resource included. The Designer provides an „Observation‟ mode which, if enabled, forces Students to view or listen to a resource before they can answer the question.
HP Classroom Manager 10.61 Question Details The Question Details dialog completes the Create Question process. Decide where to store the question and whether to add any additional author notes. Stored questions are maintained in an internal database, school.mdb, within the HP Classroom Manager program folder. The Question Editor window displays stored questions in a tree view. You are able to customize this to your own requirements by creating subjects and topics within each subject.
HP Classroom Manager 10.61 Delete Questions, Subjects and Topics A Question can only be deleted if it does not appear in an exam. A Subject or Topic can be removed if there are no items beneath it in the Tree, the currently selected Sort view determining the extent of the deletion. Select the item in the Tree and choose {Questions}{Delete Item} from the drop down menu, click the Delete Selected Item icon or right-click and select Delete.
HP Classroom Manager 10.61 Select {Exams}{Exam Grades} from the Designers drop down menu or click the Exam Grades icon. Enter a name for the Grading Schema and add a Report Image. This provides a pictorial indicator of how well the Student has done. For example, a Student scoring 20% might have one star appearing next to their grade, someone scoring 80%, four stars. The image, restricted to 32x32 pixels, must be imported into the Resources database.
HP Classroom Manager 10.61 2. The first stage is to enter general supporting information about the exam. Enter a Title and Description for the exam. Choose whether to have the exam timed, if so set the time limit, hh:mm. You can use your own grading system by selecting from the Grading Schema drop down. Decide whether to use the default scoring system (you can assign your own scores to questions in stage two).
HP Classroom Manager 10.61 2. The Question Score dialog will appear showing details of the question and the score that would normally be awarded for the question. 3. Increase the score by using the appropriate buttons. Note: Questions with multiple answers can only be incremented by a corresponding number. 4. When you have finished click Save to exit. Preview Exam You can preview an exam at any time in order to simulate what the Students will see.
HP Classroom Manager 10.61 Publish Exam Before an exam can be run at Student PCs it must be „published‟. This procedure bundles the various elements of the exam, questions, resources etc, into a ZIP file that can be stored in either the default Program Files Tests Folder or in a shared network area of your choosing. The latter having the added benefit of enabling other Teachers to access the exam. Once published, the test can be selected in the Testing Console. To Publish an Exam 1.
HP Classroom Manager 10.61 Admin Options Questions, exams etc are stored in an internal database supplied with HP Classroom Manager. This dialog provides version information about the Database. You also have an option to edit the path where imported resources (images, video, sound clips) are stored. General Tracks the version number of the database, school.mdb, that is currently in use.
HP Classroom Manager 10.61 Note: To refresh the Interface with the imported data logout of the Designer. The Testing Console Having used the Test Designer to create questions and exams, you use the Testing Console option in the HP Classroom Manager Tutor program to run the exam at Student workstations and monitor results. Running an Exam 1. Select {School}{Testing Console} from the Control window drop down menu. Or, Click the „Testing Console‟ icon on the Control toolbar. 2.
HP Classroom Manager 10.61 4. The HP Classroom Manager Test Player will automatically launch at the Student PCs and a dialog enabling you to administer the exam will appear on the Tutor screen. This dialog is used to start the exam, monitor Student progress and collect results. The window enables you to track individual Student progress.
HP Classroom Manager 10.61 Test Reports Window The Reports window enables the Tutor to review the results of an exam. You also have the option to allow Students to see their own results. By selecting the required item in the Tree view you can display two types of report, a Class Summary and individual Student summaries. Each can be printed and copies are also stored, in HTML format, in the \\HP\HP Classroom Manager\Tests\Reports folder.
HP Classroom Manager 10.61 Send to Journal Allows you to send a copy of Students result to their Student Journal. The Student then has the opportunity to review their answers after the lesson. The Test Player The HP Classroom Manager Test Player is the testing utility that loads at Student PCs when an exam is running. While the Player is loaded, Students are unable to use any other applications.
HP Classroom Manager 10.61 Contact Us If you have any comments regarding the design, installation, configuration, or operation of this package please contact us. We can never test our software on every possible combination of equipment. We may have inadvertently introduced a restriction or incompatibility which affects you. We apologize for any shortcomings that you may discover. Please let us know so that we can fix them.
HP Classroom Manager 10.61 Appendix: Features of HP Classroom Manager and HP Classroom Manager for MultiSeat HP CLASSROOM MANAGER HP CLASSROOM MANAGER FOR MULTISEAT Power On or Off all computers from Teacher PC. N/A Perform a Remote "Log off" on all PCs.
HP Classroom Manager 10.
HP Classroom Manager 10.
HP Classroom Manager 10.
HP Classroom Manager 10.61 HP Classroom Manager features, 17 starting, 17 HP Classroom Manager deploy, 8 a Client configuration, 13 an HP Classroom Manager license file, 13 an HP Classroom Manager package, 10 getting started, 9 log files, 15 pre-define settings, 15 remote uninstall, 14 HP Classroom Manager deploy via room mode, 16 I icons customize, 40 image file display image when Client locked, 128 import/export data.
HP Classroom Manager 10.
HP Classroom Manager 10.61 run exam, 157 select Students for exam, 157 setting up user accounts, 155 starting the designer, 141 store questions, 150 test player, 160 testing console, 157 true or false question, 147 what the Student sees, 160 timed lesson, 116 toolbar customize, 19 tools add, 88 transfer files, 80 transport configure at Client, 122 true or false question, 147 Tutor.