
Cisco Nexus 5000 Series Switch CLI Software Configuration Guide (OL-16597-01, July 2009)


PurposeCommand or Action
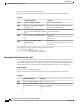
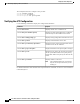
(Optional)
Displays the vPC system MAC address.
switch# show vpc role
Step 4
(Optional)
Copies the running configuration to the startup
configuration.
switch# copy running-config
startup-config
Step 5
This example shows how to configure a vPC domain MAC address:
switch# configure terminal
switch(config)# vpc domain 5
switch(config-if)# system-mac 23fb.4ab5.4c4e
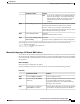
Manually Configuring the System Priority
When you create a vPC domain, the system automatically creates a vPC system priority. However, you can
also manually configure a system priority for the vPC domain.
We recommend that you manually configure the vPC system priority when you are running LACP to
ensure that the vPC peer switches are the primary switches on LACP. When you manually configure the
system priority, ensure that you configure the same priority value on both vPC peer switches. If these
values do not match, vPC will not come up.
Note
Before You Begin
Ensure that you have enabled the vPC feature.
You must configure both switches on either side of the vPC peer link with the following procedure.
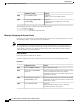
Procedure
PurposeCommand or Action
Enters configuration mode.switch# configure terminal
Step 1
Selects an existing vPC domain on the switch, or creates
a new vPC domain, and enters the vpc-domain
switch(config)# vpc domain
domain-id
Step 2
configuration mode. There is no default domain-id ; the
range is from 1 to 1000.
Enters the system priority that you want for the specified
vPC domain. The range of values is from 1 to 65535. The
default value is 32667.
switch(config-vpc-domain)#
system-priority priority
Step 3
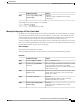
(Optional)
Displays information about each vPC, including
information about the vPC peer link.
switch# show vpc brief
Step 4
Cisco Nexus 5000 Series Switch CLI Software Configuration Guide
142 OL-16597-01
Configuring vPCs
Manually Configuring the System Priority