
HP LaserJet Pro MFP M225, M226 - User Guide


a. Turn the product on.
b. On the product control panel, press or touch the Setup
button.
c. Open the Fax Setup menu.
d. Open the Basic Setup menu.
e. Select the Answer Mode setting.
f. Select the Automatic option.
3. Continue to
Step 3: Configure the fax time, date, and header on page 67.
Shared voice/fax line
Follow these steps to set up the product on a shared voice/fax line.
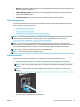
1. Disconnect any devices that are connected to the telephone jack.
2. Connect the telephone cable to the fax port on the product and to the telephone jack on the wall.
NOTE: Some countries/regions might require an adapter to the telephone cable that came with the
product.
NOTE: On some products, the fax port might be above the phone port. Refer to the icons on the
product.
3. Remove the plug from the telephone line out port on the rear of the product, and then connect a phone
to this port.
4. Set the product to answer fax calls automatically.
a. Turn the product on.
b. On the product control panel, press or touch the Setup
button.
c. Open the Fax Setup menu.
d. Open the Basic Setup menu.
e. Select the Answer Mode setting.
f. Select the Automatic option.
5. Set the product to check for a dial tone before sending a fax.
64 Chapter 7 Fax ENWW