
HP LaserJet Pro MFP M225, M226 - Getting Started Guide


3
The printer includes Scan to E-mail and Scan to Network Folder features that scan les and send them as an email attachment or save them in a folder on the network.
The printer must be connected to a wired or wireless network. To congure these options, rst obtain the following information:
• For the Scan to Email feature, obtain the SMTP server name, SMTP port number, and authentication information. Contact the email/Internet service provider or system
administrator for this information. SMTP server names and port names are typically easy to nd by doing an Internet search. For example, search for terms like “gmail smtp
server name” or “yahoo smtp server name.”
• For the Scan to Network Folder feature, conrm that a shared network folder with proper permissions is set up, and know the path to that folder on the network.
NOTE: For more help on setting up Scan to Email and Scan to Network Folder, see the User Guide, or go to www.hp.com/support/colorljMFPM225 or
www.hp.com/support/colorljMFPM226, and search using keywords “scan to email” or “scan to network folder.”
Windows
Some HP products include driver installation from a software CD. At the end
of this installation is an option to Setup Scan to Folder and Email. The setup
wizards include the options for basic conguration.
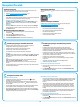
Scan to Email Setup Wizard
1. Click Start, and then click Programs.
2. Click HP, click the name of the product, and then click
Scan to E-mail Wizard.
3. In the Outgoing Email Proles dialog, click the New button.
The Scan to Email Setup dialog opens.
4. On the 1. Start page, enter the Email Address and Display Name, and
then click Next. Creating a security PIN is optional.
5. On the 2. Authenticate page, enter the SMTP Server and Port Number.
NOTE: In most cases, the default port number does not need to
be changed.
6. If you are using Google™ Gmail for email service, select the Always use
secure connection (SSL/TLS) check box.
7. If the SMTP server requires authentication to send an email, select the
Email Log-in Authentication check box, and then enter the user ID and
password. Click Next.
8. On the 4. Finish page, verify all the settings are correct, and click Finish.
Scan to Network Folder Setup Wizard
1. Click Start, and then click Programs.
2. Click HP, click the name of the product, and then click Scan to Network
Folder Wizard.
3. In the Network Folder Proles dialog, click the New button.
The Scan to Network Folder Setup dialog opens.
4. On the 1. Start page, enter the Display Name and Destination Folder,
and then click Next.
TIP: Click the Browse button to locate the folder.
5. To create a shortcut to the network folder on the computer desktop,
select the Create a Desktop shortcut to the network folder check box,
and click Next. Creating a security PIN is optional.
6. On the 2. Authenticate page, enter the Windows® User name and
Password, and click Next.
7. On the 3. Congure page, make sure that the default scan settings are
correct, and then enter a lename prex in the Filename Prex eld,
and click Next.
8. On the 4. Finish page, verify all the settings are correct, and click
Save and Test.
9. Click Finish to complete the conguration.
OS X
Open the HP Utility by clicking the HP Utility icon on the Dock, or click the
Go menu, and then double-click HP Utility.
Scan to Email
1. Click the System tab, then click the Administration link, and set the
Scan to Email option to On.
2. Click the Scan tab, then click the Outgoing E-mail Proles link, and click
the New button.
3. In the E-mail Address area, ll in the required elds.
4. In the SMTP Server Settings area, ll in the required elds.
NOTE: In most cases, the default port number does not need to be
changed.
5. If the SMTP server requires authentication to send an email, ll in the
required elds in the SMTP Authentication area. Creating a security PIN
is optional.
6. Congure email preferences in the E-mail Message Preferences area.
7. Review all the information, and then click Save and Test.
Scan to Network Folder
1. Click the System tab, then click the Administration link, and set the
Scan to Network Folder option to On.
2. Click the Scan tab, make sure the Network Folder Setup link is
highlighted.
3. On the Network Folder Conguration page, click the New button.
4. In the Network Folder Conguration area, ll in the required elds.
Creating a security PIN is optional.
5. In the Scan Settings area, ll in the required elds.
6. Review all the information, and then click Save and Test.
10.
Set up scan features for printers on a network (wireless
models only - optional)
9.
Set up HP ePrint via email (optional)
To use HP ePrint via email, the printer must meet these requirements:
• The printer must be connected to a wired or wireless network and have
Internet access.
• HP Web Services must be enabled on the printer, and the printer must be
registered with HP Connected.
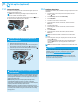
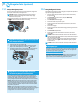
Enable HP Web Services (wireless models only)
1. From the Home screen on the printer control panel, touch the Web Services
button.
2. Touch the Enable Web Services button. The printer enables Web Services, and
then prints an information page. The information page contains a printer code
necessary to register the HP printer at HP Connected.
3. Go to www.hpconnected.com to create an HP ePrint account and complete the
setup process.
Use HP ePrint via email to print documents by sending them as an email attachment to the printer’s email address from any email enabled device, even from devices that are not
on the same network.