
HP Color LaserJet Pro CP1020 Series-Getting Started Guide


5
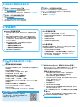
USB connection directly between the
printer and the computer
Use an A-to-B type USB cable.
Windows
1. For Windows 7 or lower, do not connect the USB cable before
installing the software. The installation process prompts to
connect the cable at the appropriate time. If the cable is already
connected, restart the printer when installation prompts to
connect the cable.
2. Continue with “5. Locate or download the software installation
les.”
NOTE: During software installation, select the option to
ConguretoprintusingUSB.
Mac
1. Connect the USB cable between the computer and the printer
before installing the software.
2. Continue with “5. Locate or download the software installation
les.”
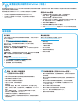
Built-in wireless network connection
(CP1025nw model only)
1. To connect the printer to a wireless (Wi-Fi) network, make sure
that the printer, access point, and computer are all turned on, and
that the computer is connected to the wireless network.
2. A USB cable will be required.
3. Disconnect any USB or Ethernet cable that is connected to the
printer.
4. To print from a computer, continue to “5. Locate or download
thesoftwareinstallationles.” To print from a phone or tablet
only, continue with “7.Mobileandwirelessprinting(optional).”
NOTE: During software installation, select the option to Congure
to print over the Wireless Network.
ManuallyconguretheIPaddress
For information on how to manually congure the IP address, see the
printer User Guide www.hp.com/support/ljcp1020series.
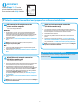
Wired (Ethernet) network connection
(CP1025nw model only)
Use a standard network cable.
1. Connect the network cable to the printer and to the network. Wait
a few minutes for the printer to acquire a network address.
2. Print a Network Conguration Page to identify the printer IP
address. On the control panel, press and hold the Cancel
button
until the ready light starts to blink, and then release the button.
The test page prints. Note the IP address for use during software
installation. Example IP address: 192.168.0.1
To manually congure the IP address, see “Manuallycongure
theIPaddress.”
3. Continue with “5. Locate or download the software installation
les.”
NOTE: During software installation, select the option to Congure
to print over the Network.
4.
Select a connection method and prepare for software installation
IMPORTANT:
Follow Steps 1 - 3 on the
printer hardware setup poster,
then continue with Step 4 below.