HP LaserJet P3010 Series Printer HP LaserJet P3010 系列打印机 EN Getting Started Guide CN 入门指南 ID JA KO TH TW VI Panduan Persiapan セットアップ ガイド 시작 설명서 คู่มือเริ่มต้นใช้งาน 入門指南 Hướng dẫn Bắt đầu Sử dụng EN Read me first CN 请先阅读 ID JA KO TH TW VI Baca dulu saya はじめにお読みください 먼저 읽어 보기 โปรดอ่านก่อนใช้งาน 請先閱讀 Đọc tài liệu này trước Terdaftar di Deperindag Provinsi DKI Jakarta No : 0089/1.824.
Copyright and License © 2009 Copyright Hewlett-Packard Development Company, L.P. Reproduction, adaptation or translation without prior written permission is prohibited, except as allowed under the copyright laws. The information contained herein is subject to change without notice. The only warranties for HP products and services are set forth in the express warranty statements accompanying such products and services. Nothing herein should be construed as constituting an additional warranty.
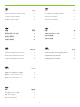
TH EN Topic Page หัวข้อ หน้า In-box documentation and CD contents 2 เอกสารที่อยู่ในกล่องและข้อมูลที่อยู่บนแผ่นซีดี 2 Set up the product hardware 4 ติดตั้งฮาร์ดแวร์ของเครื่องพิมพ์ 4 12 ติดตั้งซอฟต์แวร์ของเครื่องพิมพ์ 12 Install the product software CN 主题 TW 主題 页码 頁 随附文档和 CD 内容 2 包裝盒中的文件和 CD 內容 2 安装产品硬件 4 設定本產品硬體 4 安装产品软件 12 安裝本產品軟體 12 VI ID Topik Chủ đề Halaman Trang Dokumentasi dalam kotak dan isi CD 2 Tài liệu trong hộp và nội dung trên đĩa CD 2 Memasang perangkat
EN In-box documentation TH HP Support Flyer Software CD contents: • User Guide • Software drivers • Installer CN ใบปลิวสนับสนุนของ HP ข้อมูลที่อยู่บนแผ่นซีดีซอฟต์แวร์: • คู่มือผู้ใช้ • ไดรเวอร์ซอฟต์แวร์ • โปรแกรมติดตั้ง 随附文档 TW Dokumentasi dalam kotak VI 同梱されている文書 HP サポート パンフレット ソフトウェア CD のコンテンツ • ユーザー ガイド • ソフトウェア ドライバ • インストーラ KO Tài liệu trong hộp Tời rơi Hỗ trợ của HP Nội dung CD phần mềm: • Hướng dẫn Sử dụng • Trình điều khiển phần mềm • Bộ cài đặt Pamflet Dukungan HP Isi CD Perangkat Luna
1 EN Select a sturdy, well-ventilated, dust-free area, away from direct sunlight to position the product. CN 选择一个稳固、通风良好、无尘且远离直射日光的区域放置产品。 ID Pilih tempat yang kokoh, berventilasi baik, bebas debu, jauh dari sinar matahari langsung untuk meletakkan produk. JA 製品の設置場所には、直射日光を避けて、通気がよく埃の少ない、 しっかりした場所を選びます。 KO 직사광선을 피하여 바닥이 단단하고 환기가 잘 되며 먼지가 없는 장소를 선택하여 제품을 내려 놓습니다.
2 EN Unpack the product. CN 打开产品包装。 ID Buka kemasan produk. JA 製品を開梱します。 KO 제품을 개봉합니다. TH นำเครื่องพิมพ์ออกจากกล่อง TW 打開產品包裝。 VI Mở sản phẩm. 1 2 (P3015x) 3 1 P3015, P3015d, P3015n, P3015dn 1 15.9 kg 35.
EN Remove all orange shipping tape from the product. CN 从产品上撕下所有橙色装运胶带。 ID Lepaskan semua pita pengaman pengiriman warna jingga dari produk. JA プリンタからオレンジ色の保護テープをすべて剥がします。 KO 제품에서 주황색 테이프를 모두 떼어냅니다. TH แกะเทปสีส้มทั้งหมดออกจากเครื่องพิมพ์ TW 撕下產品上所有橘色裝運膠帶。 VI Tháo tất cả băng vận chuyển màu da cam ra khỏi sản phẩm.
3 EN Prepare the print cartridge. CN 准备好打印碳粉盒。 ID Siapkan kartrid cetak. JA プリント カートリッジを取り付けます。 KO 토너 카트리지를 준비합니다. TH เตรียมตลับหมึกพิมพ์ TW 準備碳粉匣。 VI Chuẩn bị hộp mực in.
4 EN Make sure your power source is adequate for the product voltage rating. The voltage rating is on the product label. The product uses either 100-127 Vac or 220-240 Vac and 50/60 Hz. Connect the power cord between the product and a grounded ac outlet. Caution: To prevent damage to the product, use only the power cord that is provided with the product.
EN Connect the network cable, and verify that the light on the network port is illuminated. CN 连接网线,检查网络端口上的指示灯是否亮起。 ID Hubungkan kabel jaringan, dan pastikan port jaringan menyala. JA ネットワーク ケーブルを接続し、ネットワーク ポートのランプが点灯していることを確認します。 KO 네트워크 케이블을 연결하고 네트워크 포트의 표시등이 켜지는지 확인합니다. TH เชื่อมต่อสายเคเบิลเครือข่าย และตรวจสอบว่าไฟที่พอร์ตเครือข่ายสว่างขึ้น TW 連接網路纜線,並且確定網路連接埠的燈亮起。 VI Cắm cáp mạng, và kiểm tra xem đèn trên cổng mạng có sáng không. EN Caution! Do not connect the USB now.
5 EN Turn on the product. On the control panel, if prompted, select a language and a date/time for the product. CN 打开产品电源。 如果控制面板上出现提示,请为产品选择语言和日期/时间。 ID Hidupkan produk. Pada panel kontrol, jika diminta, pilih bahasa dan tanggal/waktu produk. JA プリンタの電源を入れます。画面の指示に従い、 コントロール パネルを使用してプリンタの言語と日付/時刻を選択します。 KO 제품의 전원을 켜십시오. 제어판에 메시지가 나타나면 제품에 대한 언어 및 날짜/시간을 선택합니다.
6 EN Remove the paper tray from the product. Adjust the guides so they point to the correct paper size. Load paper. Reinsert the tray. Configure the correct paper size and type on the control panel. CN 从产品上卸下纸盘。 调节导板,以使其指向正确的纸张尺寸。 装入纸张。 重新插入纸盘。 在控制 面板上配置正确的纸张尺寸和类型。 ID Keluarkan baki kertas dari produk. Sesuaikan pemandu agar menunjuk ke ukuran kertas yang benar. Muat kertas. Masukkan kembali baki tersebut. Konfigurasilah ukuran dan jenis kertas pada panel kontrol.
3 4 1 5 2 2 2 6 P3015d, P3015n, P3015dn, P3015x P3015 11
EN Install the product software. TH ติดตั้งซอฟต์แวร์ของเครื่องพิมพ์ CN 安装产品软件。 TW 安裝本產品軟體。 ID Instal perangkat lunak produk. JA 製品ソフトウェアをインストールします。 KO 제품 소프트웨어를 설치합니다. VI Cài đặt phần mềm sản phẩm. EN For network connections, go to step 7 (page 13). CN 对于网络连接,请转至步骤 7(第 13 页)。 ID Untuk koneksi jaringan, pindah ke langkah 7 (halaman 13). JA ネットワーク接続する場合は、手順 7 (13 ページ) に進みます。 KO 네트워크 연결의 경우 7단계(13페이지)로 이동합니다.
7 EN Network connection At the product control panel, press Menu Press to highlight INFORMATION, and press OK. Press to highlight PRINT CONFIGURATION, and press OK. Locate the IP address on the Embedded Jetdirect page. CN 网络接口 在产品控制面板上,按下菜单 ,再按 以突出显示信息,然后按 OK。 按下 以突出显示打印配置,然后按下 OK。 找到嵌入式 Jetdirect 页上的 IP 地址。 ID Koneksi jaringan Pada panel kontrol produk, tekan Menu Tekan untuk menyorot INFORMATION [INFORMASI] dan tekan OK. Tekan untuk menyorot PRINT CONFIGURATION [CETAK KONFIGURASI], dan tekan OK.
8 EN If the IP address is something other than 0.0.0.0, or 192.0.0.192, or 169.254.x.x, the network configuration was successful. For Windows, go to step 9. For Mac, go to step 10. Otherwise, you must manually configure the IP address. Ask your network administrator for the IP address. At the product control panel, press Menu . Press to highlight CONFIGURE DEVICE, and press OK. Highlight I/O, and press OK. Highlight EMBEDDED JETDIRECT MENU, and press OK. Highlight TCP/IP, and press OK.
TH หาก IP แอดเดรสไม่ใช่ 0.0.0.0 หรือ 192.0.0.192 หรือ 169.254.x.
9 EN Quit all open programs on each computer that will share the product. Install the software from the CD. Follow the onscreen instructions. When prompted, select Connected via the Network, and then click Install Now. The installer shows the available printers. Select the printer that has the appropriate IP address. Click Finish. On the Additional Options screen, you can install additional software, or click exit. Go to step 15.
10 EN Quit all open programs on each computer that will share the product. Install the software from the CD. Click the product icon, and follow the onscreen instructions. Click Close when the installation is finished. At the computer, open the Apple menu and click System Preferences and then click Print & Fax. click Add or +, and then select the connection type (Default Browser or IP Printer). Default Browser: Select the product from the list.
TH ออกจากโปรแกรมที่เปิดทั้งหมดในคอมพิวเตอร์แต่ละเครื่องที่จะใช้เครื่องพิมพ์ร่วมกัน ติดตั้งซอฟต์แวร์จากแผ่นซีดี คลิกไอคอนเครื่องพิมพ์ และทำตามคำแนะนำบนหน้าจอ คลิก Close เมื่อการติดตั้งเสร็จสิ้น ที่คอมพิวเตอร์ ให้เปิดเมนู Apple และคลิก System Preferences และคลิก Print & Fax คลิก Add หรือ + และเลือกประเภทการเชื่อม ต่อ (Default Browser หรือ IP Printer) Default Browser: เลือกเครื่องพิมพ์จากรายการ จากรายการแบบดรอปดาวน์ Print Using ให้เลือกรุ่นเครื่องพิมพ์หากยังไม่มีการเลือก รุ่นไว้ คลิก Add IP Printer: จากรายการ
11 EN Configure the product software to recognize the installed accessories. Highlight the product and select Printer Setup. The Installable Options dialog box appears. Select the product options that you are using. Click Apply Changes. Go to step 15. CN 配置产品软件以识别安装的附件。 突出显示产品并选择打印机设置。 此时将出 现可安装选项对话框。 选择您将使用的产品选项。 单击应用更改。 转至步骤 15。 ID Konfigurasilah perangkat lunak produk untuk mengenali aksesori yang telah dipasang. Sorot produk dan pilih Printer Setup [Pengaturan Printer].
12 EN Windows USB connection Quit all open programs on the computer. Install the software from the CD. Follow the onscreen instructions. When prompted, select Connected directly to the computer, and then click Install Now. Do not connect the USB cable until you are prompted. At the end of the installation, click Finish. On the Additional Options screen, you can install additional software, or click exit. Go to step 15.
13 EN Macintosh USB connection Install the software from the CD. Click the product icon, and follow the onscreen instructions. Click Close. Connect the USB cable. CN Macintosh USB 连接 从 CD 安装软件。 单击产品图标,然后按照屏幕上的说明进行操作。 单击关闭 。连接 USB 电缆。 ID Koneksi USB Macintosh Instal perangkat lunak dari CD. Klik ikon produk dan ikuti petunjuk di layar. Klik Close [Tutup].Hubungkan kabel USB.
14 EN Configure the product software to recognize the installed accessories. Highlight the product and select Printer Setup. The Installable Options dialog box appears. Select the product options that you are using. Click Apply Changes. Go to step 15. CN 配置产品软件以识别安装的附件。 突出显示产品并选择打印机设置。 此时将出现 可安装选项对话框。 选择您将使用的产品选项。 单击应用更改。 转至步骤 15。 ID Konfigurasilah perangkat lunak produk untuk mengenali aksesori yang telah dipasang. Sorot produk dan pilih Printer Setup [Pengaturan Printer].
15 EN Test the software installation. Print a page from any program to make sure that the software is correctly installed. Note: If the installation failed, reinstall the software, or see the problem solving section in the User Guide. CN 测试软件安装。 从任一程序打印一个页面,确保软件安装正确。 注: 如果安装失败,请重新安装 软件,或者参阅《用户指南》中的“解决问题”部分。 ID Uji instalasi perangkat lunak. Cetak halaman dari program apa saja untuk memastikan bahwa perangkat lunak telah diinstal dengan benar.
EN Product setup is complete. Register your product at www.register.hp.com. This is the quickest and easiest way for you to register to receive the following information: • Technical support updates • Enhanced support options For more information about the following topics, see the electronic User Guide on the CD-ROM or go to: www.hp.com/support/ljp3010series. • Detailed user instructions. • Important safety notices. • Troubleshooting information. • Regulatory information. CN 产品设置至此完成。 请登录 www.register.
TH การตั้งค่าเครื่องพิมพ์เสร็จสมบูรณ์ ลงทะเบียนเครื่องพิมพ์ของคุณที่ www.register.hp.com นี่คือวิธีที่รวดเร็วและง่ายที่สุดสำหรับคุณในการลงทะเบียนเพื่อรับข้อมูลต่อไปนี้: • ข้อมูลสนับสนุนล่าสุดด้านเทคนิค • ตัวเลือกการสนับสนุนเพิ่มเติม สำหรับข้อมูลเพิ่มเติมเกี่ยวกับหัวข้อต่อไปนี้ โปรดดูคู่มือผู้ใช้อิเล็กทรอนิกส์ในแผ่นซีดี หรือไปที่: www.hp.com/support/ljp3010series • คำแนะนำสำหรับผู้ใช้โดยละเอียด • ประกาศด้านความปลอดภัยที่สำคัญ • ข้อมูลการแก้ไขปัญหา • ข้อมูลเกี่ยวกับข้อบังคับ TW 產品設定完成。 請在 www.register.hp.
© 2009 Hewlett-Packard Development Company, L.P. www.hp.