
HP LaserJet M9040/M9050 MFP - Software Technical Reference (external)

Create a network folder using the Scan Setup Wizard
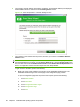
To create a network folder on an computer using the Scan Setup Wizard, follow these steps:
NOTE: You can return to the previous dialog box by clicking the < Back button, or exit the Scan Setup
Wizard by clicking the Cancel button.
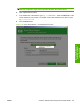
1. Insert the HP LaserJet M9040 MFP or HP LaserJet M9050 MFP printing-system software CD in
the CD-ROM drive to open an interactive CD browser.
If the installation screen does not appear when you insert the software CD into the CD-ROM drive,
follow these steps to open the CD browser:
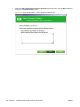
a. On the Start menu, click the Run option.
b. Type the following: X:\SETUP.EXE (where X is the letter of the CD-ROM drive).
c. Click the OK button.
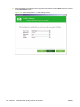
2. Click the Scan Setup Wizard button from the main screen of the CD Browser.
3. Click the Install Scan Setup Wizard button.
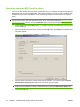
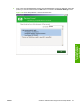
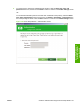
4. If the product's networking settings are known, enter either the Host Name, IP Address, or the
Hardware Address into the appropriate text box, and then click the Next > button to continue to
the Contacting Device screen (step 4).
If the product's network settings are not known, click the Help me find my device on the
network button. A Discovery in Progress window appears. After the computer searches the
network, the Devices Found screen appears (step 2).
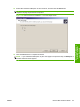
Figure 3-48 Scan Setup Wizard — Welcome screen
96 Chapter 3 Install Windows printing-system components ENWW