
Brocade Fabric OS Administrator's Guide Supporting Fabric OS v6.3.0 (53-1001336-02, November 2009)

246 Fabric OS Administrator’s Guide
53-1001336-02
Zoning configurations
11
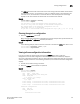
cfgenable "cfgname"
3. Enter y at the prompt.
Example
switch:admin> cfgenable "USA_cfg"
You are about to enable a new zoning configuration.
This action will replace the old zoning configuration with the
current configuration selected. If the update includes changes
to one or more traffic isolation zones, the update may result in
localized disruption to traffic on ports associated with
the traffic isolation zone changes.
Do you want to enable 'USA_cfg' configuration (yes, y, no, n): [no] y
zone config "USA_cfg" is in effect
Updating flash ...
Disabling a zone configuration
When you disable the current zone configuration, the fabric returns to non-zoning mode. All devices
can then access each other or not, depending on the default zone access mode setting.
NOTE
If the default zoning mode is set to All Access and more than 120 devices are connected to the
fabric, you cannot disable the zone configuration. See “Default zoning mode” on page 242 for
information about setting this mode to No Access.
The following procedure ends and commits the current zoning transaction buffer to both volatile
and nonvolatile memory. If a transaction is open on a different switch in the fabric when this
procedure is run, the transaction on the other switch is automatically aborted. A message displays
on the other switches to indicate that the transaction was aborted.
1. Connect to the switch and log in as admin.
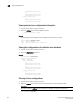
2. Enter the cfgdisable command, using the following syntax:
cfgdisable
3. Enter y at the prompt.
Example
switch:admin> cfgdisable
You are about to disable zoning configuration. This
action will disable any previous zoning configuration enabled.
Do you want to disable zoning configuration? (yes, y, no, n): [no] y
Deleting a zone configuration
1. Connect to the switch and log in as admin.
2. Enter the cfgDelete command, using the following syntax:
cfgdelete "cfgname"
3. Enter the cfgSave command to save the change to the defined configuration.