HP Access Control (HP AC) Getting Started Guide
© Copyright 2014 Hewlett-Packard Development Company, L.P. Microsoft, Windows, and Windows NT are U.S. registered trademarks of Microsoft Corporation. July 2014 Confidential computer software. Valid license from HP required for possession, use or copying. Consistent with FAR 12.211 and 12.212, Commercial Computer Software, Computer Software Documentation, and Technical Data for Commercial Items are licensed to the U.S. Government under vendor’s standard commercial license.
Table of contents 1 Introduction .................................................................................................................................................. 1 2 Prerequisites ................................................................................................................................................ 2 3 License tile ...................................................................................................................................................
5.11 Install and configure components on Xerox devices ................................................................................. 56 5.11.1 Configure AC Xerox Applications ........................................................................................... 57 5.11.2 Using the AC Xerox Applications ............................................................................................ 58 5.12 Configure XT devices .............................................................................
List of tables Table 5-1 Supported HP OfficeJet Pro printers and firmware ........................................................................................... 38 Table 5-2 Supported printers .............................................................................................................................................
List of figures Figure 1-1 Home screen ........................................................................................................................................................ 1 Figure 2-1 Database setup ................................................................................................................................................... 2 Figure 2-2 Retrieve user data ................................................................................................................
Figure 4-30 Agent tab ......................................................................................................................................................... 22 Figure 4-31 HP install files ................................................................................................................................................. 23 Figure 4-32 Lexmark install ..........................................................................................................................
Figure 5-30 External accounting application settings ....................................................................................................... 49 Figure 5-31 Apps ................................................................................................................................................................. 50 Figure 5-32 Lexmark application .....................................................................................................................................
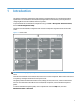
1 Introduction This guide is intended for administrators with experience using Windows servers. The following chapters explain how to use the HP Access Control (HP AC) configuration tool and introduce you to the process of configuring HP Access Control (HP AC) solutions on printers. To open the HP Access Control (HP AC) configuration tool, go to Start > All Programs > HP Access Control, then click HP AC Configuration utility.
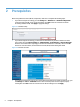
2 Prerequisites Before using HP Access Control (HP AC) components, make sure to complete the following steps. ● If you will be using Job Accounting, go to the Settings tile > Database tab > Database Configuration section and verify the SQL server connection settings. Click Test to test the connection to the Job Accounting database in SQL. Click Apply to apply the settings.
Figure 2-3 Push mode setup ● If you will be configuring devices, go to the Settings tile > Device tab > Device section. Enter a device password in the Administrator password field. This device password must match the device passwords in all printers. Click Apply.
3 License tile The License tile shows your server license number, Activation Keys for installed components and expiration dates of licenses. Figure 3-1 License tile NOTE: Information in the License tile may vary depending on what components of HP Access Control (HP AC) are installed on the server. NOTE: The License tile is highlighted red on the HP Access Control (HP AC) home screen if a component license is expired. NOTE: The Secure Pull Print Express license resets after 24 hours.
4 Settings tile The Settings tile allows you to view and change all the settings of installed components from one location. IMPORTANT: After making changes in the Settings tile, be sure to click the corresponding Apply button to apply the settings. NOTE: Information in the Settings tile may vary depending on what components of HP Access Control (HP AC) are installed on the server. Click the File menu to import or export setting information.
Figure 4-2 Database tab NOTE: The Database tab displays if HP Access Control (HP AC) Job Accounting is installed. The Database configuration section contains the method to connect to the SQL database/instance containing job accounting data. The SQL Server field displays the name and instance of the SQL Server installed. If you are connecting to a SQL Server on a different server, make sure the name and instance of the SQL Server is correct.
Figure 4-3 Device tab NOTE: The Device tab displays if DTM, Device Analysis, Agent, or Secure Pull Print Express is installed. Figure 4-4 Device settings In the Device section, the device administrator user name and password is required for communication between the server and devices. This is necessary to install and configure solutions on devices.
Figure 4-5 Tracking settings In the Tracking section, select what device information you want to display in job accounting reports when HP FutureSmart devices are configured for tracking. ● Select Device name to display the device names in job accounting reports. ● Select Network name to display the host names of devices in job accounting reports. Make sure the Get community name is entered in the SNMP section to be able to read the network/host names of devices.
the Get and Set community names are “public”. For communication between the server and devices, the Get and Set community names on the server must match the Get and Set community names on all devices. NOTE: The SNMP section displays if Job Accounting, Device Analysis, Agent, or Secure Pull Print Express is installed on the server. In the Trap level field, select the type of traps you want to track with Direct Tracking Module (DTM).
Figure 4-9 Email tab NOTE: The Email tab displays if Job Accounting, Device Analysis, IPM, Agent, or Secure Pull Print Express is installed. In the POP3/IMAP section, enter your company’s email server information if you want to allow users to email jobs for pull printing. The Secure Pull Print Express email service checks for and processes emailed jobs from users. Figure 4-10 POP3 IMAP settings NOTE: The POP3/IMAP section displays only if Secure Pull Print Express is installed.
Figure 4-11 SMTP settings The SMTP section allows you to configure emails you want to send from the server.
Figure 4-12 IIS tab NOTE: The IIS tab displays if Job Accounting, Agent, IPM, Secure Pull Print, Secure Pull Print Enterprise, or Secure Pull Print Express is installed.
IP column. Click the Test button to test the connection. The Status column should display OK. Then click Apply. Click the Encrypt all web communication (devices) checkbox if you want to enable the HTTPS protocol for communications between devices and the server. Click the Use server name instead of IP (devices) checkbox for one or both of the following reasons: ● If the server name was entered during the installation and configuration of the OPS server.
Click Test to test the connection to the web service. The Agent license service section allows you to assign a different server to handle licensing for IRM. This must be done before devices are configured. Enter the IP address of the server to handle licensing for IRM. By default, the field is populated with the IP address of the current server. After making any changes, click Apply.
IIS anonymous authentication means the IIS anonymous user identity will be assigned to the user name entered in the Login field. This allows only the domain user to access the IPM web service. Click Apply, then click Restart IIS to clear previous user grouping cache information. 4.5 SPPE tab The SPPE tab contains settings for the Secure Pull Print Express component. Figure 4-18 SPPE settings NOTE: The SPPE tab displays if Secure Pull Print Express is installed.
Figure 4-19 Pull Printing settings In the Job expires after fields, select when you want jobs to expire. This can be used to manage the amount of stored jobs on the server to reduce job storage space. The default expiration time is 24 hours. The Stored jobs folder field displays the default location for stored pull print jobs. Double-click the text field to browse to a different folder location. If you want to store jobs in a different folder on the network, you must have write access to the folder.
TIP: The order of printer information can be rearranged in the QR code. Drag and drop items in the list to change the order. In the Email section, click the Process email attachment only checkbox if you want email attachments, not email bodies, to be processed as pull print jobs. This allows users to view their email attachments as pull print jobs in their stored jobs folder.
Figure 4-23 SPP Enterprise settings NOTE: The SPP Enterprise tab displays only if the SPP Enterprise component is installed. With SPP Enterprise users can stored jobs on one server, then release the same job at a different location from a printer configured on a different server. In the Server Information section, click an open row, then enter the Fully Qualified Domain Name (FQDN) of a server you want to add, including the IPP port number (Example: Servername.Domain.com:631).
NOTE: When a pull print queue is created from the HP AC configuration utility, a printer definition file is created in the C:\Program Files\Hewlett-Packard\HP Access Control\spoolroot\prtr folder. This printer definition file is required to allow the print queue to receive print jobs from client printers. Figure 4-25 Pull print queues settings Edit the following settings in the Options section: ● Protocol: This defines the way SPP Enterprise will communicate with the printer.
● Use device IP address: When enabled, this checkbox allows the spooler to identify the printer via IP address instead of host name, in case the host name has changed and a printer has not been reconfigured. It is recommended that printers have fixed IP addresses. ● Show local and remote jobs: When enabled, this checkbox allows for pull print queues from all SPP Enterprise servers to automatically display on a device front panel after authentication.
NOTE: If the “Service not started with a domain account” message displays in the Email section, you must restart the HP AC SPP Mail service with a domain account. To restart the service with a domain account, go to Administrative Tools > Services. Right-click the HP AC SPP Mail service, then click Properties. Under the Log On tab, select This account and enter the credentials of a domain account. Click OK. Restart the HP AC SPP Mail service. 4.
Figure 4-29 Alias window 4.8 Agent tab Figure 4-30 Agent tab NOTE: The Agent tab displays if Agent is installed. In the HP installation files section, make sure the correct Installation and Uninstallation PRN files display. Double-click the text field to browse to a different location.
Figure 4-31 HP install files Use the Devices tile to install or uninstall the SPPE-Agent solution in HP printers. The Lexmark installation folder section displays the default folder location of Lexmark installation files. Double-click in the text field to browse to a different location. Figure 4-32 Lexmark install Use the Devices tile to install Lexmark installation files in Lexmark printers. In the IRM quota web service section, select features you want to enable.
4.9 Print server tab Figure 4-34 Print server tab NOTE: The Print Server tab displays if the Job Accounting Print Server is installed. In the Print server tracking section, select the method to gather tracking data. ● Port monitor creates a new port monitor for printers. This is the preferred method to gather tracking data. ● Print processor replaces the existing print processor with the Job Accounting print processor. This method may not work with all printer drivers.
4.10 IPM tab Figure 4-35 IPM tab NOTE: The IPM tab displays if Intelligent Print Management (IPM) is installed. Click the Skip rules if network failure checkbox to allow users to print after the server loses connection to the IPM web service. If this feature is not enabled and there is a network failure, then rules cannot be checked and all printing stops. Figure 4-36 IPM web service settings Click the Enable print activity log checkbox to enable a list of all jobs printed with IPM rules.
Enter the parameters to configure the Notification Desktop Client. The Notification Desktop Client is a light client application that allows notifications, such as defined printing costs, to be sent from the server to user desktops. Figure 4-38 Notification desktop client The Title field displays the default title of the notification window when the window displays on client desktops. If you want to change the title of the notification window, type a new title in the Title field.
Figure 4-39 Cost per page Define up to three Cost per page profiles to set different cost models for different print queues. TIP: Values for duplex printing should always be lower than those for simplex printing. The User grouping section applies when the cost center option of the IPM job stamp rule is used. When cost center is selected in the IPM job stamp rule, the name of a user’s cost center group is printed on all printed pages. Figure 4-40 User grouping Section 4.
The cost center information is gathered from one of the following sources: ● Select Job accounting cost center if you want to use cost centers defined in Job Accounting. For more information about defining Job Accounting cost centers, see the HP Access Control (HP AC) Job Accounting User Guide. ● Select Active Directory if you want to use groups defined in Active Directory. Click the dropdown list to select an Active Directory field containing the group names you want printed in job stamps.
5 Devices tile The Devices tile allows you to manage devices in your printing environment. Organize devices into groups and see what is installed on each printer. From the Devices tile, you can easily install and configure printers for tracking, quota, pull printing, authentication or rights managements. Figure 5-1 Devices tile 1. Device groups: In the device groups section you can create groups to better organize your printer environment. Right-click a group name to Add, Delete, or Rename a group. 2.
4. Status bar: The status bar allows you to view error messages and the status of scans or configurations. Right-click in the status bar and click Clear to delete the log information. 5. Tracking bar: The tracking bar displays data from devices configured for Confirmation Trap or from FutureSmart devices configured for Tracking. Device rows in the device list may be highlighted, indicating the following: ● Yellow indicates the Agent file is installed but not configured for tracking.
IMPORTANT: Configuration at a device occurs in order, starting at the top of the Configure window list. This means the FDT workflow is always configured last on a device. Right-click a device to display a dropdown menu of possible actions. Figure 5-3 Devices dropdown menu NOTE: The dropdown menu options may vary, depending on the type of device and the configured components on the device. ● Click Go to printer EWS to go to the device’s Embedded Web Server page.
5.1 Scan the network for printers To scan the network for single-function printers, multi-function devices, and XT devices, the following is required: ● Printers and devices must be turned on and connected to the network. ● A device administrator user name and password must be entered in the Settings tile > Device tab. In the Devices tile, go to the Devices menu and select Snmp discovery or IP range. ● Snmp discovery sends a broadcast over the network and discovers available devices.
5.2 Scan the network for XT devices The XT device is an external device with an attached card reader that allows for pull printing at any printer or multi-function device. A user simply presents his or her card at the XT card reader and all of his or her stored jobs are printed at the connected printer. For more information about XT, see the HP Access Control (HP AC) Secure Pull Print Express Admin Guide.
5.3 Manually add a device 1. In the IP field, type the IP address of a device you want to add. Figure 5-8 Add devices 2. Click Add. 5.4 Delete a device from the device list 1. Select the device(s) from the device list. 2. Press the Delete key. Then click OK to confirm the deletion. 5.5 Import/Export device data To export device data to a CSV file, follow the steps below: 1. Go to the Devices menu and select Export to CSV. 2. Browse to a save location, then click Save.
Figure 5-9 Add device groups 2. Click and drag devices from the device list to the new group name. This moves the device data from the HPAC group to the new group. TIP: Create multiple groups to better organize your printer environment. For example, create a group for single-function printers named SFPs to manage the installation and configuration of only single-function printers.
Figure 5-11 Filter devices 5.7 Install and configure components on HP FutureSmart and non-FutureSmart devices Prerequisites: ● Before installing any solution on HP devices, make sure the correct PRN installation file displays in the Installation file field in the Settings tile > Agent tab. ● Make sure a device administrator password is set on MFPs and matches the device administrator name and password in the Settings tile > Device tab.
2. Click Install to send the installation file to the device(s). The HP device(s) may reboot during the installation process. Please wait for the device(s) to return to the Ready state. Figure 5-12 Device install Section 5.
3. Select the device(s) from the device list, then click Configure. In the Configure window, select each component you want to configure on the device(s). Click OK. Figure 5-13 Configure device IMPORTANT: When reconfiguring the device(s), place an X in a component checkbox to resend the configuration file. Place a / in a component checkbox to not resend the configuration file and leave the current configuration status as is. Clear a component checkbox to disable the component on the device.
1. Go to Administrative Tools > Internet Information Services (IIS) Manager. 2. Select Default Web Site and right-click to open Properties. 3. In the Properties window, select the Directory Security tab and then click Server Certificate. Figure 5-14 Default website properties 4. The Web Server Certificate Wizard opens. Select Assign an existing certificate. Click Next. Figure 5-15 Assign an existing certificate Section 5.
5. Select the OPS server certificate and click Next. Click Finish at the end. Figure 5-16 Select certificate IIS 7 or newer: 1. Go to Administrative Tools > Internet Information Services (IIS) Manager. 2. Select Default Web Site and then click Bindings. 3. Select https and then click Edit.
4. Select the certificate from the SSL certificate dropdown menu. Click OK. Figure 5-18 SSL certificate Prerequisites: ● Agent and Secure Pull Print Express must be installed on the server. ● On Windows Server 2003, make sure the OPS service is started with a domain account. ● Make sure the Officejet Pro device administrator password matches the device administrator name and password in the Settings tile > Device tab.
1. Open a command prompt and run the OPSSetup.bat file, located in the C:\Program Files (x86)\HewlettPackard\OPS\bin folder. On 64-bit servers, make sure you select “Run as administrator” when you open the command prompt. 2. From the available options, select Unregister a device to the OPS server and follow the on-screen instructions. 3. Open the EWS of the Officejet Pro printer and go to Network > Certificates page. Select the OPS certificate, then click Remove.
5.9 Configure components on HP S900 series devices Prerequisites ● Make sure PIC licenses are available on the HP AC server. A PIC license is required for each device to allow for walk-up authentication. ● If you want to use a front panel QR code for pull printing with a mobile device, make sure to manually generate a QR code prior to configuring the device.
Figure 5-21 Card Reader settings b. At the device, tap Settings > User Control > Card Reader Device Registration. Then tap Read. c. When prompted, plug in the card reader. The card reader will beep twice. Tap OK. The card reader Product ID and Vender ID displays on the screen.
d. Tap Submit to save the card reader registration. Figure 5-23 Card reader registration Section 5.
2. To configure the device for card authentication, select User Control followed by Default Settings. Scroll down to the Card Setting section. Select the Automatic Login with a Card checkbox. Select the Card/ Front Panel Operation Authentication Approved checkbox. Specify Enable in the Card ID Registration/Change Authority dropdown. Figure 5-24 Default settings 3. On the device web page, select System Settings followed by Operation Settings followed by Home Screen Settings. a.
Figure 5-25 Home screen settings b. On the Registration screen, specify the name of the image you wish to associate with the Top Level MFP panel for the application. The HP AC icon, named “icon48x44.png”, is located on the HP AC server in the C:\Program Files\Hewlett-Packard\HP Access Control\DPR folder. Click Submit(U). Figure 5-26 Home screen registration c. After adding the custom image, select the Item tab followed by the Apps Home Button link.
4. To register HP AC Express with the MFP, select Application Settings followed by External Applications Settings. Figure 5-28 Standard Application settings From the External Application Settings, select the Add button. Specify the Application Name as AC Express. Specify the Address for Application UI as http://serverIP/HPAppsWS/Default.aspx, where serverIP is the IP address of the server.
5. To register the HPAuthWS authentication application with the MFP, select Application Settings followed by External Applications Settings followed by External Accounting Application Settings. a. Select Enable in the External Account Control dropdown. b. Select the Set Authentication Server (Server 1) checkbox. c. Select Enable in the Server 1 dropdown. d. Specify an Application Name. e. Specify the Address for Application UI as http://serverIP/HPAuthWS/Default.
● If the HP AC server is using IIS 6, SSL must be disabled. Go to the IIS Manager > local computer > Web Sites > Default Web site. Right-click HPAppsWS and select Properties. In the ASP.NET tab, click Edit Configuration. In the General tab, set the UseSSL application setting to false. Click OK. Make the same change to the HPAuthWS web site. ● If you will be using SPP Enterprise, make sure the device is configured for Pull Printing. Follow the steps below to release stored jobs at the device: 1.
X654de, X656de, XS654, XS656 X658de, XS658 X738de, X736de, X734de, X738dte, XS734, XS736, XS738 X466dwe, X466dte, X466de, X464de, X463de*, XS463*, XS464, XS466 T654, TS654 X860de, X862de, X862dte, X864de, X864dhe, XS860, XS862, XS864 W850n, W850dn, WS850 T656, TS656 X746de, X748de, X748dte, XS748 3.
1. Open the embedded Web server (EWS) for the MFP and log in with the user name and password of the device. 2. Select the Settings option. 3. Select Apps. AC Lexmark Applications version numbers are shown in the printers list of installed applications. Figure 5-32 Lexmark application 5.10.
1. In the Devices tile, select the Lexmark printer from the device list. 2. Click the Install button. Please wait a few minutes for the AC Lexmark Applications solution to install. To check the status of the printer, go to the printer’s EWS. The current status of the device displays in the page header. If the status is “Busy” or “Not Ready”, the applications are installing. 5.10.2 Configure AC Lexmark Applications NOTE: The administration pages may vary, depending on the model of the Lexmark printer.
1. In the Devices tile, right-click the Lexmark printer and select Go to printer ews. 2. On the printer admin pages, select Settings. 3. Select Security, then select Security Setup. 4. If you want to use Card Enroll, select Active Directory to configure based on your environment. An HTTPS connection to the EWS may be required. The printer may also automatically reboot in order to join the domain. 5. Select Security Template, then click Add a Security Template. 6.
Figure 5-33 Lexmark welcome 2. Present your proximity card at the card reader for scanning. Figure 5-34 Lexmark swipe 3. Follow the on screen prompts to authenticate. 4. Follow the on screen prompts to complete the requested action. Figure 5-35 Lexmark select Section 5.
5.11 Install and configure components on Xerox devices Before the AC Express application can be used on the Xerox MFP front panel, MFP devices must have the AC Xerox Agent installed and enabled. This Xerox EIP solution allows applications to be server-based, giving the Xerox MFP the ability to display the menus and communicate with the jobs folder on the servers, without having any components residing directly on the MFP. See the table below to determine which printers are supported.
Figure 5-36 Xerox application 5.11.1 Configure AC Xerox Applications NOTE: Different models of Xerox printers may have different administration pages and these steps may not be completely accurate. NOTE: HTTPS is required for communication on the web server and all printers. NOTE: Before configuring, make sure the device password matches the password in the Settings tile > Device tab. Configuration of the AC Xerox Applications consists of setting up Xerox Secure Access security on your device.
10. Change the authentication window title and description as desired, and save. 11. Select Index > User Permissions to lock the Xerox Applications to only allow logged in users. This step differs greatly depending on the device and firmware version. 5.11.2 Using the AC Xerox Applications Prerequisites: ● An RFIDeas RDR-80581AKU card reader with hardware ID VID_0C27&PID_3BFA&REV_1040 must be connected to the MFP if card based authentication is used. ● The user must have a card enrolled.
5.12 Configure XT devices Prerequisites: ● Agent and Secure Pull Print Express must be installed on the server. ● Make sure the XT device is connected to a printer and to the network. ● If your server has a firewall, make sure TCP 2000 is open to send configuration files. ● If your server has a firewall, make sure UDP 11000 port is open for device discovery. ● Make sure the IRM authentication method is set to Card Only. ● Make sure the IRM Proximity Reader settings and Card settings are correct.
6 Print server tile The Print Server tile displays all print queues installed on the server, allowing you to configure print queues for tracking, quota or IPM. The columns may vary, depending on if Job Accounting, IPM or both are installed. The checkboxes under the columns indicate what features are enabled for the print queue. Figure 6-1 Print server tile NOTE: The Print Server tile displays if Job Accounting or IPM is installed.
7 Server Information tile The Server Information tile displays valuable information to help you manage HP Access Control (HP AC) on your server. This tile displays version numbers of installed components, storage and memory of the server, and the HP Access Control (HP AC) log. This makes it easy to check if your HP Access Control (HP AC) components are up to date and view valuable information about your server such as hard drive space available.
8 HP Access Control (HP AC) Print Client The HP AC Print Client can be installed on client computers to automatically configure installed printers to use IPM rules and Quota. The HP AC server requires IPM and/or Job Accounting to be installed. The HP AC Print Client applies to all currently installed TCP/IP and LPD printers on the client computer. Follow the steps below: 1.
3. On the Configuration screen, select which components you want to configure on installed printers. Select IPM to apply the IPM rules from the HP AC server to installed printers on the client. Select Quota to apply quota rules from the HP AC server to installed printers on the client. Click Next. Figure 8-2 HP AC Print Client configuration 4. After the installation is complete, click Close.