
User Guide

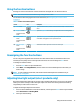
Table Of Contents

Using the function buttons
Pressing one of the function buttons activates the buttons and lights the icons above the buttons.
NOTE: The actions of the function buttons vary among monitor models.
For information about changing the function of the buttons, see Reassigning the function buttons
on page 13.
Table 2-2 Button names and descriptions
Button Icon Description
(1)
Menu button Opens the OSD main menu, selects a menu item from the OSD, or closes the OSD
menu.
(2)
Brightness button
Assignable function
button
Opens the Brightness menu where you can adjust the monitor screen brightness.
(3) Viewing Modes
button
Assignable function
button
Opens the Viewing Modes menu where you can adjust the monitor screen to a
comfortable viewing light or select a preset view mode.
(4) Next Active Input
button
Assignable function
button
Switches the monitor’s input source to the next active input.
Reassigning the function buttons
You can change the assignable function buttons from their default values so that when the buttons are
activated you can quickly access commonly used menu items. You cannot reassign the Menu button.
To reassign the function buttons:
1. Press the Menu button to open the OSD menu.
2. Select Menu, select Assign Buttons, and then select one of the available options for the button you
want to assign.
NOTE: To view an OSD menu simulator, visit the HP Customer Self Repair Services Media Library at
http://www.hp.com/go/sml.
Adjusting blue light output (select products only)
Decreasing the blue light emitted by the monitor reduces the blue light exposure to your eyes. This monitor
allows you to select a setting to reduce blue light output and create a more relaxing and less stimulating
image while you read content on the screen.
To adjust the blue light output from the monitor:
1. Press one of the OSD buttons to activate the buttons, and then press the Menu button to open the OSD.
Select Color Control and Viewing Mode.
2. Select your desired setting:
Using the function buttons 13