
Quick Start Guide


Quick Start Guide 29
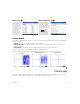
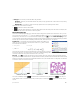
Each geometric object you create is given a name. This includes the points that make up a multi-point object. Thus if you
create a polygon, the polygon is given a name, and so too is each point at each vertex and each segment. If you create a circle,
the circle is given a name (C in the example above). So too is the center point (A) and the point on the circumference (B).
To select a point in Plot view, just tap it. If the object you tap is a point and there are multiple points available, a window listing
of all the points appears. Select the one you want, and then press E. If the bottom right of the screen shows the name
of the object, you have accurately selected it; otherwise a list of nearby objects is shown, indicating that the object has not
been selected.
If no object is selected, you can pan by dragging a finger across the screen: either up, down, left, or right. You can also use
the cursor keys to pan provided that the cursor is at the edge of the display. You can zoom by pinching, by pressing + or
:, or by tapping and choosing a zoom option from the zoom menu. The options are the same as you find in the
Plot view of many apps: Zoom In, Zoom Out, Zoom Undo, Zoom Box, Autoscale, Zoom Integer, and Zoom Decimal.
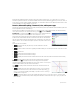
The categories in the Commands menu are as follows:
• Zoom—Contains zoom options, such as zooming in or out and so on.
• Point—Contains point options, such as point and midpoint and so on. For example, to add a point on a segment
equidistant from its two ends, select the segment, tap , tap Point, select Midpoint, and then press E.
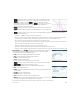
• Line—Contains straight objects, such as a segment, ray, line, tangent, and so on.
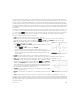
For example, to add a tangent to a circle:
1. Tap , tap Point, select Point On, and then tap the circle where you want
the point of tangency to be.
2. Now, tap , tap Line, and then select Tangent.
3. Tap the circle, press E, tap the point of tangency, and press E. A
tangent is drawn to the circle through the point of tangency. Note that the point
and the tangent are given names (D and E respectively in the example on the
previous page).
• Polygon—Contains polygon options, such as a triangle, quadrilateral, and so on.
• Curve—Contains options for curved objects, such as a circles and conic sections, as well as the menu option Locus.
• Plot—Contains symbolic plot options to draw graphs, such as functions, polar plots, slope fields, and so on.
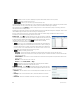
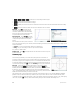
• Transform—Contains the geometric transformations, such as translation, rotation,
dilation, and so on. For example, to reflect an object, tap , tap Transform,
and then select Reflection. Tap the object (point or straight object) that is to be the
center, and then press E. Next, tap the object that is to be reflected, and then
press E. The selected object is reflected over the center. In the illustration at
the right, circle G is a reflection over point E of circle C.
• Cartesian—Contains options for displaying the coordinates of points, the equations
of lines and curves, and so on.
• Measure—Contains various measurements, such as distance, perimeter, slope, and
area.
• Tests—Contains various tests that you can perform on objects, such as Is_Collinear?, Is_Parallelogram?, and so on.
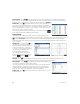
All geometric objects created in Plot view (points, lines, circles, and so on) are recorded in Symbolic view as well. Similarly, all
calculations (point coordinates, equations of curves, measurements, tests, and so on) are recorded in Numeric view. These
calculations appear in Plot view docked at the top left. You can undock them and move them anywhere in Plot view. You can
redock them as well.