
Quick Start Guide


28 Quick Start Guide
• , , , —Enters the corresponding text when tapped
• —Cancels the current addition or change
• —Accepts the current addition or change
• —Displays the selected sequence in textbook format in full-screen view (with vertical and horizontal scrolling
enabled)
• —Resolves references when one sequence is defined in terms of another
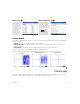
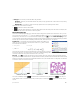
Plot view Press P to display the Plot
view and see the graphs of the sequences
selected in Symbolic view. The functionality
here is the same as in the Function Plot view,
except that there are no Fcn functions.
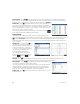
Plot Setup view Press SP to display
the Plot Setup view. This view enables you to
configure the appearance of the sequence
graphs.
This view offers the same options as the Plot
Setup view of the Function app (see “Function, Advanced Graphing, Parametric, Polar, and Sequence apps” on page 22), but
with two extra fields:
• Seq Plot—Lets you choose between stairstep and cobweb plots
• N Rng—Lets you set the range of terms to plot for each sequence
Also, there is no Method field.
Numeric view Press N to display Numeric view. This view is the same as you see
in the Function app.
Geometry app
The Geometry app enables you to draw and explore geometric constructions. A
geometric construction can be composed of any number of geometric objects, such as
points, lines, polygons, curves, tangents, and so on. You can take measurements (such
as areas and distances), manipulate objects, and note how measurements change. To
open the Geometry app, press ! and select Geometry. The app opens in Plot view.
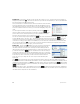
Plot view In Plot view you can directly draw objects on the screen using the
Commands menu (tap ). For example, to draw a circle, tap , tap
Curve, and then select Circle. Now, tap where you want the center of the circle to
be and press E. Next, tap a point that is to be on the circumference and press
E. A circle is drawn with a center at the location of your first tap, and with a radius
equal to the distance between your first and second tap.
Note that there are on-screen instructions at the bottom of the display to help you. For example, Select another
point means tap the location where you want the point on your circle to be. The current command and the pointer
coordinates are also displayed at the bottom of the screen. Always confirm your intention by pressing E after tapping
the screen, and press & when you have finished drawing an object. This deactivates the drawing tool.