
User's Manual

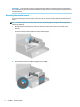


Table Of Contents
- Getting started
- Using the monitor
- Downloading software and utilities
- The Information file
- The Image Color Matching file
- Using the OSD menu
- Changing the Power Mode setting (select products only)
- Using Auto-Sleep Mode (select products only)
- Using PiP and PbP (select products only)
- Using low blue light mode (select products only)
- DisplayPort multistreaming over DisplayPort (select models only)
- Support and troubleshooting
- Maintaining the monitor
- Technical specifications
- 60.5 cm (23.8 in) model specifications
- 61 cm (24 in) model specifications
- 68.6 cm (27 in) model specifications
- Preset display resolutions
- 60.5 cm (23.8 in) model high-definition video formats
- 61 cm (24 in) model high-definition video formats
- 68.6 cm (27 in) model high-definition video formats
- Energy saver feature
- Accessibility

3. Align the VESA mounting plate with the two VESA screw holes (3), and then tighten the screws (4).
4. To attach the monitor head to a swing arm or other mounting device, insert four mounting screws
through the holes on the mounting device and into the VESA screw holes on the back of the monitor
head.
IMPORTANT: If these instructions do not apply to your device, then follow the mounting device
manufacturer’s instructions when mounting the monitor to a wall or swing arm.
Connecting the cables
In addition to details about how to connect a cable, this section contains information about how your monitor
functions when you connect certain cables.
NOTE: Depending on the model, the monitor might be capable of supporting HDMI or DisplayPort inputs.
The video mode is determined by the video cable used. The monitor automatically determines which inputs
have valid video signals. You can select the inputs through the OSD menu. The monitor ships with select
cables. Not all cables shown in this section are included with the monitor.
1. Place the monitor in a convenient, well-ventilated location near the computer.
8 Chapter 1 Getting started