
User Manual


Rear components
Component Function
1 Power button Turns the monitor on or o.
2 Function buttons Navigate through the OSD menu based on the indicators above the buttons
that are activated while the OSD menu is open.
NOTE: You can assign the function buttons in the OSD menu to quickly
select the most commonly used operations. See Assigning the function
buttons on page 16 for more information.
3 Master power switch Turns on or o all power to the monitor.
NOTE: Putting the switch in the O position will yield the lowest power
state for the monitor when not in use.
4 Power connector Connects a power cord.
5 Audio-out (headphone)
jack
Connects optional powered stereo speakers, headphones, earbuds, a
headset, or a television audio cable.
WARNING! To reduce the risk of personal injury, reduce the volume before
using headphones, earbuds, or a headset. For additional safety information,
see the Product Notices provided with your product.
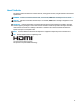
6 HDMI port Connects the HDMI cable to a source device.
7 Mini DisplayPort port Connects the Mini DisplayPort cable to a source device.
8 DisplayPort port Connects the DisplayPort cable to a source device.
9 USB Type-C port
(upstream)*
Connects a USB Type-C cable to a source device.
10 USB Type-A ports (2)
(downstream)
Connect the USB Type-A cables to source devices.
11 Security cable slot Connects a security cable to a stationary object.
NOTE: The security cable is designed to act as a deterrent, but it may not
prevent the monitor from being mishandled or stolen.
12 USB Type-A port
(upstream)
Connects a USB Type-A cable to a source device.
Product features and components 3