U S E R’S M A N U A L T60H786 Mini-PCI Type IIIB 802.11b/g WLAN CARD Ambit Microsystems Corporation 5F-1, 5 Hsin-An Rd., Hsinchu Science-Based Industrial Park, Hsinchu, Taiwan, R.O.C. TEL: 886-3-5784975, FAX: 886-3-5782924, Internet: Ambit@shts.seed.net.
Contents SECTION ONE: INTRODUCTION .................................................................................................1 1-1 FEATURES ..........................................................................................................................1 1-2 REGULATORY NOTICE ...................................................................................................3 FCC CLASS B STATEMENT ..........................................................................................
Section One: Introduction IBM Wireless Mini-PCI Module complied with IEEE 802.11b/g Standard, it can be used to provide a variety of low-cost wireless network interface card to connect your wireless LAN via fitting into the Mini-PCI Type III slot. The Wireless Mini-PCI Module that complies with this specification and combines networking with highspeed Internet access will let people connect to the Internet anywhere, anytime.
Media Access Protocol CSMA/CA with ACK Transmitter Output Power Typical 12 dBm for 54Mbps Typical 13 dBm for 48Mbps Typical 14 dBm for 36Mbps Typical 15 dBm for 24, 18, 12, 9, 6Mbps Typical 17 dBm for 11, 5.
Federal Communication Commission Interference Statement This equipment has been tested and found to comply with the limits for a Class B digital device, pursuant to Part 15 of the FCC Rules. These limits are designed to provide reasonable protection against harmful interference in a residential installation. This equipment generates, uses and can radiate radio frequency energy and, if not installed and used in accordance with the instructions, may cause harmful interference to radio communications.
This device is intended only for OEM integrators under the following conditions: 1) The antenna must be installed such that 20 cm is maintained between the antenna and users, and 2) The transmitter module may not be co-located with any other transmitter or antenna. As long as the 2 conditions above are met, further transmitter testing will not be required.
Canadian Regulatory Wireless Notice Operation is subject to the following two conditions: (1) this device may not cause interference, and (2) this device must accept any interference, including interference that may cause undesired operation of the device. European Union Notice Products bearing the CE marking comply with the R&TTE Directive (1999/5/EC), EMC Directive (89/336/EEC) and the Low Voltage Directive (73/23/EEC) issued by the Commission of the European Community.
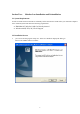
Section Two: Wireless Lan Installation and Uninstallation 2-1 System Requirements In order to install Wireless LAN driver and Utility and use the Wireless LAN card in your notebook computer. Your notebook system must meet the following requirements: ! ! IBM Mini-PCI Wireless LAN Card already inserted Windows 98SE, NT4, 2K, XP OS Support 2-2 Installation Process 1. you can execute the program ‘Setup.exe’ in the CD. Windows displays the dialog as below. Press ‘Next’ button to continue.
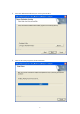
2. Select the destination folder that you want to place the files. 3. Wait for the install program to do the installation.
Window displays the cautions screen automatically. Press ‘Continue Anyway’ button to continue. After obtainning the WHQL certification, this caution screen will not appear. 4. Congratulations! Wireless LAN has been installed successfully. Please click ‘Finish’ to complete setup and go to the next step. Please remove any disks from any drives before your click ‘Finish’.
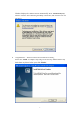
5. Dut to we haven’t obtained WHQL certification yet, following three displays will appear after installation completion. After obtainning the WHQL certification, this caution screen will not appear. Press ‘Next’ button to continue. Press ‘continue Anyway’ button to continue.
Please click ‘Finish’ to complete setup and go to the next step.
2-3 Uninstallation Process 1. One can remove the Wireless LAN via the ‘Add or Remove Programs’ in the ‘Control Panel’. Click ‘Change or Remove Programs’ button and select ‘Wireless LAN’, the dialog as below displays. Then click ‘Change/Remove’ button to perform the un-installation.
2. Select ‘Delete the previous installatoin’ and then click the ‘Next’ button to go to the next step. 3. Click ‘OK’ button if you really want to remove the Wireless LAN.
4. Click ‘Finish’ to complete the un-Installation.
Section Three: Wireless Utility and Configuration The following sections describe the Wireless Network Configuration Utility. This utility provides quick access and friendly interface to configure the card setup. 3-1 Windows 98SE/NT4/2000/XP Wireless Utility After installation is completed, a Wireless LAN Utility icon will appear in the system tray each time your computer is restarted. Click it, then you will see the display of Wireless Client Utility. If you cannot find the icon, you can select ‘Start\P
3-2 Current Status Tab The current status tab displays the following information about your wireless connection. ! Profile Name – The current name of the selected configuration profile. ! Network Type – The current type of wireless network that is either Access Point ! or Ad-hoc. Current Mode – The current mode is the frequency and data rate that has been ! selected. Current Channel – Specifies the current channel that the WLAN 802.11b/g is connected to or scanning on.
The Advanced button provides more detailed information regarding your wireless connection. ! Country – The country the card is set for. ! ! Transmit Power Level – Provides current setting of Radio output power. Network Name (SSID) – The wireless network name (SSID) that the device is currently connected with. ! ! Power Save Mode – The type of Power Savings that is configured on the device. Frequency – The current frequency that the Wireless device is connected or scanning on.
configure the wireless device to search for wireless networks that match up to those specific profile wireless settings. Figure 3-3 The Available networks button allows the user to view a list of all available wireless network that are within range of the WLAN 802.11b/g . Each wireless network entry displays the SSID, encryption settings, signal strength level, channel and wireless mode information.
3-3-1 Create or Modify a Profile 1. From the Profile Management tab Click on the New or Modify button 2. The Network Configuration Settings dialog box will appear 3. In the Profile Name box, type in a unique name that describes the wireless network you are configuring the settings to connect to. 4. In the SSID boxes type in the SSID that matches up with the wireless network you are trying to configure the profile to connect with.
Figure 3-6 6. Choose the security setting that is required on the wireless network. Once the appropriate security mode is chosen the button next to the selection will enable you to include any additional information required by that security mode. 3-3-2 Security Settings in Profile Management The Security Tab allows you to configure the WLAN 802.11b/g device to match the security settings of the Wireless LAN network.
Figure 3-7 Setting Pre-Shared Keys Pre-Shared keys can be defined using the “Define Pre-Shared Keys” box Figure 3-8 Key Entry Method – Determines the entry method for an encryption key: • Hexadecimal (0-9, A-F) • ASCII text (any keyboard characters, A-Z, 0-9).
Pre User Key – Defines the unique encryption key for network configuration security. The Pre User key is used with many authentication mechanism and encryption Shared Keys – Determines a set of shared encryption keys (First, Second, Third, Fourth) used for wireless encryption and security. At least one Shared Key field must be populated to enable security using a shared key. If more then one key is defined then Click on the radio button to select a key as the default encryption key.
Figure 3-9 Wireless Mode Setting The wireless Mode settings allow the user to specify which wireless frequency and data rate the wireless network is operating at. If all selections are chosen, the WLAN 802.11b/g device will automatically search all frequencies and data rates for wireless networks that match up to the profile settings. Wireless Mode when starting Ad-Hoc setting The “Wireless Mode when starting ad-hoc setting” allows the user to determine the type of ad-hoc network to be started.
4-4 Diagnostic Tab The diagnostic TAB displays the current data statistics for both receive and transmit. Additional statistics and driver information can be displayed using the appropriate labeled buttons.
4-5 Action Menu The Action menu allows for enabling and disabling both the wireless radio and/or system tray icon. Figure 3-11 4-5-1 Enable/Disable Radio There may be situations when the user wants to disable the WLAN 802.11b/g device’s radio, so that the wireless device cannot send or receive any wireless traffic. If a user is in an environment where there are no wireless networks, the user may turn off the radio in order to minimize power consumption of the WLAN 802.11b/g device.
Wireless\Wireless Client Utility. • Enable Tray Icon: This will allow for the system tray icon to once again be placed in the system tray.
Section Four: Windows XP Wireless Utility and Configuration 4-1 Windows XP Wireless Utility 1. To configure the wireless card setting, you can select Start\Settings\Network Connection in the Windows XP. Choose the wireless network connection, then you will see below screen. From this screen, you can see wireless connection status and wireless signal level. 2. Select ‘Properties’ in the above screen. The following windows will show up.
In ‘General’ page, Wireless LAN card information and networking protocol have been displayed. Extra networking protocol can be installed in this page.
3. Select Wireless Networks page, you can see available wireless networks in your nearby area. You can add your preferred wireless Access Point to your list, so your wireless card will search for specific wireless networks. Configure To connect to an existing access point (infrastructure) network, under Available networks, click the network name, and then click ‘Configure’ to setup wireless security and data encryption.
Advanced *If your network are configuring to a computer-to-computer (ad hoc) network, select ‘Computer-to-computer (ad hoc) network only’. *If you want to connect to a computer-to-computer and access point (infrastructure) networks are within range of your computer, click ‘Access point (infrastructure)network only’.
Define your network name (SSID) in the following windows, so your can join a specific wireless network. Check AP has WEP on or not. You wireless network will need to have same WEP setting with AP in order to communicate.
This window provides authentication via 802.1X. 802.1X, an IEEE standard that provides an authentication framework for 802-based LANs. 802.1X takes advantage of an existing authentication protocol known as the Extensible Authentication Protocol. 802.1x, giving someone secure, encrypted, wireless access on a Microsoft network will be as easy as setting a flag on the users domain account. What does this mean for the Home Network user? 802.
The ‘Advanced’ window offers Firewall and Internet Connection Sharing functions. Depends on your networking environment, you can select below functions.
Appendix A Glossary Access Point - An internetworking device that seamlessly connects wired and wireless networks together. Ad-Hoc - Ad-Hoc is a peer- to-peer wireless network without Access Point. A group of wireless clients consistent an independent wireless LAN. Backbone - The core infrastructure of a network, the portion of the network that transports information from one central location to another central location. The information is then off-loaded onto a local system.