
User's Manual

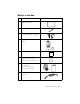

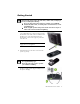
Table Of Contents
- Conventions
- What’s in the Box
- Getting Started
- Remote Control
- Navigating the Keyboard Utility
- HP DreamScreen
- Key Features
- Initial Setup
- Photo Slide Show and Browse
- Managing Photos
- Using a PC as an External Media Source
- Menu Options
- HP DreamScreen PC Software
- Installing HP DreamScreen PC Software
- Running HP DreamScreen PC Software
- Troubleshooting
- Specifications
- Frequently Asked Questions
- Cleaning and Care Tips
- Regulatory and Safety Information
- Index
2 HP DreamScreen User Guide
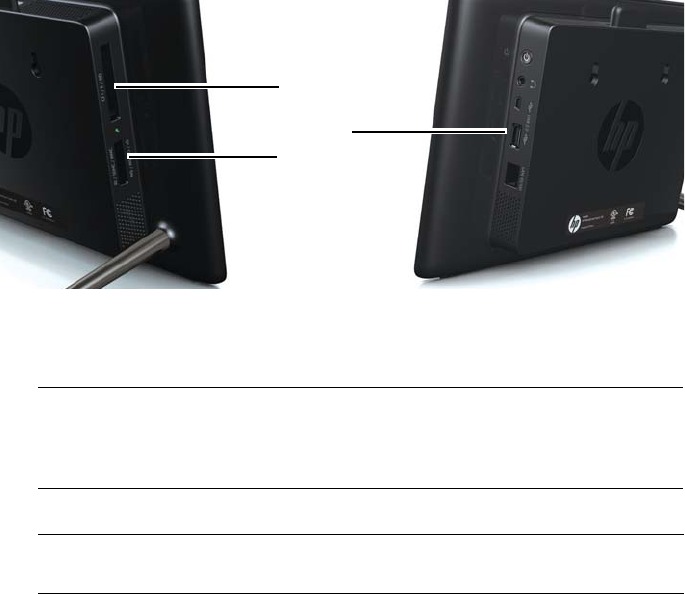
4 Insert your memory card or USB storage device (external memory) containing desired
photos, music, and/or video into the appropriate card slot or USB port as illustrated.
(A) is for Compact Flash (CF) types I, II, and MD.
(B) is for Secure Digital (SD) types SD, SDHC, MS, MS-Pro, MMC, and xD.
(C) is for USB flash drives
A dialog box prompting you to select an application appears.
5 Use
or to select the Video, Photo or Music application. Then press OK.
NOTE: Memory cards and USB flash drives must be oriented correctly. Ensure the label
on the card is facing toward the rear of the HP DreamScreen when you insert the card
into a slot. A USB device can only be plugged in when oriented correctly. Do not force
a memory card into a slot or a USB flash drive into a connector.
NOTE: The HP DreamScreen must be at the main menu for the dialog box to start when
an external source is connected.
A
B
C