
User manual

10
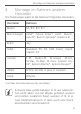
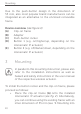
Mounting
Due to the push-button design in the dimension of
55mm, also most popular brand manufacturers can be
integrated as an alternative to the enclosed removable
frame.
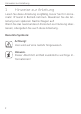
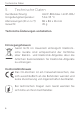
Device overview (see figure 1):
(A) Clip-on frame
(B) Adapter
(C) Push-button rocker
(D) Button 1 (e.g. on/higher/up, depending on the
Homematic IP actuator)
(E) Button 2 (e.g. o/darker/down, depending on the
Homematic IP actuator)
3 Mounting
In parallel to this mounting instruction, please also
refer to the installation instructions as well as
hazard and safety instructions in the user manual
of the respective wireless actuator.
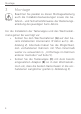
To install the button rocker and the clip-on frame, please
proceed as follows:
• Place the clip-on frame (A) onto the installed
Homematic IP actuator (see fig. 2). Alternatively,
you can continue using the existing frame with an
inner dimension of 55 mm (see “4 Mounting into