
Installation Guide
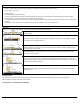
Table Of Contents
- WARNING: This product can expose you to formaldehyde gas which is known to the State of California to cause cancer. For more information, go to www.P65Warnings.ca.gov.
- WARNING: This product can expose you to formaldehyde gas which is known to the State of California to cause cancer. For more information, go to www.P65Warnings.ca.gov.
- WARNING: Drilling, sawing, sanding or machining wood products can expose you to wood dust, a substance known to the State of California to cause cancer. Avoid inhaling wood dust or use a dust mask or other safeguards for personal protection. For mo...
- WARNING: Drilling, sawing, sanding or machining wood products can expose you to wood dust, a substance known to the State of California to cause cancer. Avoid inhaling wood dust or use a dust mask or other safeguards for personal protection. For mo...
- CAUTION: ASBESTOS IN EXISTING FLOOR
- Warranty

Doc. ID: 268 Rev: 3 Effective: 9-18-2020 Page | 6
Pre-Install Activities
• Lay out the board from several cartons. Rack the boards to give you the appearance you want. Colors and shades should be mixed up
evenly. End joints should be staggered; minimum ends stager is 6” and varied.
• Inspect plank quality and grading. If flooring is defective, contact dealer or the store immediately and discontinue installation.
• Lay out trim moldings in advance and find planks or strips whose shade closely coordinates the floor. Set these aside for future use.
• Remove existing base, shoe molding or threshold carefully. They can be used to cover the 1/2” expansion gap left around the edge of
the room.
• Subfloors should be clean prior to the floor installation.
• Undercut doors and casings using a handsaw laid flat on a piece of scrap flooring. This will eliminate difficult scribe cuts.
• Install the underlayment (if used) according to underlayment manufacture instructions.
• Always use protective foot/pad and proper height adapter plate on the fastening machine to prevent face damage, mallet damage,
and edge bruising.
• TEST FIRE THE POWER NAILER ON SACRIFICIAL FLOOR PLANK ONTO A BOARD. CHECK NAIL PENETRATION. CHECK FOR IMPACT
DAMAGE ON FLOOR FACE. CHECK FOR SPLITTING TONGUE.