
Installation Guide
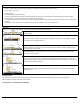
Table Of Contents
- WARNING: This product can expose you to formaldehyde gas which is known to the State of California to cause cancer. For more information, go to www.P65Warnings.ca.gov.
- WARNING: This product can expose you to formaldehyde gas which is known to the State of California to cause cancer. For more information, go to www.P65Warnings.ca.gov.
- WARNING: Drilling, sawing, sanding or machining wood products can expose you to wood dust, a substance known to the State of California to cause cancer. Avoid inhaling wood dust or use a dust mask or other safeguards for personal protection. For mo...
- WARNING: Drilling, sawing, sanding or machining wood products can expose you to wood dust, a substance known to the State of California to cause cancer. Avoid inhaling wood dust or use a dust mask or other safeguards for personal protection. For mo...
- CAUTION: ASBESTOS IN EXISTING FLOOR
- Warranty

Doc. ID: 268 Rev: 3 Effective: 9-18-2020 Page | 4
Transition Molding
Floating installation, transition T-molding is required in the following cases: floor spanning greater than 35 feet in length or width; doorways
or passageways 5 ft. wide or less.
Note: Floor areas interrupted by wall openings greater than 5 ft. wide or interrupted by wall sections extending out of the wall, or floor areas
which are not rectangular may experience buckling or gapping if there is excessive floor expansion or shrinkage.
Adhesive
Use premium flooring adhesive which is non-water based, formulated for engineered hardwood flooring installation.
Preferred type: moisture cure urethane floor glue.
For floating installation, use edge glue formulated for engineered hardwood flooring installation.
Fastener
1/2” or thicker Floorings
Finish nail: 6d-8d.
Nail / Cleat Length: 1 1/2” to 2″ (4–5 cm);
Nail size gauge: 15-16 gauge or 18-20 gauge; higher gauge is needed if tongue is splitting upon impact.
Staple length and crown size: 1 1/2” - 2” and narrow crown (3/8”).
Face nailing spacing: Every 10”-12” (position first and last nail between 1”- 3” from ends and 1/2“from edge).
Blind nailing spacing: Every 6”- 8” (position first and last between 1”- 3” from ends)
.
3/8” Flooring
Finish nail: 6d.
Nail / Cleat Length: 1″ - 1 1/2″ (3-4cm);
Nail / Cleat size: 18-20 gauge. You may have to glue the floor if the tongue is splitting upon impact.
Staple length and crown size: 1” - 1 1/2” and narrow crown (3/8”).
Face nailing spacing: Every 10”-12” (position first and last nail between 1”- 3” from ends and 1/2“from edge)
Blind nailing spacing: Every 6”- 8” (position first and last between 1”- 3” from ends)
Tools and Materials
Basics:
Tape measure • Moisture meter (wood, concrete or both) • Chalk line & chalk • Hammer • Power saw • Carbide tipped saw blade for fine cut
• NIOSH-designated dust mask • Hand saw or jamb saw • Eye protection • Straight edge • Pry Bar • Mallet • Broom • Color matched wood
putty • Tapping block • Pull bar
Additional Supplies for Nail Down or Staple Down Method:
Electric drill and bits • Compressor and hose with in-line regulator for pneumatic tools • Power nailer or stapler for flooring with height
adapter to match floor thickness • Pneumatic finish nailer • Nail set
Additional Supplies for Glue Down or Floating Method:
Flooring adhesive or Joint Glue• Trowels • Adhesive remover for selected adhesive • Clean rags • Weight roller • Flooring Straps.
Floor Damage Prevention
It is extremely important to take precautionary actions to prevent damage to the floor during installation. ALWAYS TEST FIRE THE NAILER TO
ENSURE PROPER SETTING. Use proper nailer, floor thickness adapters, face plates and cleats. Improper fasteners, machines and air pressure
can cause severe damage to the flooring. Forcing or pounding floor boards together with a rubber mallet during assembly may bruise or
damage board edges. Home Legend is not responsible for installation damages. Tongue fracture and surface dimpling are common
installation damage. They are not product defects.
Damages can be minimized by one or more of the following:
• Change the angle of nail entry.
• Use thinner cleats or nails (18-20 gauge).
• Use an over-size base or foot plate to distribute the nailing force.
• Pre-drilling pilot holes and hand nailing may be required.
• As a last resort, use glue-down method instead, especially on thinner floors.
Fastening Failure
Safety and Health Precautions
Power tools can be dangerous. Operate in strict accordance to manufacturer’s operating instructions and safety precautions. Unsafe
and improper use of can cause serious injuries.
Avoid inhalation and exposures to wood dust by mechanical means and by wearing personal protective equipment.
Wear appropriate personal protective equipment (PPE) which include NIOSH or OSHA approve dust masks, safety goggle and work gloves.