
Installation & Assembly
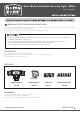

Solar Motion-Activated Security Light - White
(888) 782-5618
HOW TO INSTALL
OPERATION
Model No. ES00836V
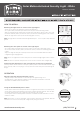
Mounting the light fixture as shown in the right figures
• Locate area in which you would like to install your light fixture.
• Use a power drill (not included) to drill the holes on your chosen mounting surface.
• Place the mounting plate (attached on the back of the light fixture) over the holes & use 4 of
the Plastic Anchors (Part D) and Screws (Part C) to fasten the mounting plate to the surface.
• Buckle the Light Fixture (Part A) into the mounting plate securely
Note: The light fixture should be mounted approximately 6.5 - 8.25 feet (2m-2.54m) above the
ground.
Mounting the solar panel as shown in the right figure
• Use a power drill (not included) to create the holes on your chosen mounting surface
• Use 4 of the Plastic Anchors (Part D) and Screws (Part C) to fasten the mounting plate to the
surface
• Adjust the angle of solar panel (Part B) so that it will receive maximum amount of direct
sunlight during the daylight hours.
Note: Ensure the light fixture and the solar panel are located enough together for the cord to
reach.
Note: For best result, locate solar panel to receive at least 3-4 hours direct sunlight daily.
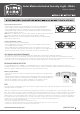
Adjusting the lamp heads and motion sensor
• Swing the lamp heads horizonal or vertical to adjust the light coverage area.
• In TEST process, gently grasp the motion sensor and rotate it horizonal or vertical to
determine the motion sensor detection zone.
Using the AUTO/OFF/ON power switch
• Set the power switch to the OFF position to turn the light off and to conserve the battery life.
• Set the power switch to ON position to override the motion activation function. This will allow
turning the light constant on for a limited period during the day or night.
• Set the power switch to AUTO position to activate the motion detection function in test and
normal use mode.
Note: Prior to first use of your solar light, slide the power switch to the OFF position, allow the
solar fixture to receive three full days of sunlight to fully charge the battery.
Connecting the light fixture to the solar panel as shown in the right figure
Carefully connect the wire from the solar panel (Part B) into the socket located under the Light
Fixture (Part A), make sure the plug is securely connected. Your solar panel will now begin to
charge.
sec urit y
www.homezonesecurity.com
ON | OFF | AUTO