
- HAI OmniPro II Owner's Manual
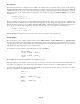
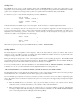
Table Of Contents
- INTRODUCTION
- OVERALL DESCRIPTION
- SECURITY SYSTEM OPERATION
- Disarming the Security System and Silencing Alarms
- Arming the Security System
- Using Shortcut Keys
- Quick Arm
- Bypassing Zones
- Restoring Zones
- What To Do When You Come Home
- What Happens When the Alarm is Activated
- Emergency Keys
- Duress Code Entered or Duress Alarm Activated
- Alarm Reset
- Alarm Cancel
- Trouble Indications
- Codes
- Duress Code
- Panic Switches
- Area Arming
- GOTO Area
- Testing Your System
- CONTROL
- Control Commands
- About UPB
- HAI Lighting Control (HLC) Format
- About CentraLite
- About Lutron RadioRA
- About ALC
- About X-10
- House Codes
- Unit Numbers
- Scrolling Through Names
- Controlling Units
- Timed Commands
- Status of a Unit
- Internal Flags
- Controlling Outputs
- All On / Off
- Leviton Scene Control
- Buttons
- Temperature Control
- HAI RC-Series Thermostats
- Programmable Energy Saver Modules (PESMs)
- Temperature Alarms
- Humidity
- Status
- Event Log
- Messages
- TELEPHONE CONTROL
- Telephone Interface
- In-House Phones
- Remote Phones
- Phone Access Denied - Remote Lockout
- Alternate Method
- Main Menu
- 1 - Control
- 2 - Security
- 3 - Button
- 4 - All
- 5 - Temperature
- 6 - Status
- 7 - Events
- 8 - Message
- 9 - Good-Bye
- Panic Button over the Phone (# # # # # #)
- Emergency Dial-Out
- Digital Dialer
- Voice Dialer
- PC Access
- Built-In Ethernet Port
- Controller IP Address, Port Number, and Encryption Key
- OmniPro II Ethernet Connections
- Connecting to Network via PC Access
- Dynamic DNS
- SETUP
- UNDERWRITER'S LABORATORIES REQUIREMENTS
- FEDERAL COMMUNICATION COMMISSION NOTICE:
- CANADIAN INDUSTRY CANADA NOTICE
- APPENDIX A - DIAL OUT PLANNER
- APPENDIX B - TEXT DESCRIPTION CHARACTER CODES
- APPENDIX C - VOICE DESCRIPTION CODES
Set Up Arming
To configure different arming and disarming options, from the Setup menu, press the 5 (ARM) key.
Entry Delay
The Entry Delay is the time, in seconds, that you have to turn off the alarm after entering your home. The Entry Delay only
applies to the entry/exit zone (i.e. your doors). If you (or someone else) come in through a window, there will be no entry delay
and the alarm will sound immediately.
When you come in through a door on an entry/exit zone, the other zones are delayed too. This allows you to get to your phone or
console to turn off the security system, even if you have to go through a room protected by a motion detector.
Some doors (a back door or garage door) may be configured as a Double or Quadruple Entry Delay. If so, that door has two
times or four times the entry delay shown on the display.
The default Entry Delay is 15 seconds. If you wish to allow yourself more time to get in and turn off the security system, you
may set the entry delay between 15 and 45 seconds.
ENTRY DELAY: 15
15-45 SECONDS
↓
The console will beep and the new entry delay will be displayed.
Exit Delay
The Exit Delay is the time, in seconds, that you have to leave your house when you turn on the system. When arming the system
in Day, Night, or Away modes, the system will wait this amount of time before arming.
The default exit delay is 15 seconds. You may change it from 15 to 180 seconds.
EXIT DELAY: 15
15-180 SECONDS
Audible Exit Delay
The Audible Exit Delay is an audible indication from the console beeper while the exit delay is in effect. During the last 10
seconds of the exit delay, the audible indication will beep twice as fast to let you know that you must leave at once.
The default setting for Audible Exit Delay is Yes.
Entry/Exit Chime
When Entry/Exit Chime is set to Yes, the console(s) will beep once when a door on an entry/exit zone is opened, even if the alarm
system is off. This lets you know when someone enters and leaves.
The default setting for Entry/Exit Chime is Yes.
Perimeter Chime
When Perimeter Chime is set to Yes, the console(s) will beep once when a window or any other perimeter zone is opened, even if
the alarm system is off.
The default setting for Perimeter Chime is Yes.
Page 73