
- HAI OmniPro II Owner's Manual
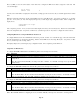
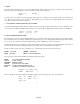
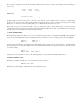
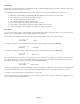
Table Of Contents
- INTRODUCTION
- OVERALL DESCRIPTION
- SECURITY SYSTEM OPERATION
- Disarming the Security System and Silencing Alarms
- Arming the Security System
- Using Shortcut Keys
- Quick Arm
- Bypassing Zones
- Restoring Zones
- What To Do When You Come Home
- What Happens When the Alarm is Activated
- Emergency Keys
- Duress Code Entered or Duress Alarm Activated
- Alarm Reset
- Alarm Cancel
- Trouble Indications
- Codes
- Duress Code
- Panic Switches
- Area Arming
- GOTO Area
- Testing Your System
- CONTROL
- Control Commands
- About UPB
- HAI Lighting Control (HLC) Format
- About CentraLite
- About Lutron RadioRA
- About ALC
- About X-10
- House Codes
- Unit Numbers
- Scrolling Through Names
- Controlling Units
- Timed Commands
- Status of a Unit
- Internal Flags
- Controlling Outputs
- All On / Off
- Leviton Scene Control
- Buttons
- Temperature Control
- HAI RC-Series Thermostats
- Programmable Energy Saver Modules (PESMs)
- Temperature Alarms
- Humidity
- Status
- Event Log
- Messages
- TELEPHONE CONTROL
- Telephone Interface
- In-House Phones
- Remote Phones
- Phone Access Denied - Remote Lockout
- Alternate Method
- Main Menu
- 1 - Control
- 2 - Security
- 3 - Button
- 4 - All
- 5 - Temperature
- 6 - Status
- 7 - Events
- 8 - Message
- 9 - Good-Bye
- Panic Button over the Phone (# # # # # #)
- Emergency Dial-Out
- Digital Dialer
- Voice Dialer
- PC Access
- Built-In Ethernet Port
- Controller IP Address, Port Number, and Encryption Key
- OmniPro II Ethernet Connections
- Connecting to Network via PC Access
- Dynamic DNS
- SETUP
- UNDERWRITER'S LABORATORIES REQUIREMENTS
- FEDERAL COMMUNICATION COMMISSION NOTICE:
- CANADIAN INDUSTRY CANADA NOTICE
- APPENDIX A - DIAL OUT PLANNER
- APPENDIX B - TEXT DESCRIPTION CHARACTER CODES
- APPENDIX C - VOICE DESCRIPTION CODES

Press 1 (CTRL) to view the current status of each unit and to configure the HLC device that is assigned for each unit. The
console will display:
Porch Light
STATUS OFF
↓
You may enter a unit number to display the selected unit, or simply press the down arrow key to scroll through the list of named
units.
When the desired unit is displayed, put the selected HLC device into Setup Mode (See - Setup Mode for HLC Devices), and then
press the ' # ' key twice (i.e. # #). The display will provide you with step-by-step configuration status. When complete, the
display shows:
CONFIGURE Porch Light
COMPLETED
Once completed, press the ' # ' key to return to the Status display and select your next unit (device). Put the next selected HLC
device into Setup Mode (See - Setup Mode for HLC Devices) and then press the ' # ' key twice to configure the selected device.
Configuring HLC Devices using an OmniTouch Touchscreen
To configure HLC devices from an OmniTouch touchscreen, press the “Control” icon on the Home page. Select the desired unit
from the Control list box to display the unit dialog. Put the selected HLC device into Setup Mode (See - Setup Mode for HLC
Devices), and then press the “Config” button.
The display will provide you with step-by-step configuration status. Once completed, press the Exit icon.
Setup Mode for HLC Devices
To configure HAI UPB™ Wall Switches and Dimmers, put the device in Setup mode as follows:
Step Operation
1 Tap the rocker switch quickly 5 times.
2 The HAI UPB™ Wall Switch or Dimmer will flash the lighting load one time and blink its LED blue to indicate that it is
in Setup Mode.
Note: The switch will automatically exit Setup mode after 5 minutes. To manually exit Setup mode, tap the switch
quickly 2 times.
To configure the HAI UPB™ 6-Button Room Controller, put the device in Setup mode as follows:
Step Operation
1 Press and hold the “ON” and “OFF” pushbuttons simultaneously for at least 3 seconds.
2 All of the LED indicators will blink to indicate that the HAI UPB™ 6-Button Room Controller is in Setup Mode.
Note: The HAI 6-Button Room Controller will automatically exit Setup mode after 5 minutes. To manually exit Setup
mode, press and hold the “ON” and “OFF” pushbuttons simultaneously for at least 3 seconds.
To configure the HAI UPB™ 8-Button House Controller, put the device in Setup mode as follows:
Step Operation
1 Press and hold the “1” and “8” pushbuttons simultaneously for at least 3 seconds.
2 All of the LED indicators will blink to indicate that the HAI UPB™ 8-Button House Controller is in Setup Mode.
Note: The HAI 8-Button House Controller will automatically exit Setup mode after 5 minutes. To manually exit Setup
mode, press and hold the “1” and “8” pushbuttons simultaneously for at least 3 seconds.
Note: When OmniPro II finishes configuring the device, it will automatically exit Setup mode and return to normal operation.
Page 37