
- HAI OmniPro II Owner's Manual

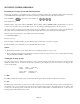
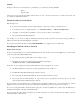


Table Of Contents
- INTRODUCTION
- OVERALL DESCRIPTION
- SECURITY SYSTEM OPERATION
- Disarming the Security System and Silencing Alarms
- Arming the Security System
- Using Shortcut Keys
- Quick Arm
- Bypassing Zones
- Restoring Zones
- What To Do When You Come Home
- What Happens When the Alarm is Activated
- Emergency Keys
- Duress Code Entered or Duress Alarm Activated
- Alarm Reset
- Alarm Cancel
- Trouble Indications
- Codes
- Duress Code
- Panic Switches
- Area Arming
- GOTO Area
- Testing Your System
- CONTROL
- Control Commands
- About UPB
- HAI Lighting Control (HLC) Format
- About CentraLite
- About Lutron RadioRA
- About ALC
- About X-10
- House Codes
- Unit Numbers
- Scrolling Through Names
- Controlling Units
- Timed Commands
- Status of a Unit
- Internal Flags
- Controlling Outputs
- All On / Off
- Leviton Scene Control
- Buttons
- Temperature Control
- HAI RC-Series Thermostats
- Programmable Energy Saver Modules (PESMs)
- Temperature Alarms
- Humidity
- Status
- Event Log
- Messages
- TELEPHONE CONTROL
- Telephone Interface
- In-House Phones
- Remote Phones
- Phone Access Denied - Remote Lockout
- Alternate Method
- Main Menu
- 1 - Control
- 2 - Security
- 3 - Button
- 4 - All
- 5 - Temperature
- 6 - Status
- 7 - Events
- 8 - Message
- 9 - Good-Bye
- Panic Button over the Phone (# # # # # #)
- Emergency Dial-Out
- Digital Dialer
- Voice Dialer
- PC Access
- Built-In Ethernet Port
- Controller IP Address, Port Number, and Encryption Key
- OmniPro II Ethernet Connections
- Connecting to Network via PC Access
- Dynamic DNS
- SETUP
- UNDERWRITER'S LABORATORIES REQUIREMENTS
- FEDERAL COMMUNICATION COMMISSION NOTICE:
- CANADIAN INDUSTRY CANADA NOTICE
- APPENDIX A - DIAL OUT PLANNER
- APPENDIX B - TEXT DESCRIPTION CHARACTER CODES
- APPENDIX C - VOICE DESCRIPTION CODES
6- UP ARROW
The Up Arrow key is used to scroll through menus and lists. The Up Arrow is used to scroll back through a list (for example, if
you have already used the down arrow to scroll to an item, the Up Arrow will bring you back to a previous item).
7- CONSOLE LED
The Console LED is used to indicate whether the security system is currently armed or disarmed. If armed in any security mode,
the LED is set to red. If the system is disarmed, the LED is set to green. The LED flashes when a Message is displayed.
8- CONSOLE DISPLAY
The Console Display is used to show the current security mode and to give useful information that will guide you through normal
operations of your OmniPro II control and security system.
9- CONSOLE KEYPAD
The Console Keypad is used to enter user codes for arming, disarming, bypassing, and restoring zones. In some cases, the keys
(0-9) are assigned to different functions. From the top-level display, each key functions as a menu choice.
10- CONSOLE BEEPER
The Console Beeper is used to confirm a keystroke, alert user of errors and troubles, and sound upon entry and exit delays.
11- ' * ' KEY
The ' * ' Key is used to cancel and return the display to the previous menu. When you are entering a number, ' * ' will cancel the
previously entered digits and will prompt you to reenter the number.
12- ' # ' KEY
The ' # ' Key is used to enter or confirm a selection. It may also be used to display a menu or to offer you additional choices.
Normal Top-Level Display
In its normal state, the console display will show the day, date, and time on the top line, and the system status on the bottom line.
If all doors, windows, sensors, etc. are closed, no zones are bypassed, and if there are no troubles, the bottom line will show
"SYSTEM OK" as seen below:
Thu Feb 23, 06 4:00 PM
SYSTEM OK
If one of the doors, windows, motion, or other detector connected to the OmniPro II is open, or has detected motion, the bottom
line of the display will say, "ZONE NAME NOT RDY".
For example, the display will show, "FRONT DOOR NOT RDY".
If the zone name has not been entered during set up, the display will give the zone number and zone type. This display will
remain for 2 seconds, then the next zone not ready, in trouble, or bypassed will be displayed.
Display Menus
The system has been designed to be easy to operate. Whenever you press a key on the console, the top line of the display will
indicate what you are doing. To the right of that is your selection or current setting. The bottom line will show a menu of your
next options. To the lower right corner of the display is the direction arrow(s). Where possible, the up (
↑), down (↓), and two-
headed () arrow characters are shown on the console display to indicate which arrow keys may be pressed at that time.
Page 3