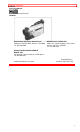
TABLE OF CONTENTS HITACHI Instruction Manual 8mm Video Camera/Recorder VM-H38A Hitachi Home Electronics (America), Inc. 3890 Steve Reynolds Blvd., Norcross, GA 30093 Tel. 404-279-5600 HITACHI (HSC) CANADA INC. 3300 Trans Canada Highway, Pointe Claire, Quebec, H9R 1B1, CANADA Tel. 514-697-9150 HITACHI SALES CORPORATION OF HAWAII, INC. 3219 Koapaka Street, Honolulu, Hawaii 96819 Tel. 808-836-3621 P4707229 © Hitachi, Ltd.
TABLE OF CONTENTS TABLE OF CONTENTS TABLE OF CONTENTS ............................................................................................................................ 2 IMPORTANT SAFEGUARDS ..................................................................................................................... 3 FEATURES ................................................................................................................................................. 5 ACCESSORIES ...................
IMPORTANT SAFEGUARDS IMPORTANT SAFEGUARDS WARNING: TO PREVENT FIRE OR SHOCK HAZARD, DO NOT EXPOSE THIS UNIT TO RAIN OR MOISTURE. CAUTION: TO REDUCE THE RISK OF ELECTRIC SHOCK, DO NOT REMOVE COVER (OR BACK). NO USER-SERVICEABLE PARTS INSIDE. REFER SERVICING TO QUALIFIED SERVICE PERSONNEL. This symbol warms the user that uninsulated voltage within the unit may have sufficient magnitude to cause electric shock. Therefore, it is dangerous to make any kind of contact with any inside part of this unit.
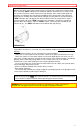
IMPORTANT SAFEGUARDS MOISTURE Moisture may occur if the video camera/recorder is moved from a cold area to a warm humid area. A flashing "DEW" indication in the viewfinder indicates that moisture has condensed on the recorder mechanism, which could result in tape damage. Since condensation builds up gradually, the indication does not appear immediately when condensation starts.
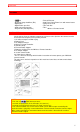
FEATURES FEATURES • Hi8 • Electronic Image Stabilizer (EIS) • Digital Filter • Digital Zoom up to X16 • Solid-state camera pickup • Program AE (Auto Exposure) • Fade-in/Fade-out • Auto Focus Power Zoom Lens with macro feature • Flying Erase Head • Time and date • Titler • Wireless Remote Control ACCESSORIES Check that you have the following components and accessories (besides the camera/recorder unit itself) before disposing of the packing material. 1. AV Stereo Output Cord with S plug 2.
IMPORTANT SAFEGUARDS IMPORTANT SAFEGUARDS In addition to the careful attention devoted to quality standards in the manufacture of your video product, safety is a major factor in the design of every instrument. But, safety is your responsibility too. This page lists important information that will help to assure your enjoyment and proper use of a Video Camera/Recorder and accessory equipment. Please read it carefully before operating your video product and keep it in a handy place for future reference.
IMPORTANT SAFEGUARDS Caution: Maintain electrical safety. Powerline operated equipment or accessories connected to this unit should bear the UL listing mark or CSA certification mark on the accessory itself and should not have been modified so as to defeat the safety features. This will help avoid any potential hazard from electric shock or fire. If in doubt, contact qualified service personnel.
IMPORTANT SAFEGUARDS SERVICE 17 Servicing -- Do not attempt to service this video product yourself as opening or removing covers may expose you to dangerous voltage or other hazards. Refer all servicing to qualified service personnel. 18 Conditions Requiring Service -- Unplug this video product from the wall outlet and refer servicing to qualified service personnel under the following conditions. a. When the power-supply cord or plug is damaged b.
IMPORTANT SAFETY INSTRUCTIONS FOR AC ADAPTER/CHARGER IMPORTANT SAFETY INSTRUCTIONS FOR AC ADAPTER/CHARGER 1. Save these instructions -- This page contains important safety and operating instructions for AC Adapter/Charger Model VM-AC 82A. 2. Before using AC Adapter/Charger, read all instructions and cautionary markings on (1) AC Adapter/Charger, (2) battery and (3) product using battery. 3. Also read all instructions on pages 4 and 5. 4.
Hi8 Hi8 has realized high resolution and high picture quality when compared to the standard format. Compatibilty with conventional video camera/recorder video cassettes are recorded in the format when the switch of this • camera/recorder is set to "AUTO", and recorded in the format when it is set to "OFF". • video cassettes are recorded in the format regardless of the position of the switch.
HOW TO ATTACH THE SHOULDER STRAP HOW TO ATTACH THE SHOULDER STRAP Attach the shoulder strap (provided), as illustrated. LOADING BATTERIES FOR DATE/TIME AND REMOTE CONTROL You may want to install the date/time and remote control batteries (provided) immediately to prevent misplacing them. For date/time 1. Pull the battery holder. 2. Insert the date/time battery with the "+" terminal facing up. 3. Fully insert the battery hjolder into the camera/recorder. For remote control 1.
POWER SOURCES NOTES: • When replacing the batteries, use 3V micro lithium cell such as Maxell CR2025 or equivalent. • Instructions for setting the date and time are on page 22. You can do that later if desired after you're more familiar with your camera/recorder. • Dispose of battery safely and in accordance with local laws. • Do not dispose of in fire. WARNING: Keep this battery away from children. If swallowed, consult a physician immediately for emergency treatment.
CHECKING THE BATTERY WHEN USING WITH THE AC ADAPTER/CHARGER (provided) 1. Plug the AC adapter/charger power cord into an AC electrical output; the "POWER" indicator on the AC adapter/charger will come on. 2. Attach the external power adapter (provided) to the camera/recorder as shown in the figure. Align the marks and hold the external power adapter flush against the camera/recorder. Then attach it using the same procedure used when attaching the battery. 3.
CHECKING THE BATTERY When the " " indication appears in the viewfinder and flashes while the camera/recorder is being operated with a battery (provided), it indicates that the battery charge is low. Charge it or replace it with a charged battery. NOTE: Whenever the linear time counter is present in the viewfinder, the battery level indicator " " is displayed in the viewfinder indicating the condition of camera/recorder battery power. When the battery is fully charged, " " is displayed.
CHARGING THE BATTERY CHARGING THE BATTERY 1. Plug the AC adapter/charger power cord into AC electrical outlet. 2. Attach the battery to the AC adapter/charger. Align the " " mark on the battery with that of AC adapter/charger and push the battery flush with the AC adapter/charger and slide it in the direction of arrow. NOTES: • You must remove the external power adapter from the AC adapter/charger to charge the battery. If the external power adapter is connected, "CHARGE" light will flash.
INSERTION AND REMOVAL OF CASSETES INSERTION AND REMOVAL OF CASSETES Before inserting or removing a cassette, be sure to connect the power source. When a power source is connected, the cassette can be ejected and removed whether the power is on or off. Insertion 1. Slide the "EJECT" switch. The cassette door will open. 2. Insert a cassette so the transparent window is toward you and the arrow toward the cassette holder. Slide the cassette into cassette holder as far as it will go. 3.
MAKING A SAMPLE CAMERA RECORDING MAKING A SAMPLE CAMERA RECORDING 1. Connect the POWER SOURCE. (See pages 11 and 12.) 2. Slide "EJECT" switch and insert tha cassette so the transparent window is toward you and the arrow toward the cassette holder. Slide the cassette into cassette holder as far as it will go. NOTE: If the power source is not connected to the camera/recorder, the cassette holder will not open. 3. Press the cassette holder. The holder will latch in the operating position.
MAKING A SAMPLE CAMERA RECORDING NOTE: If you connect the camera/recorder to your TV, you can see the picture played back on your TV. Refer to "VIEWING THE PICTURE PLAYED BACK ON YOUR TV" on page 37. 11. After playing, press "STOP" button. 12. Slide the power switch to "OFF" and then slide "EJECT" switch to remove cassette. 13. Always remove the power source from the camera/recorder after use. See "POWER SOURCES" on page 11.
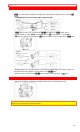
IDENTIFICATION AND OPERATION OF CONTROLS IDENTIFICATION AND OPERATION OF CONTROLS Left side Illustration 1. Lens F1.4 (6~48mm) 8:1 power zoom lens features auto focus and auto iris functions. 2. "ZOOM MODE" Button Use this button to switch the digital zoom feature. Usually press this button so that "ZM:1" appears in the viewfinder. (See "DIGITAL ZOOM" on page 25.) 3. "EIS" (Electronic Image Stabilizer) Button Press to display (hand) in the viewfinder.
IDENTIFICATION AND OPERATION OF CONTROLS 18. "AV IN/OUT" Jack (Behind the door) Use the RF output adapter (provided) to connect this jack to a TV to view the pictures played back by the camera/recorder. Use the AV input cord (provided) to connect this jack to a TV or VCR to record pictures from the VCR or TV. 19. Hand Strap Adjust to best fit your hand. 20. Power Supply Attachment Section Attach the battery (provided) or external power adapter (provided) here. 21.
IDENTIFICATION AND OPERATION OF CONTROLS 30. "RESET" Button When the linear time counter is displayed in the viewfinder, pressing this button resets the counter to "0:00:00". 31. "DISPLAY" Button When this button is pressed, the display in the viewfinder will change in sequence. 32. "DATE" Button Press this button to display the date and time in the viewfinder. Whenever the date and time appear in the viewfinder, they will be recorded on the tape. 33.
DATE/TIME SETTING DATE/TIME SETTING 1 The date and time can be recorded on your tapes to act as a handy reference when viewing them at a later time. Use the following procedure to set up this display for the current date and time. 1. Load the camera/recorder's date/time battery as described on page 10. 2. Press and hold small red button in the power switch, and then slide it to "CAMERA" position. 3. Press "DATE" button. Date and time appear in the viewfinder and "1" flashes. 4. Press "F.
DATE/TIME SETTING NOTE: The date/time graphics will be recorded whenever they appear in the viewfinder. To record date/time graphics Press the "DATE" button repeatedly to select the required date/time graphics in the viewfinder, then strat recording. • The display changes in the following order each time the "DATE" button is pressed. NOTE: Refer to page 29 for setting the second clock. To correct date/time after starting the date/time 1. Press and hold "DATE" button, and then press "STOP" button.
AUTO FOCUS AUTO FOCUS • You can always focus the subject automatically if "FOCUS M." is not displayed in the viewfinder. The range of subject with which auto focus can be used • On "T" side: about 3.6 feet from the lens surface to infinity. • On "W" side: about 3/8 inches from the lens surface to infinity. You cannot focus automatically with the following objects. Focus manually. 1. Objects not in the center of the viewfinder. 2. Objects at far and near positions at the same time 3.
EXPOSURE CORRECTION MANUAL FOCUSING 1. Press "FOCUS" select button to display "FOCUS M." in the viewfinder. • When "FOCUS M." is displayed in the viewfinder, you can adjust the focus manually. • When "FOCUS" select button is pressed again, "FOCUS M." disappears and camera returns to the auto focus mode. 2. Zoom in on the object by pressing the power zoom switch on the "T" side. 3. Turn the focus control to focus on the object.
POWER ZOOM POWER ZOOM • Press power zoom switch on the "W" side, and the picture gradually widens. • Press power zoom switch on the "T" side, and the picture gradually becomes telescopic.
DIGITAL ZOOM DIGITAL ZOOM This feature allows you to increase the magnification of the image at the center of the screen up to 2 or 8 times greater than the extreme telephoto position. 1. Press "ZOOM MODE" button to select "ZM:1" or "ZM:2". The display in the viewfinder will change as follows each time the button is pressed. 2. Press and hold "T" side of the power zoom switch. The digital zoom functions from the extremely telephoto position of X8. • "ZM:1" enlarges the image from X8 to X16.
FADE-IN/FADE-OUT FADE-IN/FADE-OUT This feature lest you add a professional touch to your home recordings. When you fade into a scene, the recording will start with a blank scene and the picture will gradually appear. The picture gradually disappears when fading out. There are three fade modes. NOTE: Both picture and sound will gradually appear and disappear. The fade speed is automatically controlled by the camera/recorder.
DIGITAL FILTER DIGITAL FILTER This function changes the picture that is being recorded to monochrome, sepia and sunset for special-effect recording. Press the "D. FILTER" button to select the required recording mode and then start recording. • Each time the "D. FILTER" button is pressed, the recording mode is switched. The last mode selected will appear first. Three special-effect recording modes are available.
ELECTRONIC IMAGE STABILIZER (EIS) ELECTRONIC IMAGE STABILIZER (EIS) This function corrects slight shaking of the image in the following record modes. • Recording by zooming up to a distant subject • Recording by approaching a small subject. • Recording while walking around • Recording in a vehicle or recording a subject behind the window of a vehicle 1. Press the "EIS" button to engage the electronic image stabilizer and to display the EIS indicator " ".
MACRO MACRO It permits you to shoot objects as close as 3/8 inch from the lens tip. Press and hold "W" side of power zoom switch. An object is auto focused. NOTES: • Determine the size of the object by moving the camera backward and forward. • Be careful as the lighting tends to be insufficient when shooting in the above conditions.
SECOND CLOCK SETTING SECOND CLOCK SETTING Since the camera/recorder has a dual time feature, if you go abroad to a country with a different time, you can record the local time superimposed on the scene being shot. 1. Press the "DATE" button repeatedly to select the second clock graphics in the viewfinder. NOTE: You cannot set the second clock without having set the first clock. 2. Select the month, date year following the same steps as "DATE/TIME SETTING" on page 22. 3.
DISPLAY BUTTON DISPLAY BUTTON Pressing the "DISPLAY" button lets you check several special display in the viewfinder. LINEAR TIME COUNTER Shows length of tape run in hours, minutes and seconds. Press "DISPLAY" button to select the linear time counter display. Load a cassette into the camera/recorder and perform recording or playback; the counter indicates the elapsed time. NOTE: Counter changes to 0:00:00 when cassette is ejected.
MEMORY MEMORY When the linear time counter with memory indication appears in the viewfinder, a tape that is being rewound automatically stops when the counter reads approximately "0:00:00 M". This is useful if there is a section of tape you want to review immediately after recording or if you want to return to the same point several times in a row. 1. Press "DISPLAY" button until the linear time counter with memory is displayed. 2. Start playing or recording a tape. 3.
INSTANT REVIEW INSTANT REVIEW 1. In record/pause (stand-by) mode, press "REVIEW" button, and the last few seconds of the recorded scene is played back in the reverse direction and then played back in the forward direction. 2. When the tape reaches the end of the scene you have just recorded, the camera/recorder returns to the record/pause (stand-by) mode. Recording starts again when the start/stop button is pressed again.
EYEPIECE ADJUSTMENT EYEPIECE ADJUSTMENT To use the electronic viewfinder without eyeglasses on, adjust the diopter control for optimum focus adjustment. TITLE RECORDING You can easily create and record personalized titles on your videos with the camera/recorder's built-in titler. The titler will store 2 different title pages in memory. Once a title is stored. it can be displayed and recorded at anytime. Each title page can contain two lines of 16 characters each.
TITLE RECORDING NOTE: The power switch may be in either the "CAMERA" or "VIDEO" 2. Press "TITLE" button. The flashing cursor will appear in the viewfinder. 3. Press "SHIFT" button repeatedly to move the flashing cursor to the place you want to begin your title. 4. Select the first character for your title by pressing the (-) or (+) button repeatedly until the desired character appears. NOTE: Each title can contain up to two lines of 16 characters each.
TITLE RECORDING NOTE: The corrected character may flash, however it will be recorded correctly without flashing. Recording Titles on a Tape in the Camera/Recorder 1. Slide the power switch to "VIDEO". 2. Locate the position on the tape that you wish to record the title. 3. Slide the power switch to "CAMERA". 4. Press "TITLE" button to display the title graphics. 5. Press "PAGE" button until the title you wish to record appears in the viewfinder. 6. Press the start/stop button to start the title recording.
WIRELESS REMOTE CONTROLLER WIRELESS REMOTE CONTROLLER You can operate the camera/recorder with the wireless remote controller (provided) from a distance. The buttons on the remote controller except for "AV DUB" button have the same functions as the buttons with the same identifications on the camera/recorder. Aim the remote controller at the receiver of the camera/recorder. Remote controllable range Cautions on the remote controller • Use the remote controller indoors.
AUDIO/VIDEO DUBBING AUDIO/VIDEO DUBBING Audio/video dubbing lets you record new audio and video from another VCR on a previously recorded tape in the camera/recorder. Audio/video dubbing hookup Illustration NOTES: • If your VCR has a single (mono) audio output, connect either the left or right audio plug to the audio output of the VCR. • If no video and audio plugs are connected, new audio and video from the camera/recorder's builtin microphone and camera is dubbed onto the tape.
RECORDING TV PROGRAMS RECORDING TV PROGRAMS If your TV or VCR has video/audio out jacks, you can record the TV program with camera/recorder. Recording TV programs Illustration 1. Connect the AV input cord to "AUDIO OUT" and "VIDEO OUT" of your TV or VCR. 2. Connect the other end to "AV IN/OUT" of camera/recorder. 3. Insert the cassette. NOTE: Power source must be connected to the camera/recorder. 4. Slide the power switch of the camera/recorder to "CAMERA". 5.
VIEWING THE PICTURE PLAYED BACK ON YOUR TV VIEWING THE PICTURE PLAYED BACK ON YOUR TV To play back a tape recorded on your camera/recorder and view it on your TV receiver, you must connect the camera/recorder to the TV receiver using either AV stereo output cord (provided) or RF output adapter (provided). Example 1: If your TV is already connected to the VCR, 1. Connect the AV stereo output cord (provided) to "AUDIO IN" and "VIDEO IN" of your VCR.
VIEWING THE PICTURE PLAYED BACK ON YOUR TV Example 3: If your TV is a regular TV, Camera hookup to regular TV Illustration 1. Disconnect the VHF antenna leads from the rear of the TV receiver. NOTE: Leave the UHF antenna leads connected to the TV. 2. Connect the VHF antenna lead to "IN FROM ANT" on the RF output adapter. If the cable is round (75-ohm), it will connect direcly to the "IN FROM ANT".
STILL STILL When "PAUSE" button is pressed during playback, a still picture can be seen. To start again press "PAUSE" button and playback will be resumed. NOTES: • There will be some noise (interference) in the still picture. • If the play-pause mode continues for more than 5 minutes, the camera/recorder will automatically enter the stop mode to protect the tape from damage. FORWARD AND REVERSE SEARCH When you press "F.
ATTACHING THE TELE OR WIDE CONVERTER ATTACHING THE TELE OR WIDE CONVERTER 1. To remove the lens hood, turn it counterclockwise. 2. Remove both caps of the tele or wide converter. 3. Screw the lens into the threads on the front of video camera/recorder lens assembly. CAMERA/RECORDER TO VCR DUBBING If you wish to exchange or copy some of your friend's favorite home recordings, the following instructions can be used to connect camera/recorder to VCR for this purpose.
FLYING ERASE HEAD FLYING ERASE HEAD A rotating erase head which elminates glitches and rainbow noise that occurs at the joints between recorded segments. PROGRAMME AE (Auto Exposure) Programme AE automatically selects the shutter speed 1/60, 1/100, 1/120 or 1/250 second that is optimum for the brightness of the subject. The iris is also adjusted automatically in response to the shutter speed.
SYNCHRO EDIT 6. Pressing "REVIEW" button on the camera/recorder puts the camera/recorder in the preview mode for several seconds and then into the playback mode. The recording VCR starts recording automatically. 7. Pressing "REW", "F.FWD", "STOP" or "PAUSE" on the camera/recorder automatically put the VCR into the record/pause mode. This allows you to search (forward or backward), fastforward or rewind the tape in the camera/recorder without disturbing the tape in the VCR.
ATTACHING THE OPTIONAL DC CAMERA LIGHT (VM-CP4) ATTACHING THE OPTIONAL DC CAMERA LIGHT (VM-CP4) Use the DC camera light if you wish to shoot objects in dark places. CAUTION: The front and lamp of the DC camera light become very hot during use of the camera light or immediately after use. Be careful that your hand or hair does not touch them. NOTES: • When the DC camera light is used, the operation time of the camera/recorder becomes short even if a fully-charged battry pack is attached.
ATTACHING THE OPTIONAL DC CAMERA LIGHT (VM-CP4) securely by aligning the recess of the lamp and the " " mark of the light. Press the lamp through the hole of the reflective place and re-attach the front case to the camera light by aligning the "-" marks of the front case and camera light, then turn the case in the direction of the arrow. NOTES: • Do not touch the lamp directly with your fingers. It may shorten its service life.
TROUBLESHOOTING TROUBLESHOOTING Your camera/recorder is a highly sophisticated instrument. It has been carefully checked and adjusted at the factory under the mose rigid quality control and inspection systems. However, should problems develop, check the following points and take necessary corrective measures. INSERTING OR REMOVING THE CASSETTE Symptom Cassette holder cannot be opened when you slide “EJECT” button Cassette cannot be inserted into cassette compartment.
HEAD CLEANING DEW Symptom “DEW” indication flashes in the viewfinder. Check Point & Correction Condensation on the camera/recorder mechanism – wait until the unit has reached normal room temperature and condensation has dried. “DEW” indication will then stop flashing. BATTERY CONDITION Symptom Check Point & Correction The " " indication in the electronic Try another battery or charge the viewfinder battery.
SPECIFICATIONS SPECIFICATIONS General Power requirements Power consumption Dimensions Weight strap's 6V DC 7.2W (When "FOCUS M" is displayed in the viewfinder.) 3-1/8" (W) x 4-1/8" (H) x 9-3/8" (D) 80.5 (W) x 104 (H) x 238 (D) mm 1.
ACCESSORY TO ADD MORE EXCITEMENT ACCESSORY TO ADD MORE EXCITEMENT You're ready to add more excitement to your home videos, and Hitachi's right there with you. With our new line of video accessories, you can go anywhere your imagination takes you. Now that you know how much fun video recording can be, you'll want to add new dimensions to your home videos. With converter lenses, adaptors, extra. OPTIONAL ACCESSORY chart If you want to place an order for these items, you can: 1.