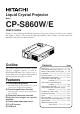
Liquid Crystal Projector Model CP-S860W/E USER’S GUIDE Thank you for purchasing the Hitachi liquid crystal projector. Please read this user’s manual thoroughly to ensure correct usage through understanding. After reading, store this instruction manual in a safe place for future reference. Outline This liquid crystal projector is used to project various computer signals as well as NTSC/PAL/SECAM video signals onto a screen. Little space is required for installation and large images can easily be realized.
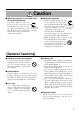
Before Use About the Symbols Various symbols are used in this instruction manual and on the product itself to ensure correct usage, to prevent danger to the user and others, and to prevent property damage. The meanings of these symbols are described below. It is important that you read these descriptions thoroughly and fully understand the contents. Warning This symbol indicates information that, if ignored, could possibly result in personal injury or even death due to incorrect handling.
[Safety Precaution] Warning ■ If a problem should occur. or a strange odor arise, continued • Ifusesmoke could result in fire or electrical shock. In • • such case, immediately turn off the power switch and then disconnect the power plug from the power outlet. After making sure that the smoke or odor has stopped, contact your dealer for repairs. Never attempt to make repairs yourself because this is dangerous.
Warning ■ Handle the power cord with care. not damage, cut, process or • Do strongly twist the power cord. Placing heavy objects on the power cord, heating or strongly pulling the power cord can result in damage as well as fire or electrical shock. • Pulling on the power cord • Placing heavy objects on the power cord • Damaging the cord • Placing near heaters not position the power • Do cord under the projector. This can • • damage the power cord and cause fire or electrical shock.
Caution ■ Do not sit or place heavy objects on this projector. Do not sit on this projector. • This could result in overturning, • leading to damage or personal injury. Use special caution in households where children are present. Do not place heavy objects on this projector. Placing heavy objects on this projector could result in loss of balance or falling and cause personal injury. ■ Do not block the ventilation openings. Do not block the ventilation openings of this projector.
Caution ■ When the projector is not to be used for an extended period. For safety purposes when the projector is not to be used for an extended period because of travel, the etc., always disconnect the power Disconnect plug from the plug from the power outlet. Also power outlet. close the lens cover to prevent the lens surface being scratched. ■ Moving the projector.
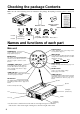
Checking the package Contents Make sure all of the following items are included in the package. If anything is missing, please contact your dealer.
Names and functions of each part (continued) Remote control photoreceptor Main power switch Used to turn the power on and off. : OFF : ON AC IN jack Used to connect the accessory power cord. VIDEO IN jack Caution Connecting to the AC IN jack Make sure the accesory power cord is plugged into the AC IN jack as far as it will go. Incomplete connection can result in fire or electrical shock.
Names and functions of each part (continued) Remote control transmitter VIDEO, RGB button LASER button Press to switch the input. (Refer to page 13, 19.) STANDBY / ON button VIDEO RGB LASER STANDBY/ON Turns the laser beam on and off. Refer to page 11 cocnerning usage and observe the cautions. POSITION Used to turn the power on and off. Press for 1 sec. or more to turn the power off (enter standby status). (Refer to pages13 and 14.
Names and functions of each part (continued) Loading the batteries Loading AA batteries into the remote control. 1Remove the battery cover. Press the battery cover and slide it in the direction of the arrow. 2Loading the batteries. Make sure the plus and minus poles are correctly oriented. 3Close the battery cover. • • Caution Battery usage cautions Use only the specified batteries with this projector. Also, do not mix new and old batteries.
Installation Typical LCD Projector and Screen Installation Use the diagram below as reference to determine the screen size and projection distnace. Side view Top view Screen Lens center b a a a (inches) Screen size (inches) b (inches) Minimum Maximum 40 55 73 1 60 85 114 2 80 114 151 2 100 144 191 3 120 176 231 3 150 220 282 4 200 291 386 6 a. Distance from the LCD projector to the screen b. Distance from the lens center to the bottom of the screen (a,b : +/-10%).
Basic operations To project VIDEO RGB LASER 2 POSITION STANDBY/ON 7 5 7 4 2 RESET MENU FREEZE MAGNIFY VOLUME OFF P in P 5 1 MUTE BLANK FOCUS AUTO TIMER 4 ZOOM 3 1 Turn on the main power switch of the projector [ I: ON]. 2 Press the STANDBY / ON button. 3 4 5 Remove the lens cap. 6 Turn on the power to the connected equipment. 7 Press either the INPUT button of the projector or the VIDEO/RGB button of the remote control to select the signal to be projected on the screen.
Basic operations (continued) Turning off the power 1 1 VIDEO RGB LASER STANDBY/ON POSITION RESET MENU FREEZE 2 MAGNIFY VOLUME OFF 3 P in P BLANK MUTE AUTO TIMER 1 Press the STANDBY/ON button for approximately 1 sec. 2 3 Turn off the main power switch of the projector [ • The ON indicator will blink orange, then the lamp will turn off. Approximately 1 sec. after that, the lamp will light orange. • After the power is turned off, the lamp will be cooled for approximately 1 min.
Basic operations (continued) Freeze function This function is used to freeze the image being displayed. This function can be used together with the MAGNIFY function (refer to page 10). VIDEO RGB LASER STANDBY/ON POSITION RESET MENU FREEZE MAGNIFY 1 VOLUME OFF P in P BLANK 1 MUTE AUTO TIMER Press the FREEZE button. • The image being displayed will freeze. • The [ ] mark will be displayed for approximately 3 sec. when the FREEZE function is on.
Basic operations (continued) Magnify function VIDEO RGB LASER Part of an image can be displayed magnified. This function can be used together with the FREEZE function (refer to page 10). STANDBY/ON POSITION 4 5 RESET 1,2 MENU MAGNIFY 3 VOLUME OFF P in P BLANK 1 6 FREEZE MUTE AUTO TIMER Press the MAGNIFY + button. • The center part of the image will be displayed magnified approximately two times. Changing the magnification ratio 2 Press the MAGNIFY + button.
Adjustments and functions VIDEO RGB LASER 1, 2, 3 POSITION STANDBY/ON 2, 3 RESET MENU FREEZE MAGNIFY VOLUME OFF MENU P in P 1 BLANK FOCUS MUTE AUTO 3 TIMER ZOOM 1, 3 1 Press the MENU ( ) buttons of the projector or the MENU button of the remote control. • The Menu screen will appear. (refer to page 18-21 for details.) 2 Press the MENU ( ) buttons of the projector or the DISK PAD button of the remote control to select the menu item to be adjusted.
Adjustments and functions (continued) SET UP Images and display positions can be adjusted from the SETUP menu. Video signal input RGB signal input SETUP INPUT IMAGE VOLUME BRIGHT CONTRAST V POSIT H POSIT H PHASE H SIZE COLOR BAL R COLOR BAL B SETUP OPT. 800 VOLUME BRIGHT (BRIGHTNESS) CONTRAST SHARPNESS COLOR TINT IMAGE OPT.
Adjustments and functions (continued) INPUT The INPUT menu is used to select RGB signal sync signal frequency of the monitor and the VIDEO signal. SETUP RGB VIDEO INPUT IMAGE OPT. fH:38kHz SETUP INPUT RGB VIDEO fV:60Hz IMAGE OPT. AUTO NTSC PAL SECAM NTSC4.43 M-PAL N-PAL Adjustment item Adjustment description RGB Displays the following RGB inputs fH: horizontal sync frequency fV: vertical sync frequency VIDEO Sets the video signal system.
Adjustments and functions (continued) IMAGE Projection image inversion, etc., can be selected from the IMAGE menu. SETUP SETUP INPUT IMAGE KEYSTONE MIRROR BLANK START UP P. IN P. OPT. INPUT IMAGE OPT. SETUP KEYSTONE MIRROR BLANK START UP P. IN P. SETUP INPUT KEYSTONE MIRROR BLANK START UP P. IN P. SETUP INPUT INPUT KEYSTONE MIRROR BLANK START UP P. IN P. IMAGE OPT. SETUP KEYSTONE MIRROR BLANK START UP P. IN P.
Adjustments and functions (continued) OPT Communication functions, etc., can be set from the OPT menu. SETUP SETUP INPUT IMAGE COM. SPEED COM. BITS TIMER LANGUAGE AUTO OFF SYNC ON G OPT. INPUT COM. SPEED COM. BITS TIMER LANGUAGE AUTO OFF SYNC ON G 1200bps 2400bps 4800bps 9600bps 19200bps SETUP IMAGE INPUT COM. SPEED COM. BITS TIMER LANGUAGE AUTO OFF SYNC ON G SETUP INPUT COM. SPEED COM. BITS TIMER LANGUAGE AUTO OFF SYNC ON G Adjustment item COM. SPEED COM. BITS TIMER IMAGE OPT.
Connection to the video signal terminals 1. Input signals Brightness signal Color signal S-VIDEO signal 1.0V p-p, 75 Ω terminator 0.286V p-p (burst signal), 75 Ω terminator 1.0V p-p, 75 Ω terminator VIDEO signal Input 200mV rms, 20k Ω or less (max. 3.0V p-p) Output 0∼200mVrms,1k Ω Audio signal 2. Signal input jacks Color signal Ground Brightness signal Ground S-VIDEO input (mini DIN 4-pin) Caution The priority sequence of the video input jacks is as follows.
Connection to the RGB signal terminal (continued) 3. Example of computer signal Resolution H×V fH (kHz) fV (Hz) 640 × 400 24.8 56.4 640 × 350 37.9 85.1 640 × 400 37.9 720 × 400 Rating Signal mode Display mode NEC PC9800 Zoom in VESA VGA-1 Zoom in 85.1 VESA VGA-2 Zoom in 37.9 85.0 VESA TEXT Zoom in 640 × 480 31.5 59.9 VESA VGA-3 Zoom in 640 × 480 35.0 66.7 Mac13"mode Zoom in 640 × 480 37.9 72.8 VESA VGA-3(72Hz) Zoom in 640 × 480 37.5 75.
Connection to the RGB signal terminal (continued) 4. Initial set signals The following signals are used for the initial settings. The signal timing of some computer models may be different. In such case, refer to pages 17 and 18 and adjust the V.POSIT and H.POSIT of the menu. Back porch bb Front porch d d Display cinterval c DATA HSYNC Computer/Signal VGA-1(85Hz) Syncaa Horizontal signal timing (µs) Computer/Signal Horizontal signal timing (µs) a b c d a b c d 2.0 3.0 20.3 1.
Connecting the USB 1. Connect the projector and computer with a suitable commercially available cable. 2. Press the INPUT button of the projector or the RGB 1/2 button of the remote control and select the input where the computer is to be connected. 3. Start the mouse function. 4. Refer to page 10, 26 concerning the remote control of mouse operations. 5. Varying the force with which the DISK PAD button is pressed varies the speed of mouse operation.
Connection to the control signal terminal 1. Mouse functions (1) Turn off the main power switches of the projector and computer and connect the two units with the cable provided or an optional suitable commercially available cable. Disconnect the USB cable from the projector. (2) Turn on the main switch of the projector (the ON indicator lamp will light green). (3) Press the INPUT button of the projector or the RGB button of the remote control and select the input where the computer is to be connected.
Connection to the control signal terminal (continued) CONTROL signal jack ADB (Mac) mouse Mouse Pin no.
Connection to the control signal terminal (continued) 2. RS232C communication (1) Turn off the projector and computer power supplies and connect with the RS232C cable. (2) Turn on the computer power supply and, after the computer has started up, turn on the projector power supply. (3) Refer to page 20, 21 and set the communication speed and the number of communication bits. (4) Start RS232C communication.
Connection to the control signal terminal (continued) Command data chart Item MOUSE Data code 00h=disable mouse function, 01 ∼ 7Fh=start mouse function COMMUNICATE 0Xh=8N1, 1Xh=7N1 X0h=1200bps, X1h=2400bps, X2h=4800bps, X3h=9600bps, X4h=19200bps POWER 3Eh=power off (standby status), 3Fh=power on ZOOM 01 ∼ 3Fh=Zoom+, 41 ∼ 7Fh=Zoom-, 01, 04 (zoom out) ∼ 3F, 7F (zoom in) FOCUS 01 ∼ 3Fh=Focus+, 41 ∼ 7Fh=Focus-, 01, 04 (short) ∼ 3F, 7F (long) MIRROR 00h=Normal, 01h=H : Invert, 02h=V : Invert, 03h=H &
Connection to the control signal terminal (continued) Requesting projector status (1) Send the request code ‘20H’ + ‘yyH’ from the computer to the projector. (2) The projector returns the response code ‘1xH’ + ‘yyH’ +data to the computer. Changing the projector settings (1) Send the setting code ‘3xH’ + ‘yyH’ +data from the computer to the projector. (2) The projector changes the setting based on the above setting code. (3) The projector returns the response code ‘1xH’ + ‘yyH’ +data to the computer.
Example of system setup Computer (notebook type) AC input 1 RGB IN 2 S-VIDEO IN VIDEO IN CONTROL RGB OUT AUDIO IN L MONO R AUDIO IN 1 2 AUDIO OUT USB Computer (desktop type) Video tape recorder with S jack Video tape recorder Speaker (with built-in amp) Caution Display monitor Turn power off to all devices before connecting. Refer to the instruction manual of each device before connecting. Cleaning the Air filter Clean the air filter about every 100 hours .
Cleaning the Air filter (continued) 3 4 Cleaning the air filter with a vacuum cleaner Installing the air filter Caution When the air filter becomes clogged with dust, etc., the projector power may turn off to prevent the internal heat level rising. Do not operate the projector with the air filter removed. Lamp The light source lamp has a service life. When used for an extended time, the images may become darker and the colors may deteriorate.
Message table (continued) Indicators The ON indicator, LAMP indicator and TEMP indicator light or blink in the following cases. ON indicator LAMP indicator TEMP indicator Lights orange Turns off Turns off Standby status Flashes green Turns off Turns off Warming up Lights green Turns off Turns off Operation status *1 Flashes orange Turns off Turns off Cool down Message Processing Lights red Lights red Turns off Wait some time (approx. 20 min.) before turning the power on again.
· These specifications are subject to change without notice. · This liquid crystal projector is designed for use in Japan and cannot be used in any other country. Specifications Product name Liquid crystal projector Model CP-S860W/E Display method Three liquid crystal panels, three primary color system. Liquid crystal Panel size 3.3 cm (1.3 type) panel Drive system TFT active matrix Number of pixels 480,000 pixels ( 600 horizontal × 800 vertical) Lens Zoom lens F=1.7~2.
About the warranty and after-service About the warranty A warranty is provided for this product. Fill in the necessary items and store in a safe place. About after-service When a problem occurs, please check first using the Troubleshooting Chart provided in this instruction manual. If the problem still persists, contact your dealer or service company. About repairs during the warranty period Repairs will be made as described in the warranty. For details, please read the warranty.
QR41821 Printed in Japan KY-K (S)
Flüssigkristall-Projektor Modell CP-S860W/E BEDIENUNGSANLEITUNG Herzlichen Glückwunsch zum Kauf dieses Flüssigkristall-Projektors von Hitachi. Bitte lesen Sie diese Bedienungsanleitung zugunsten der korrekten Bedienung aufmerksam. Bewahren Sie die Anleitung anschließend für späteres Nachschlagen an einem sicheren Platz auf. Kurzbeschreibung Dieser Flüssigkristallprojektor dient zum Projizieren von Computergrafiken und NTSC/PAL/SECAMVideobildern auf eine Leinwand.
Vor der Inbetriebnahme Bedeutung der Symbole Zugunsten der korrekten Bedienung des Geräts befinden sich in dieser Anleitung sowie auf dem Projektor selbst bestimmte Symbole, die auf Sicherheitsrisiken und entsprechende Vorsichtsmaßregeln hinweisen, um Körperverletzungen und Sachschäden zu vermeiden. Die Bedeutung dieser Symbole ist nachfolgend erklärt. Es ist wichtig, daß Sie die folgenden Sicherheitshinweise aufmerksam durchlesen und verstehen.
[Sicherheitshinweise] Warnung ■ Bei Auftreten von Betriebsstörungen fremden Gerüchen oder Rauchentwicklung • Bei kann eine Fortsetzung des Betriebs zu Bränden oder ■ Niemals im Badezimmer verwenden. Verwenden Sie den Projektor niemals im Badezimmer, da hierbei die Gefahr elektrischer Schläge besteht. elektrischen Schlägen führen. Schalten Sie das Gerät Nicht in der Nähe von in diesem Fall sofort aus, und ziehen den Wasser verwenden. Netzstecker aus der Steckdose.
Warnung ■ Den Projektor niemals in einen Behälter stellen, der Flüssigkeit enthält. Stellen Sie niemals Blumenvasen, Blumentöpfe, Tassen, Kosmetika oder Flüssigkeiten jeglicher Art auf den Projektor. Ein Verschütten kann zu Bränden oder elektrischen Schlägen führen. ■ Nur mit der korrekten Netzspannung betreiben. Betreiben Sie den Projektor ausschließlich mit der vorgeschriebenen Netzspannung. Ein Anschluß an andere Netzversorgungsquellen kann zu Bränden oder elektrischen Schlägen führen.
Vorsicht ■ Nicht auf den Projektor setzen und keine schweren Gegenstände darauf ablegen. auf den Projektor setzen. • Nicht Der Projektor kann hierdurch • umfallen und Verletzungen verursachen. Besondere Vorsicht ist in Haushalten mit Kindern geboten. Durch Auflegen schwerer Gegenstände kann der Projektor umfallen und Verletzungen verursachen.
Vorsicht Netzstecker niemals durch Ziehen • Den am Kabel von der Steckdose trennen. Brände oder elektrische Schläge ausgelöst werden. Den Netzstecker deshalb stets am Stecker haltend aus der Steckdose ziehen. ■ Transport des Projektors einem Transport des Projektors den • Bei Objektivdeckel ansetzen, den Netzstecker ■ Wenn der Projektor längere Zeit nicht benutzt wird: Wird der Projektor, z.B. aufgrund einer bevorstehenden Reise o. dergl.
Überprüfung des Lieferumfangs Den Kartoninhalt überprüfen und vergewissern, daß alle Teile vollständig vorhanden sind. Falls Teile fehlen, bitte an Ihren Fachhändler wenden.
Bezeichnung und Funktion der Teile (Fortsetzung) Empfangsfenster für Fernsteuerungssignale Hauptnetzschalter Dient zum Ein- und Ausschalten des Geräts : OFF : ON Netzeingangsbuchse (AC IN) Dient zum Anschließen des Zusatznetzkabels. Videoeingangsbuchse (VIDEO IN) Vorsicht Anschluß an die Netzeingangsbuchse (AC IN) Darauf achten, den Stecker des Zusatznetzkabels so weit wie möglich in die Buchse AC IN einzuschieben. Ein lockerer Anschluß kann zu Bränden oder elektrischen Schlägen führen.
Bezeichnung und Funktion der Teile (Fortsetzung) Fernbedienungsteil VIDEO-, RGB-Taste LASER-Taste (LASER) Diese Taste dient zum Wählen der Eingangsquelle (siehe Seite 13, 19). VIDEO RGB Diese Taste dient zum Ein- und Ausschalten des Laserstrahls. Siehe Seite 11 über Verwendung und Vorsichtsmaßregeln. LASER Position-Taste (POSITION) Bereitschafts-/Ein-Taste (STANDY/ON) STANDBY/ON POSITION Diese Taste dient zum Ein- und Ausschalten der Netzversorgung.
Bezeichnung und Funktion der Teile (Fortsetzung) Einlegen der Batterien Einlegen von R06-Batterien in das Fernbedienungsteil 1Den Batteriefachdeckel abnehmen. 2Einlegen der Batterien Auf die korrekte Ausrichtung der Plus- und Minuspole achten. Auf den Batteriefachdeckel drücken und den Deckel dabei gleichzeitig in Pfeilrichtung schieben. Vorsicht Vorsichtsmaßregeln für den 3Den Batteriefachdeckel wieder anbringen.
Aufstellung Typische Aufstellung von LCD-Projektor und Leinwand Mit Hilfe dieser Abbildung die Größe der Leinwand und deren Entfernung zum Projektor bestimmen. Seitenansicht Aufsicht Leinwand Objektivmitte b a a a (Zoll) Leinwandgröße (Zoll) b (Zoll)12 Minimal Maximal 40 55 73 1 60 85 114 2 80 114 151 2 100 144 191 3 120 176 231 3 150 220 282 4 200 291 386 6 a. Entfernung des LCD-Projektors zur Leinwand b.
Grundlegende Bedienung Projizieren von Bildern VIDEO RGB LASER 2 POSITION STANDBY/ON 7 5 7 4 2 RESET MENU FREEZE MAGNIFY VOLUME OFF P in P 5 1 MUTE BLANK FOCUS AUTO TIMER 4 ZOOM 3 1 Das Gerät mit dem Hauptnetzschalter am Projektor einschalten [ I: ON]. 2 Die Taste STANDBY / ON drücken. 3 4 5 Den Objektivdeckel abnehmen. 6 Das angeschlossene Gerät einschalten.
Grundlegende Bedienung (Fortsetzung) Ausschalten der Netzversorgung 1 VIDEO RGB LASER STANDBY/ON POSITION 1 RESET MENU FREEZE 2 MAGNIFY VOLUME OFF 3 P in P BLANK MUTE AUTO TIMER 1 Die Taste STANDBY / ON etwa 1 Sekunde lang drücken. 2 Das Gerät mit dem Hauptnetzschalter am Projektor ausschalten [ : OFF]. 3 Den Objektivdeckel anbringen. • Die Betriebsanzeige (ON) blinkt orange und die Lampe erlischt. Etwa 1 Sekunde später leuchtet die Lampe orange.
Grundlegende Bedienung (Fortsetzung) Festhalten-Funktion Diese Funktion dient zum Festhalten des gezeigten Bildes. Diese Funktion wird zusammen mit der MAGNIFY-Funktion verwendet (siehe Seite 10). VIDEO RGB LASER STANDBY/ON POSITION RESET MENU FREEZE MAGNIFY 1 VOLUME OFF P in P BLANK 1 MUTE AUTO TIMER Die FREEZE-Taste drücken. • Das gezeigte Bild wird festgehalten. • Die Markierung [ ] erscheint etwa 3 Sekunden lang, wnen die FREEZE-Funktion aktiviert ist.
Grundlegende Bedienung (Fortsetzung) Vergrößerungsfunktion VIDEO RGB LASER Ein Teil eines Bildes kann vergrößert gezeigt werden. Diese Funktion kann zusammen mit der FREEZE-Funktion verwendet werden (siehe Seite 10). STANDBY/ON POSITION 4 5 RESET 1,2 MENU MAGNIFY 3 VOLUME OFF P in P BLANK 1 6 FREEZE MUTE AUTO TIMER Die Taste MAGNIFY + drücken. • Der mittlere Teil des Bildes wird etwa doppelt vergrößert. Ändern des Vergrößerungsverhältnisses 2 Die Taste MAGNIFY + drücken.
Einstellungen und Funktionen VIDEO RGB LASER 1, 2, 3 POSITION STANDBY/ON 2, 3 RESET MENU FREEZE MAGNIFY VOLUME OFF MENU P in P 1 BLANK FOCUS MUTE AUTO 3 TIMER ZOOM 1, 3 1 Die MENU-Tasten ( ) am Projektor oder die Taste MENU am Fernbedienungsteil drücken. • Das Menübild erscheint. • Einzelheiten siehe Seite 18-21. 2 Zum Wählen des einzustellenden Menügegenstands die MENU-Tasten ( ) am Projektor oder die Taste DISK PAD am Fernbedienungsteil drücken.
Einstellungen und Funktionen (Fortsetzung) EINRICHTUNG Bilder und Anzeigepositionen können auf dem SETUP-Menü eingestellt werden. RGB-Signaleingang EISTL EINGB ABBLD LAUTST HELLE KONTRAST V-POSIT H-POSIT H-PHASE H-GR FARB BAL R FARB BAL B Videosignaleingang EISTL OPT. 800 LAUTST.
Einstellungen und Funktionen (Fortsetzung) INPUT Das Eingabe-Menü (INPUT) dient zum Wählen der RGB-Signal-Sync-Frequenzen von Monitor und VIDEO-Signal. EISTL RGB VIDEO EINGB ABBLD OPT. fH:38kHz fV:60Hz EISTL EINGB RGB VIDEO Einstellgegenstand Beschreibung der Einstellung RGB Zeigt die folgenden RGB-Eingänge: fH: horizontale Sync-Frequenz fV: vertikale Sync-Frequenz VIDEO Wählt VIDEO-Eingang ABBLD OPT. AUTO NTSC PAL SECAM NTSC4.
Einstellungen und Funktionen (Fortsetzung) IMAGE Auf dem IMAGE-Menü kann die Inversion des Projektionsbilds usw. gewählt werden. EISTL EISTL EINGB ABBLD KEYSTONE SPIEGEL BLANK START P. IN P. OPT. EINGB ABBLD OPT. EISTL KEYSTONE SPIEGEL BLANK START P. IN P. EISTL EINGB KEYSTONE SPIEGEL BLANK START P. IN P. EISTL KEYSTONE SPIEGEL BLANK START P. IN P. ABBLD EISTL OPT. ABBLD EINGB KEYSTONE SPIEGEL BLANK START P. IN P. WEISS BLAU SCHWRZ EINGB EINGB ABBLD OPT.
Einstellungen und Funktionen (Fortsetzung) OPT Auf dem OPT-Menü können Datenaustauschfunktionen usw. eingestellt werden. SEEI S TT ULP EISTL EINGB ABBLD KOM-GSCHW KOM-BITS TIMER SPRACHE AUTOM-AUS SYNC EIN G OPT. E I NI N PG UB T KOM-GSCHW KOM-BITS TIMER SPRACHE AUTOM-AUS SYNC EIN G 1200bps 2400bps 4800bps 9600bps 19200bps EISTL ABBLD EINGB KOM-GSCHW KOM-BITS TIMER SPRACHE AUTOM-AUS SYNC EIN G EISTL EINGB KOM-GSCHW KOM-BITS TIMER SPRACHE AUTOM-AUS SYNC EIN G Einstellgegenstand KOM-GSCHW KOM.
Anschluß an die Video-Eingangsbuchsen 1. Eingangssignale Helligkeitssignal Farbsignal S-VIDEO-Signal VIDEO-Signal 1,0 Vs-s, 75 Ohm Abschlußstecker 0,286 Vs-s (Burstsignal), 75 Ohm Abschlußstecker 1,0 Vs-s, 75 Ohm Abschlußstecker Eingang 200 mVeff, 20 kOhm oder weniger (max. 3,0 Vs-s) Ausgang 0 bis 200 mVeff, 1 kOhm Audio signal 2.
Anschluß an die RGB-Buchse (Fortsetzung) 3.
Anschluß an die RGB-Buchse (Fortsetzung) 4. Anfangseinstellungssignale Die folgenden Signale werden für die Anfangseinstellungen verwendet. Die folgenden sind die Anfangs-Signaleinstellungen. Die Signalzeitgabe einiger Computermodelle kann unterschiedlich sein. In diesem Fall siehe Seite 17 und 18 zur Einstellung von V.POSIT und H.POSIT im Menü.
Anschluß der USB-Maus 1. Den Projektor und den Computer mit einem im Fachhandel erhältlichen angemessenen Kabel verbinden. 2. Durch Drücken der INPUT-Taste am Projektor oder der Taste RGB 1/2 am Fernbedienungsteil wählen, an welchen Eingang der Computer angeschlossen werden soll. 3. Die Mausfunktion starten. 4. Zur der Fernsteuerung der Mausfunktionen siehe Seite 10, 26. 5. Die Geschwindigkeit der Mausfunktionen richtet sich danach, wie stark die Steuerfläche (DISK PAD) gedrückt wird.
Anschluß an die Steuersignalbuchse 1. Mausfunktionen (1) Computer und Projektor mit dem jeweiligen Netzschalter ausschalten und die beiden Geräte mit dem mitgelieferten Kabel oder einem im Fachhandel erhältlichen Kabel, das hierzu geeignet ist, anschließen. (2) Den Projektor mit dem Hauptnetzschalter einschalten (die Betriebsanzeige “ON” leuchtet grün).
Anschluß an die Steuersignalbuchse (Fortsetzung) Steuersignalbuchse (CONTROL) ADB-Maus (Mac) Maus Stift-Nr.
Anschluß an die Steuersignalbuchse (Fortsetzung) 2. RS232C-Datenaustausch (1) Den Projektor und den Computer ausschalten und das RS232C-Kabel anschließen. (2) Den Computer einschalten, warten bis das Programm startet und dann den Projektor einschalten. (3) Hinsichtlich der Datenübertragungsgeschwindigkeit und Anzahl der Datenbits siehe Seite 17. (4) Den RS232C-Datenaustausch starten.
Anschluß an die Steuersignalbuchse (Fortsetzung) Befehlsdatentabelle Gegenstand Datencode MAUS 00h=Mausfunktion deaktivieren, 01 bis 7Fh=Mausfunktion starten COMMUNICATE 0Xh=8N1, 1Xh=7N1 X0h=1200 bps, X1h=2400 bps, x2h=4800 bps, X3h=9600 bps, X4h=19200 bps POWER 3Eh=Netzversorgung Aus (Bereitschaftszustand), 3Fh=Netzversorgung Ein ZOOM 01 bis 3Fh=Zoom+, 41 bis 7Fh=Zoom-, 01, 04 (Zoom-Ferneinstellung) bis 3F, 7F (Zoom-Naheinstellung) FOCUS 01 bis 3Fh=Focus+, 41 bis 7Fh=Focus-, 01, 04 (kurz) bis 3F
Anschluß an die Steuersignalbuchse (Fortsetzung) Projektorstatusabfrage (1) Den Abfragecode ‘20H’ + ‘yyH’ vom Computer zum Projektor schicken. (2) Der Projektor überträgt den Rückmeldecode ‘1xH’ + ‘yyH’ +Daten an den Computer. Ändern der Projektoreinstellungen (1) Den Einstellcode ‘3xH’ + ‘yyH’ +Daten vom Computer zum Projektor schicken. (2) Der Projektor ändert die Einstellungen entsprechend dem obigen Einstellcode. (3) Der Projektor überträgt den Rückmeldecode ‘1xH’ + ‘yyH’ +Daten an den Computer.
Systemübersicht (Beispiel) Computer (Notebook) Netzeingang 1 RGB IN 2 S-VIDEO IN VIDEO IN CONTROL RGB OUT AUDIO IN L MONO R AUDIO IN 1 2 AUDIO OUT USB Computer (Desktop) Videorecorder mit S-Buchse Videorecorder Lautsprecher (mit eingebautem Verstärker) Vorsicht Bildschirmgerät Vor dem Anschließen alle Geräte ausschalten. Vor dem Anschließen die Bedienungsanleitung des jeweiligen Geräts durchlesen. Reinigen des Luftfilters Den Luftfilter etwa alle 100 Betriebsstunden säubern.
Reinigen des Luftfilters (Fortsetzung) 3 4 Säubern des Luftfilters mit einem Staubsauger Wiedereinbauen des Luftfilters Vorsicht Wenn der Luftfilter mit Staub usw. verstopft ist, schaltet sich der Projektor eventuell automatisch aus, um einen Hitzestau im Gehäuse zu vermeiden. Den Projektor niemals mit herausgenommenen Luftfilter einschalten. Lampe Die als Lichtquelle dienende Lampe hat eine bestimmte Betriebslebensdauer.
Meldungstabelle (Fortsetzung) Anzeigen Die Betriebsanzeige (ON), die Lampenanzeige (LAMP) und die Temperaturanzeige (TEMP) leuchten oder blinken in den folgenden Fällen. ON-Anzeige LAMP-Anzeige TEMP-Anzeige Leuchtet orange Erlischt Erlischt Bereitschaftszustand Meldung Blinkt grün Erlischt Erlischt Aufwärmphase Leuchtet grün Erlischt Erlischt Betriebszustand *1 Blinkt orange Erlischt Erlischt Kühlt ab Lampe leuchtet nicht.
Technische Daten · Änderungen bei technischen Daten und Design bleiben ohne Vorankündigung vorbehalten. · Der Flüssigkristallprojektor ist für den Betrieb in Japan konzipiert und kann nicht in anderen Ländern verwendet werden. Produktbezeichnung Flüssigkristallprojektor Modell CP-S860W/E Anzeigemethode Drei Flüssigkristallfelder, drei primäre Farbsysteme Flüssigkrist Größe 3,3 cm (Typ 1,3) allfeld Antriebsystem TFT-Aktiv-Matrix Bildpunktezahl 480.
Garantie und Kundendienst Zur Garantie Der Projektor wird mit einer Garantie verkauft. Bitte füllen Sie die Garantiekarte aus und bewahren Sie sie an einem sicheren Platz auf. Zum Kundendienst Bitte überprüfen Sie Störungsursachen zuerst mit Hilfe der Fehlersuchtabelle in dieser Anleitung, bevor Sie das Gerät zur Reparatur einreichen. Falls sich das Problem hierdurch nicht beheben läßt, wenden Sie sich bitte an Ihren Fachhändler.
QR41821 Printed in Japan KY-K (S)