PROJECTION COLOR TV 50UX57B 60UX57B OPERATING GUIDE IMPORTANT SAFEGUARDS FIRST TIME USE SET UP CUSTOM VIDEO AUDIO THEATER INFO 2-4 5-18 THE GENIUS REMOTE CONTROL 19-30 ULTRATEC BIT-MAP ON-SCREEN DISPLAY 31-58 USEFUL INFORMATION INDEX 59-63
IMPORTANT Follow all warnings and instructions marked on this projection television. RISK OF ELECTRIC SHOCK DO NOT OPEN The lightning flash with arrowhead symbol, within an equilateral triangle, is intended to alert the user to the presence of uninsulated “dangerous voltage” within the product’s enclosure that may be of a sufficient magnitude to constitute a risk of electric shock to persons. CAUTION: TO REDUCE THE RISK OF ELECTRIC SHOCK, DO NOT REMOVE COVER (OR BACK). NO USER SERVICEABLE PARTS INSIDE.
SAFETY TIPS IMPORTANT SAFEGUARDS CAUTION: • Read all of these instructions. • Save these instructions for later use. • Follow all warnings and instructions marked on the television. SAFETY POINTS YOU SHOULD KNOW ABOUT YOUR HITACHI PROJECTION TELEVISION Our reputation has been built on the quality, performance, and ease of service of HITACHI televisions. Safety is also foremost in our minds in the design of these units.
SAFETY TIPS PROTECTION AND LOCATION OF YOUR TELEVISION 16-1. If an outside antenna is connected to the television, be sure the antenna system is grounded so as to provide some protection against voltage surges and built-up static charges. Section 810 of the National Electrical Code, NFPA No.
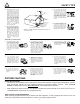
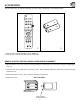
ACCESSORIES Check to make sure you have the following accessories before disposing of the packing material. POWER TV CABLE SAT PIP SWAP MOVE PIP CH HELP FRZ TV/CABLE/SAT VCR LST-CH VOL AUDIO MUTE CH INFO EXIT GUIDE L I G H C.S. T RECALL FAV CH MENU FAV CH SCHED SVCS REC SELECT 1 2 4 5 6 7 8 9 INPUT 3 SLEEP 0 CLU-615MP 1. 2. 1. Remote Control Unit CLU-615MP (Part No. HL00715). 2. Two “AA” size, 1.5V batteries (For Remote Control Unit).
HOW TO SET UP YOUR NEW HITACHI PROJECTION TV ANTENNA Unless your TV is connected to a cable TV system or to a centralized antenna system, a good outdoor color TV antenna is recommended for best performance. However, if you are located in an exceptionally good signal area that is free from interference and multiple image ghosts, an indoor antenna may be sufficient. LOCATION Select an area where sunlight or bright indoor illumination will not fall directly on the picture screen.
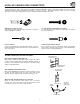
HOOK-UP CABLES AND CONNECTORS Most video/audio connections between components can be made with shielded video and audio cables that have phono connectors. For best performance, video cables should use 75-Ohm coaxial shielded wire. Cables can be purchased from most stores that sell audio/video products. Below are illustrations and names of common connectors. Before purchasing any cables, be sure of the output and input connector types required by the various components and the length of each cable.
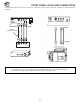
FRONT PANEL CONTROLS FRONT VIEW CH+ POWER VOLEXIT SRS ( G ) SOUND RETRIEVAL SYSTEM VOL+ MENU 쏐 PUSH INPUT CH- Push open door and pull forward and down. CH+ POWER INPUT VOL- SRS ( G ) SOUND RETRIEVAL SYSTEM EXIT VOL+ MAGIC FOCUS MENU 쏐 CH- 10 MENU button This button allows you to enter the MENU, making it possible to set TV features to your preference without using the remote.
FRONT PANEL CONTROLS POWER light You will see a red light when the TV is turned on. AI (Artificial Intelligence) sensor The Artificial Intelligence sensor will make automatic picture adjustments depending on the amount of light in the room to give the best picture. (See page 50.) REMOTE CONTROL sensor Point your remote at this area when selecting channels, adjusting volume, etc. MAGIC FOCUS Use this button to adjust your picture quality to optimum performance. (See page 40.
FRONT PANEL JACKS AND CONNECTIONS The front panel jacks are provided as a convenience to allow you to easily connect a camcorder or VCR as shown in the following examples: MAGIC FOCUS S-VIDEO VIDEO L/MONO INPUT 3 R AUDIO INPUT S-INPUT (Optional, see note) OUTPUT S-VHS V L R OUTPUT Back of VCR NOTE: Completely insert connection cord plugs when connecting to front panel jacks. If you do not, the played back picture may be abnormal.
REAR PANEL JACKS ANT A REAR SPEAKER 8Ω ONLY S-VIDEO R L TO CONVERTER VIDEO VIDEO COMPONENT Cb Y VIDEO (MONO) (MONO) L L SP. MATRIX SURROUND R R L L AUDIO R R R AUDIO INPUT 1 INPUT 2 MONITOR WIRELESS AUDIO OUT OUT TO Hi-Fi EXT. Antenna Input/Output L ANT B AUDIO Cr The remote control allows you to switch between two separate 75-Ohm RF antenna inputs, ANT A and ANT B. ANT A input can be displayed as a main picture or sub-picture.
REAR PANEL CONNECTIONS Outside antenna or cable TV coaxial cable 2-Way signal splitter ANT A S-VIDEO S-VIDEO TO CONVERTER VIDEO VIDEO COMPONENT Cb Y See tips on page 13 Cr Y Cb Cr OUTPUT L R VIDEO (MONO) (MONO) L L L L L R R R ANT B R AUDIO R AUDIO DVD Player, Laserdisc player, etc.
TIPS ON REAR PANEL CONNECTIONS S-Video connections are provided for high performance laserdisc players, VCRs etc. that have this feature. Use these connections in place of the standard video connection if your device has this feature. If your device has only one audio output (mono sound), connect it to the left audio jack on the television. Refer to the operating guide of your other electronic equipment for additional information on connecting your hook-up cables.
EXTERNAL CONNECTIONS CONNECTING EXTERNAL AUDIO AMPLIFIER To control the audio level of an external audio amplifier with the remote control, connect the system as shown below. (REAR OF TV SET) AUDIO TO HI-FI TERMINAL L R AUDIO TO HI-FI TO AUDIO INPUT TERMINAL OF EXTERNAL AMPLIFIER EXTERNAL SPEAKERS NOTE: AUDIO AMPLIFIER EXTERNAL SPEAKERS To prevent damage to the speaker and distorted sound, set the volume control of the audio amplifier lower and adjust the sound using the remote control of the TV set.
CONNECTING EXTERNAL VIDEO SOURCES The exact arrangement you use to connect the VCR, camcorder, laserdisc player, and DVD player to your TV set is dependent on the model and features of each component. Check the owner’s manual of each component for the location of video and audio inputs and outputs. The following connection diagrams are offered as suggestions. However, you may need to modify them to accommodate your particular assortment of components and features.
CONNECTING EXTERNAL VIDEO SOURCES CONNECTING A STEREO VCR OR STEREO LASERDISC PLAYER 1. Connect the cable from the VIDEO OUT of the VCR or the laserdisc player to the INPUT (VIDEO) jack on the TV set below. 2. Connect the cable from the AUDIO OUT R of the VCR or the laserdisc player to the INPUT(AUDIO/R) jack. 3. Connect the cable from the AUDIO OUT L of the VCR or the laserdisc player to the INPUT(AUDIO/L) jack. 4. Press the INPUT button to view the program from the VCR or laserdisc player.
CONNECTING EXTERNAL VIDEO SOURCES CONNECTING A STEREO LASERDISC PLAYER OR DVD PLAYER TO INPUT 2. 1. Connect the cable from the Y OUT of the Laserdisc or the DVD player to the INPUT 2 (Y) jack as shown on the TV set below. 2. Connect the cable from the Cb OUT or B-Y OUT of the Laserdisc or the DVD player to the INPUT 2 (Cb) jack, as shown on the TV set below. 3. Connect the cable from the Cr OUT or R-Y OUT of the Laserdisc or the DVD player to the INPUT 2 (Cr) jack, as shown on the TV set below. 4.
AUDIO SYSTEM SETUP Match the numbers below to the diagrams for speaker placement. (See page 54 for SRS functions.) The television’s internal speakers. These speakers are connected to a separate audio amplifier. Use the AUDIO TO HI-FI output on the TV. These speakers are controlled by a wireless speaker transmitter. Use the WIRELESS OUT output on the TV.
THE GENIUS REMOTE CONTROL (CLU-615MP) In addition to controlling all the functions on your HITACHI Projection TV, the remote control is designed to operate different types of VCRs, CATV (cable TV)/satellite converters, and audio equipment with one touch. Basic operation keys are grouped together in one area. All other controls are separated from them and arranged in MULTI-PAGE sections, with a display that can be switched to cover any of the three pages.
MULTI-PAGE WINDOWS POWER POWER TV CABLE SAT PIP SWAP MOVE PIP CH HELP FRZ TV/CABLE/SAT SELECT SWITCH REC STOP PAUSE SLOW PROG. TV/VCR TV/CABLE/SAT VCR VCR AUDIO AUDIO When TV/CABLE/SAT is set. When VCR is set. POWER AMP CD TAPE REC STOP PAUSE TV/CABLE/SAT VCR AUDIO When AUDIO is set.
HOW TO USE THE GENIUS REMOTE TO CONTROL YOUR TV POWER TV CABLE SAT PIP SWAP MOVE HELP PIP CH FRZ TV/CABLE/SAT VCR LST-CH VOL AUDIO MUTE CH INFO EXIT GUIDE L I G H C.S. T RECALL FAV CH MENU SCHED SVCS REC FAV CH SELECT 1 2 3 4 5 6 7 8 INPUT 9 SLEEP 0 CLU-615MP POWER button Press this button to turn the TV set on or off when the remote is in TV mode. (See page 19 for instructions on how to set the remote control to TV mode.
HOW TO USE THE GENIUS REMOTE TO CONTROL YOUR TV PICTURE-IN-PICTURE buttons See separate section on page 24 for a description. PIP CH button Use the PIP CH button to select between main picture and sub-picture tuning. The channel number which is green indicates which channel is being controlled. HELP button Press this button when a menu is displayed to view HELP text, which gives a description of the displayed menu.
HOW TO USE THE REMOTE TO CONTROL YOUR TV EXIT button When in MENU mode, this button will exit all On-Screen Displays. RECALL button Press this button when no menu is displayed when you want to check the channel being received, the picture source, if the channel has stereo (ST) or second audio program (SAP), the time, CHANNEL ID, if the Channel Skip (C.S.) function is activated, if SPECIAL EVENT REMINDER is set, and if the SLEEP timer is set.
PICTURE-IN-PICTURE (PIP) Your HITACHI Projection TV incorporates Dual Tuner technology designed for improved viewing enjoyment. This Dual Tuner feature allows you to view antenna inputs on both the main picture and sub-picture simultaneously, with separate tuning control for each. The Dual Tuner can operate with only one input (ANT A only) or two inputs (ANT A and ANT B). ANT A input can be viewed as both the main picture and the sub-picture simultaneously.
PICTURE-IN-PICTURE (PIP) PICTURE-IN-PICTURE CONT. SURF MODE PIP This feature will automatically scan all active channel numbers (those set in memory) and display them as PIP sub-pictures, along the right edge of the screen. Press the PIP button a second time to remove the sub-pictures from the screen. ANT A 28 PIP PIP SINGLE SURF NOTE: 1. 2. If no buttons are pressed when in SURF mode, auto-scanning will continuously scan.
PICTURE-IN-PICTURE (PIP) FREEZE (FRZ) button (With PIP ON) If you wish to freeze the sub-picture, press the FRZ button. This is convenient when trying to write down the address for a mail order company, recording statistics for a sporting event, etc. To return the picture to motion, press the FRZ button again. NOTE: The FREEZE function will only operate when SINGLE PIP mode is chosen.
USING THE REMOTE TO CONTROL VCR FUNCTIONS Operating the precoded function for your VCR. This remote is designed to operate different types of VCRs. You must first program the remote to match the remote system of your VCR. (Refer to page 30.) 1. Set the MULTI-PAGE select switch to VCR. 2. Turn ON your VCR. 3. Aim the remote control at the front of your VCR. 4. Hold down the PROG button on the remote, enter the two digit preset code that matches your VCR as shown on page 30.
USING THE REMOTE TO CONTROL CABLE BOX/SATELLITE FUNCTIONS Operating the precoded function for your cable/satellite box. This remote is designed to operate different types of cable boxes and satellite systems. You must first program the remote to match the remote system of your cable/satellite box. (Refer to page 30.) 1. Set the MULTI-PAGE select switch to TV/CABLE/SAT. 2. Turn ON your cable/satellite box. 3.
USING THE REMOTE TO CONTROL AUDIO EQUIPMENT FUNCTIONS Operating the precoded function for your audio equipment. This remote is designed to operate certain types of audio equipment. You must first program the remote to match the remote system of your audio equipment. (Refer to page 30.) 1. Set the MULTI-PAGE select switch to AUDIO. 2. Turn ON the audio component you wish to control with your remote control (AMP, CD, or TAPE). 3. Aim the remote control at the front of your audio equipment. 4.
AUDIO, CABLE/SATELLITE, AND VCR CODES AMPLIFIER BRAND CODE Aiwa . . . . . . . . . . . . . . . . . . .04, 05 Carver . . . . . . . . . . . .00, 05, 06, 07 Casio . . . . . . . . . . . . . . . . . . . . .08 Clarinette . . . . . . . . . . . . . . . . . .08 Denon . . . . . . . . . . . . . . . . . . . . .09 Fisher . . . . . . . . . . . . . . . . . .07, 10 Hitachi . . . . . . . . . . . . . . . . . . . . .11 JVC . . . . . . . . . . . . . . . . . . . . . . .12 Kenwood . . . . . . . . . .13, 14, 16, 17 Lloyd’s . . . .
SET UP CUSTOM VIDEO ULTRATEC OSD AUDIO 1. Press MENU on the remote control to display the different features on your HITACHI Projection TV. 2. Press the CURSOR buttons to highlight a different feature. 3. Press EXIT on the remote control to quickly exit from a menu. HELP EXIT 4. Press HELP on the remote control when a menu is displayed, and text will appear giving a description of that menu. FAV CH MENU FAV CH This part of the screen shows what selections are available.
Set Up Custom Video Audio Theater Info Set Up Custom Video Audio Theater Info ULTRATEC OSD MENU LANGUAGE PLUG & PLAY SIGNAL SOURCE AUTO CHANNEL SET CHANNEL MEMORY CHANNEL LIST CLOCK SET MAGIC FOCUS Choose English, French, or Spanish text. Optimum hook up for your system. Select Antenna or Cable TV. First time set up for channel buttons. Channel buttons, add, skip. Check channel name, scan, and child lock. Set before using timer features.
SET UP Set Up Select INITIAL SETUP when setting your TV up for the first time. Use the CURSOR or on the remote to highlight the function desired. Set Up Set Up Custom Video Audio Theater Set Set Up Up Custom IInfo CURSOR TO AUTO DEMO TURN TV OFF, PRESS AND HOLD MENU FAV CH FAV CH TV S POWER BUTTON.
SET UP Set Up PLUG & PLAY This graphic guide function will help you to properly set up your TV or Home Theater System. Simply answer two questions and a graphic will be displayed, showing you the optimum setup for your personalized system.
SET UP Set Up Select ANTENNA if you are using an indoor or outdoor antenna. Select CATV if you have cable TV.
SET UP Set Up This feature will automatically store active TV channels in CHANNEL MEMORY. This will allow you to skip unused channels when using CHANNEL UP ( ) or DOWN ( ).
SET UP Set Up Use this function after AUTO CHANNEL SET to add or erase additional channels to the remote control CHANNEL or buttons.
SET UP Set Up This function allows you to review which channels are labeled in CHANNEL ID (ID.), which have been added to CHANNEL MEMORY (SCAN), and which are protected by CHILD LOCK (LOCK).
SET UP Set Up CLOCK SET The time must be set before you can use the CALENDAR, 4 EVENT PROGRAM, SPECIAL EVENT REMINDER, or TV TIME OUT.
SET UP Set Up MAGIC FOCUS Your HITACHI Projection TV has three color projection tubes: one for red, one for green, one for blue. When mixed together in the proper proportion, the output of these three color tubes can produce any color. To produce these colors, however, the beams must be precisely aligned over each other so that the colors can be mixed. The process of aligning these picture beams is called “convergence”.
CUSTOM CUSTOM This selection contains advanced features which will make TV viewing easier and more enjoyable. CUSTOM Use this feature to give up to 20 channels a name when ANTENNA signal source is selected and up to 60 channels a name when CATV1 signal source is selected. CHANNEL ID. SET UP CUSTOM VIDEO CURSOR MENU FAV CH FAV CH AUDIO INFO SET UP CUSTOM VIDEO C H 03 **** ERASE CHANNEL ID. VIDEO ID.
CUSTOM CUSTOM FAMILY FAVORITES (MENU) This function allows you to group your favorite channels into six personalized categories that you can rename. A total of 24 channels can be stored in the FAMILY FAVORITES function. SET UP CUSTOM VIDEO AUDIO THEATER INFO C H A NNEL ID. V I D E O ID.
CUSTOM FAMILY FAVORITES (OPERATION) CUSTOM Use this function to display FAMILY FAVORITES selections as sub-pictures or to tune the main picture to a desired favorite channel.
CUSTOM CUSTOM This function will block out the picture and sound of the selected channel or video input. It can also be used to keep the TV from being viewed for a scheduled amount of time that you set. CHILD LOCK The code to enter CHILD LOCK is a four digit secret code number. The factory preset code is 0000. Use the number buttons to select secret code. SET UP CUSTOM VIDEO AUDIO THEATER INFO C H A N NEL ID. V I D E O ID.
CUSTOM 4 EVENT PROG. CUSTOM This function will automatically turn the TV on and off, one time only, every day or once a week. SET UP CUSTOM VIDEO AUDIO THEATER INFO CHANNEL ID . VIDEO ID.
CUSTOM CUSTOM AUTO LINK Use this function to automatically turn the TV on and tune to VIDEO: 1, 2, or 3, when it detects a VIDEO input. SET UP CUSTOM VIDEO C H A NNEL ID. V I D E O ID. FA M I LY FAVORIT ES C H I L D L OCK 4 E V ENT PROGRAM A U TO L INK C L O S ED CAPT ION M E N U BACKGROUND F I R S T T IM E T OUR MENU TO MENU BAR AUDIO THEATER INFO SET UP CUSTOM VIDEO FAV CH V1 V2 V3 AUTO REM OT E OF F TO QUIT C H A N N E L ID . V ID EO ID .
CUSTOM CUSTOM Closed captions are the dialogue, narration, and/or sound effects of a television program or home video which . are displayed on the TV screen. Your local TV program guide denotes these programs as CC or CLOSED CAPTION SET UP CUSTOM VIDEO AUDIO THEATER INFO C H A N N EL ID. V I D E O ID. FA M I LY FAVORIT ES C H I L D L OCK 4 E V E NT PROGRAM A U TO LINK C L O S ED CAPT ION M E N U BACKGROUND F I R S T T IM E TOUR MENU TO MENU BAR SET UP CUSTOM VIDEO D ISP LAY OFF MOD E C .C .
CUSTOM CUSTOM FIRST TIME TOUR This function introduces you to the First Time Tour Setup Feature, showing you basic TV functions as well as helping you set up your TV or Home Theater System. This feature will be displayed every time your TV is turned on, unless you set FIRST TIME TOUR to OFF. HITACHI POWER ON POWER INTRODUCES YOU TO THE F I R S T T I M E S E T U P F E AT U R E . SHOWING YOU THE OPTIMUM SETUP GUIDE FOR YOUR PERSONALIZED SYSTEM.
VIDEO VIDEO Select VIDEO to adjust picture settings and improve picture quality.
VIDEO VIDEO ADVANCED SETTINGS Your HITACHI Projection TV has an Ultra AI (Artificial Intelligence) function which will automatically adjust picture settings to produce the highest quality picture possible. When AI is highlighted, use CURSOR to turn the AI on or off.
AUDIO AUDIO Select AUDIO SETTINGS to adjust the TV to your preference and to improve the sound quality. AUDIO SET UP CUSTOM VIDEO AUDIO THEATER INFO CURSOR FAV CH MENU FAV CH BASS T REBL E BAL ANCE RESET ADVANCED SET T INGS MENU TO MENU BAR 72% 50% SET UP CUSTOM VIDEO CURSOR FAV CH TO QUIT EXIT AUDIO THEATER BASS TR E B LE B A LA N C E RESET A D VA N C E D SE TTIN GS MENU TO MENU BAR INFO 90% 50% TO QUIT EXIT Use CURSOR or to highlight the function to be adjusted.
AUDIO AUDIO ADVANCED SETTINGS Use ADVANCED SETTINGS to improve the sound performance of your TV, depending on listening conditions.
THEATER THEATER Use this function to choose picture settings for a true home THEATER experience. THEATER THEATER MODES Use this function to choose from automatic picture settings to optimize your TV’s performance.
THEATER THEATER SRS ( G ) 쏐 Based on the principles of the human hearing system, SRS technology delivers an exciting and realistic 3D Sound experience from just two speakers (or) the two internal speakers of your HITACHI television. If your HITACHI television is connected to an external audio system, SRS will also create an incredible 3D sound experience from two speakers and even enhance a complete multi-speaker surround sound system.
THEATER THEATER WIRELESS SOUND This feature allows you to choose between two possible variable audio outputs for a separate set of wireless speakers or another stereo amplifier. The audio output may be either MAIN TV AUDIO or PIP AUDIO.
INFO INFO This function allows your TV to assist you with your busy day-to-day schedule. INFO SPECIAL EVENT REMINDER Use this function to set up to six special events into memory. These events can then be viewed in CALENDAR mode.
INFO INFO CALENDAR Use this function to check the day, month, and year. Dates programmed in SPECIAL EVENT REMINDER will appear blinking and special event message will be displayed.
INFO INFO AUTO HELP Use this function to display a description of the current menu. SET UP CUSTOM VIDEO SPECIAL EVENT REMINDER CALENDAR AUTO HELP MENU TO MENU BAR AUDIO THEATER INFO SET UP CUSTOM VIDEO CURSOR CURSOR FAV CH ON OFF TO QUIT EXIT AUDIO SPECIAL EVENT REMINDER CALENDAR AUTO HELP MENU TO MENU BAR TO QUIT You can also turn this function ON and OFF by pressing the HELP button on the remote control. 58 INFO ON OFF Press CURSOR , to select ON or OFF.
CARE OF YOUR HITACHI PROJECTION TV AND YOUR REMOTE CONTROL DO Dust the screen and cabinet with a soft cloth. Clean the screen with a soft cloth moistened in warm water and dry with a soft cloth. A mild soap may be used if the screen is extremely dirty. Place your television away from extreme heat, humidity, and extremely dusty places. Remove the plug from the wall outlet if your television will not be used for a long period of time, for instances, when you go on vacation.
RECEPTION PROBLEMS • IGNITION NOISE: Black spots or horizontal streaks may appear, picture may flutter or drift. Usually caused by interference from automobile ignition systems, neon lamps, electrical drills, and other electrical appliances. • GHOSTS: Ghosts are caused by the television signal following two paths. One is the direct path and the other is reflected from tall buildings, hills or some other objects. Changing the direction or position of the antenna may improve reception.
rd ss TV i ure No Picture, no sound Try SYMPTOMS wit cor is p rec lug t ge d an c i n h oth ed ''O er N" cha Ch nn eck el ( an sta ten tion na Ch tr o eck con ub ne an le) ctio ten ns na Ch (ba for eck c b k r ou oke of T tsid n le V) Ch ea ad eck nte -in nn for wir a loc e al i Ad nte jus tC r fe ren on tr a ce Ad s t co jus ntr tB ol rig h tne Ad ss jus con tC tr o olo l rc Ad o jus ntr tT o l int con Ad tr o jus l tV olu me con tr o l CH TR ECK Y T TH HE ES Be SE E I sur AD TEM ee xte JU
USEFUL INFO Features: • • • • • • • • • • • • • • • Superfine Picture Quality 1000 Line Horizontal Resolution Pure Green and Red Filter Lenses Artificial Intelligence System Remote (Controls many VCR brands, cable boxes, satellite boxes, and other audio equipment.
USEFUL INFO e c i v r e s To locate an authorized HITACHI service facility in the continental U.S.A. and Canada, DIAL TOLL FREE 7 days a week, 24 hours a day 800 HITACHI (1-800-448-2244) Hitachi America, LTD. Home Electronics Division Hitachi has made every effort to assure you hours of trouble free operation from your unit. However, should you require service, a network of Hitachi Authorized Service Facilities has been established in all 50 states and Puerto Rico.
QR41081