
User's Manual


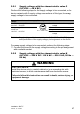


Table Of Contents
- Installation
- Contents
- Safety instructions
- General safety instructions
- Certified usage
- Installation site requirements
- Device casing
- Qualification requirements for personnel
- National and international safety regulations
- Grounding the device
- Lightning protection
- Requirements for connecting electrical wires
- Requirements for connecting the supply voltage
- ATEX directive 2014/34/EU – specific regulations for safe operation
- Relevant for use in explosion hazard areas (Hazardous Locations, Class I, Division 2):
- E marking
- CE marking
- LED or laser components
- FCC note
- Note for the use in the Japan
- Note for the use in Oman
- Recycling note
- About this manual
- Key
- 1 Description
- 1.1 General description
- 1.2 Device name and product code
- 1.3 Device view
- 1.4 Power supply
- 1.4.1 Supply voltage with the characteristic value C (24 V DC ... 48 V DC)
- 1.4.2 Supply voltage with the characteristic value K (60 V DC ... 250 V DC / 110 V AC ... 230 V AC, 50 Hz ... 60 Hz)
- 1.4.3 Supply voltage with the characteristic value P (Power supply only through PoE)
- 1.4.4 Supply voltage with the characteristic value W (24 V DC)
- 1.5 Ethernet ports
- 1.6 Connections for antennas
- 1.7 Display elements
- 1.8 Management interfaces
- 1.9 Signal contact
- 1.10 Reset button
- 2 Installation
- 3 Making basic settings
- 4 First login (Password change)
- 5 Obtain compliance for operation in the European Union
- 6 Configuring the transmit power
- 7 Configuring the transmit power for the 4.9 GHz band
- 8 Maintenance and service
- 9 Disassembly
- 10 Technical data
- 10.1 General technical data
- 10.2 Dimension drawings
- 10.3 Radio technology
- 10.4 Roaming
- 10.5 Receiving sensitivity, transmit power, and data rate of the WLAN module version EWLAN1 (Approvals 2, characteristic value M or 9)
- 10.6 Receiving sensitivity, transmit power, and data rate of the WLAN module version EWLAN1 for device variants with approval for the 4.9 GHz band (Approvals 2, characteristic value P)
- 10.7 Receiving sensitivity, transmit power, and data rate of the WLAN module version EWLAN2 for high-gain antennas (Approvals 2, characteristic value H)
- 10.8 EMC and immunity
- 10.9 Network range
- 10.10 Power consumption/power output
- 11 Scope of delivery, order numbers and accessories
- 12 Underlying technical standards
- A Further support

46
Installation BAT-F
Release
18
07/2020
If you would like to connect several antennas to a WLAN module, align the
antennas so that the points of the antennas point away form each other in a
star shape.
Install at least one antenna on the WLAN module that you would like to
use.
Insert the terminating resistors available as accessories into the sockets
not being used in order to avoid radio signals from one WLAN module
being received by the other WLAN module.
Relevant for use of BAT-ANT-N-MiMo-18N-IP65 with FCC and approval 2,
characteristic value H. The devices are labeled as follows:
“FCC ID: U99EWLAN2 and IC: 4019A-EWLAN2”
Connect the BAT-ANT-N-MiMo-18N-IP65 to the WLAN module as follows:
Connect the antenna port "Ver" with the WLAN antenna port 1.
Connect the antenna port "+45 °" with the WLAN antenna port 2.
Connect the antenna port "-45 °" with the WLAN antenna port 3.
Connect the BAT-ANT-N-MiMo-18N-IP65 in this way exclusively.
2.5 Connecting the power supply and the signal
contact lines
The supply voltage is electrically isolated from the casing.
You have the option of supplying the supply voltage redundantly, without
load distribution.
WARNING
ELECTRIC SHOCK
Before connecting the electrical wires, always verify that the requirements
listed are complied with.
See “Requirements for connecting electrical wires” on page 10.
See “Requirements for connecting the supply voltage” on page 10.
Failure to follow this instruction can result in death, serious injury, or
equipment damage.