
Quick Start Guide

18
────────────────────────────────────────────────────
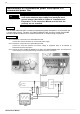
Measurement Method
────────────────────────────────────────────────────
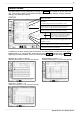
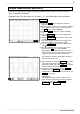
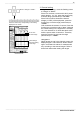
3. Channel setting
Using the cursor ke ys, move the flashing cursor
to "Range" or "Mode."
Since CH1 receives a commercial 100-V power
supply (approx. 141 Vp), press the function key
to set the range (vertical axis) to "
20 V/DIV
."
Since CH2 is used to observe the interval
voltage (12 VDC) of the equipment, press the
function key to set the range ( vertical axis) to
"
2V/DIV
."
CH3 measures the amount of current. Press the
function key to set the mode to "
3273
." Although
the current flowing in the equipment is normally
1A, it can increase to 10 times that level at the
time the power switch is turned on. Therefore,
press the function key and set the range
(vertical axis) to "
1A/DIV
."
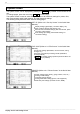
< Key point >
Whe n ranges are set in the channel screen, the
displayed upper- and lower-limit values and the
upper- and lower-limit values for measurement
vary according to the entered ranges. Refer to
these limit values when setting the ranges.
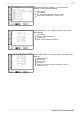
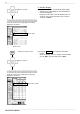
Move to "Range" or "Mode."
Press the function ke y corresponding to the setting
displayed in the screen.
Set to 3273.
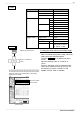
Channel screen
Set each range.
These settings
change according
to the range.