
Installation & Assembly


Table Of Contents
start here
commencez ici
empezar aquí
Assembly Instructions Les Instructions D’assemblage Instrucciones De Montaje
LIGHTING
HINKLEY
English Spanish
French
H I N K L E Y L I G H T I N G 33000 Pin Oak Parkway Avon Lake, OH 44012 800.446.5539 / 440.653.5500 hinkleylighting.com
Item No:
42005,42006,42007
42008,42009,42010
Número del artículo:
42005,42006,42007
42008,42009,42010
Numéro d’article:
42005,42006,42007
42008,42009,42010
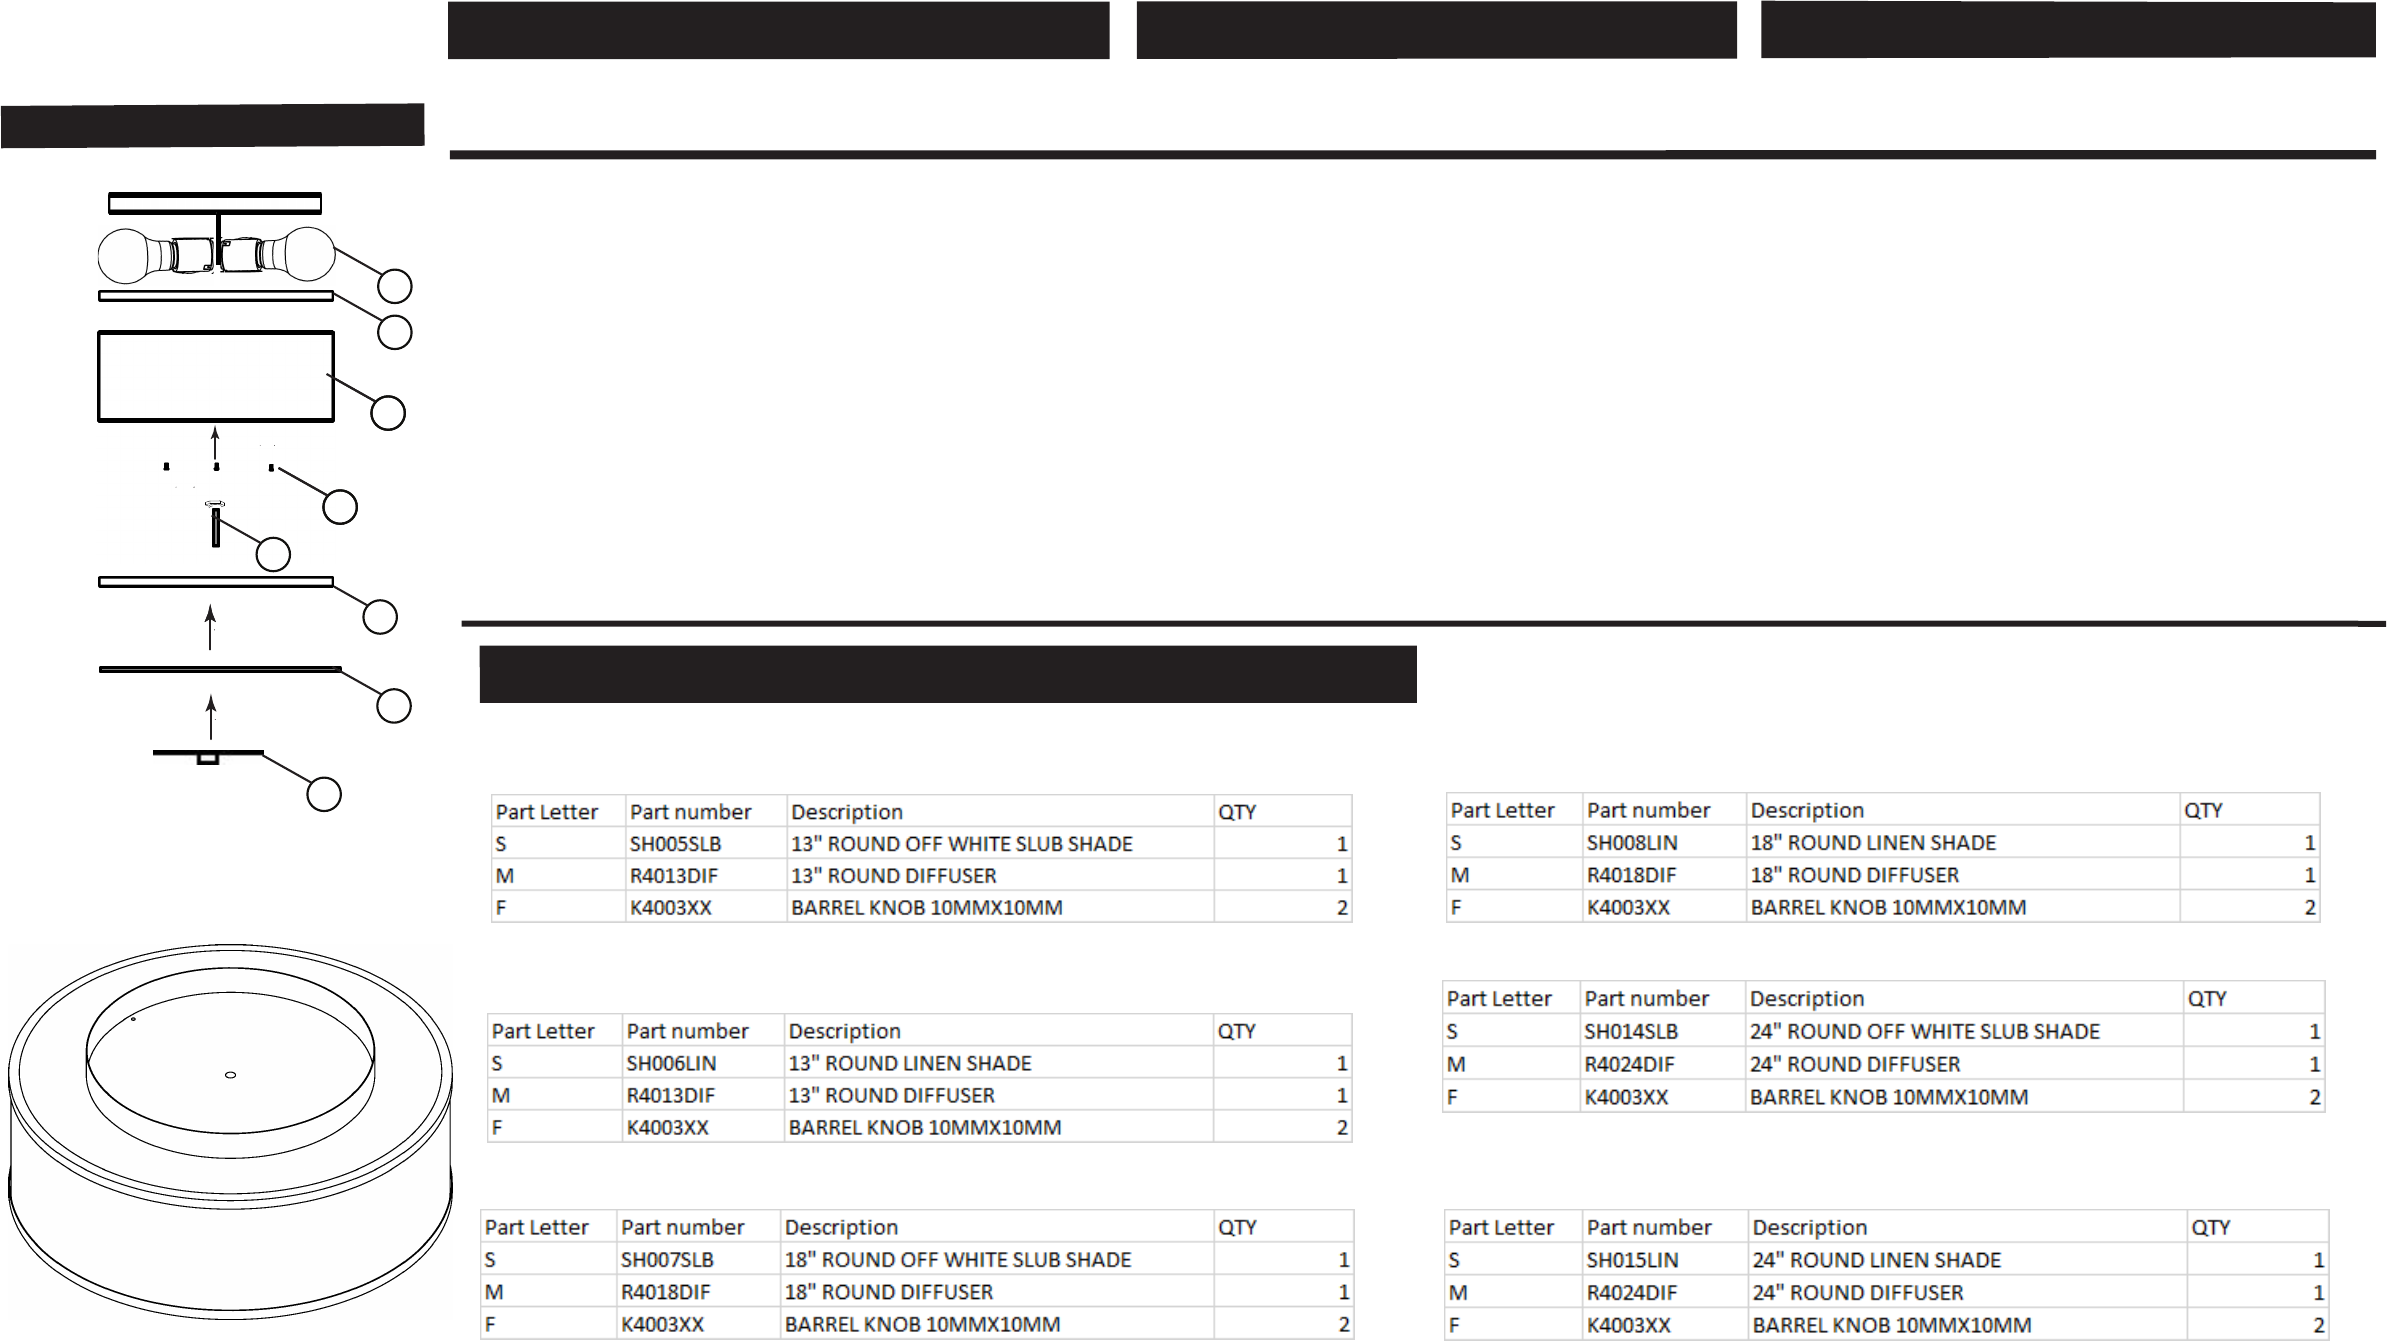
1.To begin screw in threaded rod and hex
nut (R) to hex hickey in socket cluster (H)
2.Next place top ring (T) on shade (S)
3.Secure shade and top ring to canopy using
screws provided (K).
4.Next place diffuser (M) and bottom ring (N)
under shade.
5.Then use lock up (L) at the bottom of
fixture to secure ring and diffuser to shade
6.Refer to I.S. 18 for wiring and grounding
instructions
1. Para comenzar, atornille la varilla roscada y la tuerca
hexagonal (R) al chupetón hexagonal en el conjunto de
receptáculos (H)
2. Luego coloque el anillo superior (T) en la sombra (S)
3. Asegure la sombra y el anillo superior a la cubierta
utilizando los tornillos provistos (K)
4. A continuación coloque el difusor (M) y el anillo inferior
(N) debajo de la sombra.
5. Luego use el seguro (L) en la parte inferior del accesorio
para asegurar el anillo y el difusor a la sombra
6. Consulte I.S. 18 para instrucciones de cableado y
conexión a tierra
Replacement parts for Halo family
42005
42006
42007
42008
42009
42010
L
N
M
R
T
K
S
H
1. Pour commencer, vissez la tige filetée et l'écrou
hexagonal (R) sur le suçon hexagonal dans le groupe de
douilles (H)
2. Placez ensuite l'anneau supérieur (T) sur l'ombre (S)
3. Fixez le store et l'anneau supérieur à la verrière à l'aide
des vis fournies (K).
4. Placez ensuite le diffuseur (M) et l'anneau inférieur (N)
sous l'ombre.
5. Ensuite, utilisez le verrou (L) au bas du luminaire pour
fixer l'anneau et le diffuseur à l'ombre
6. Reportez-vous à I.S. 18 pour les instructions de câblage
et de mise à la terre
l
l