
User Manual


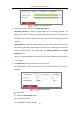


Table Of Contents
- Chapter 1 System Requirement
- Chapter 2 Network Connection
- Chapter 3 Access to the Network Camera
- Chapter 4 Wi-Fi Settings
- Chapter 5 Live View
- Chapter 6 Network Camera Configuration
- Chapter 7 Network Settings
- 7.1 Configuring Basic Settings
- 7.2 Configure Advanced Settings
- 7.2.1 Configuring SNMP Settings
- 7.2.2 Configuring FTP Settings
- 7.2.3 Configuring Email Settings
- 7.2.4 Platform Access
- 7.2.5 Wireless Dial
- 7.2.6 HTTPS Settings
- 7.2.7 Configuring QoS Settings
- 7.2.8 Configuring 802.1X Settings
- 7.2.9 Integration Protocol
- 7.2.10 Bandwidth Adaptation
- 7.2.11 Network Service
- 7.2.12 Smooth Streaming
- 7.2.13 Security Control Panel Configuration
- Chapter 8 Video/Audio Settings
- Chapter 9 Image Settings
- Chapter 10 Event Settings
- Chapter 11 Storage Settings
- Chapter 12 Playback
- Chapter 13 Picture
- Appendix
- Appendix 1 SADP Software Introduction
- Appendix 2 Port Mapping
- Appendix 3

Network Camera User Manual
140
5. Go to Capture Parameters tab to configure the capture parameters.
(1) Check the Enable Timing Snapshot checkbox to enable continuous snapshot.
(2) Select the picture format, resolution, quality and capture interval.
(3) Check the Enable Event-triggered Snapshot checkbox to enable event-
triggered snapshot.
(4) Select the picture format, resolution, quality, capture interval, and capture
number.
Set Capture Parameters
6. Set the time interval between two snapshots.
7. Click Save to save the settings.
Configure HDD Management
Purpose:
HDD management allows you to view the HDD capacity, free space, status, encryption