Network Traffic Camera • User Manual Network Traffic Camera (for Checkpoint and Intersection Violation System) Quick Start Guide
Network Traffic Camera • Quick Start Guide © 2020 Hangzhou Hikvision Digital Technology Co., Ltd. All rights reserved. This Manual is the property of Hangzhou Hikvision Digital Technology Co., Ltd. or its affiliates (hereinafter referred to as “Hikvision”), and it cannot be reproduced, changed, translated, or distributed, partially or wholly, by any means, without the prior written permission of Hikvision.
Network Traffic Camera • Quick Start Guide Regulatory Information FCC Information Please take attention that changes or modification not expressly approved by the party responsible for compliance could void the user’s authority to operate the equipment. FCC compliance: This equipment has been tested and found to comply with the limits for a Class A digital device, pursuant to part 15 of the FCC Rules.
Network Traffic Camera • Quick Start Guide Symbol Conventions The symbols that may be found in this document are defined as follows. Symbol Description Provides additional information to emphasize or supplement important points of the main text. Indicates a potentially hazardous situation, which if not avoided, could result in equipment damage, data loss, performance degradation, or unexpected results.
Network Traffic Camera • Quick Start Guide To avoid heat accumulation, good ventilation is required for a proper operating environment. Store the device in dry, well-ventilated, corrosive-gas-free, no direct sunlight, and no heating source environment. Avoid fire, water, and explosive environment when using the device. Avoid lightning strike for device installation. Install a lightning arrester if Transportation, Use, and Storage necessary. Keep the device away from magnetic interference.
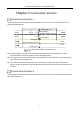
Network Traffic Camera • Quick Start Guide TABLE OF CONTENTS Chapter 1 Introduction ................................................................................................................... 6 Overview ............................................................................................................................. 6 Key Feature.......................................................................................................................... 6 System Requirement..................
Network Traffic Camera • Quick Start Guide Chapter 1 Introduction Overview Integrated with video collection, smart encoding compression, and network transmission, network traffic camera can capture pictures and recognize vehicle features, such as license plate number, vehicle type, vehicle color, and vehicle brand. It is widely used in highway safety checkpoint, city safety checkpoint, and intersections. Key Feature Supports H.265/H.264. Multiple application modes, e.g.
Network Traffic Camera • Quick Start Guide Appearance and Interfaces Appearance Lens Auto Iris Interface Appearance Interfaces The interfaces are mainly located on the rear panel.
Network Traffic Camera • Quick Start Guide Rear Panel Interface Interface Description LAN1/LAN2 10/100/1000 M Ethernet interface TF TF card slot PWR Power indicator Ground RTG RS-232 interface for debugging and temperature shield control via transparent channel. D1-D3 RS-485 interface, for transferring RS-485 input information (such as radar, vehicle detector, etc.).
Network Traffic Camera • Quick Start Guide Chapter 2 Construction Solution Construction Solution I The following construction takes example of 3 MP camera in the scene of bidirectional 4 lanes without speed detection. 26 m Lane 2 3.75 m 5m 26 m Pole Height: 6 m Flash Light 2 Network Traffic Camera 1 5m Lane 1 Flash Light 1 Flash Light 3 Network Traffic Camera 2 Lane 3 Lane 4 Flash Light 4 Construction Solution for 3 MP Camera The pole height is 6 m.
Network Traffic Camera • Quick Start Guide 26 m Lane 3 26 m Pole Height: 6 m Flash Light 3 Flash Light 2 Radar 3 3.75 m 5m Lane 2 3.75 m Lane 1 3.75 m Trigger Position Radar 2 Network Traffic Camera 1 m 55 m Radar 1 Flash Light 1 Flash Light 4 Radar 4 5m Network Traffic Camera 2 Radar 5 Radar 6 Flash Light 5 Flash Light 6 Trigger Position 3. mm 3.75 Lane 4 3.75 m Lane 5 3.75 m Lane 6 5m Pole Height: 6 m Construction Solution for 9 MP Camera The pole height is 6 m.
Network Traffic Camera • Quick Start Guide Chapter 3 Installation Install Lens Pull out the sensor protective cover. Install the lens, and rotate it 90 clockwise until it is fixed. Connect the lens cable plug to the auto iris interface. If the camera only supports manual iris, skip step 2. Insert TF card Install the TF card according to arrow direction as shown in the Figure 3-1. If you want to take out the TF card, press it inwards lightly to pop it up.
Network Traffic Camera • Quick Start Guide Guard Shield Buckle Open Guard Shield Take off the bottom plate from the guard shield, and fix the camera on it by included screws. Fix Camera on Bottom Plate Fix the guard shield cover on the camera. Connect the cable with the camera, and thread the cable through the hole in bottom. Connect Camera with Cable Install Camera on Horizontal Pole Cardan joint consists of 2 parts. Upper part includes 2 screw holes, and lower part is connected with hoop.
Network Traffic Camera • Quick Start Guide Install the hoop. 1) Loosen the hoop screws and open the hoop. 2) Pull the hoop ring, and shrink the hoop to the thickness of the horizontal pole. 3) Install the hoop bracket on the horizontal pole. Install Hoop Align the screw holes at the bottom of the cardan joint with the hoop, screw in, and tighten the screws, to install the cardan joint on the hoop. Install Cardan Joint Fix the whole camera with sun shield on the horizontal pole with the cardan joint.
Network Traffic Camera • Quick Start Guide Chapter 4 Network Connection You shall acknowledge that the use of the product with Internet access might be under network security risks. For avoidance of any network attacks and information leakage, please strengthen your own protection. If the product does not work properly, please contact with your dealer or the nearest service center. To ensure the network security of the camera, we recommend you to have the camera assessed and maintained termly.
Network Traffic Camera • Quick Start Guide Switch Network Traffic Camera Computer Connection via a Switch or a Router Activate the Camera You are required to activate the camera first by setting a strong password for it before you can use it. Multiple activation methods are supported. Here we take example of activation via web browser and SADP. Refer to the user manual of client software for the activation via client software.
Network Traffic Camera • Quick Start Guide SADP Interface Create a password, and confirm it. Click Activate to activate the device. STRONG PASSWORD RECOMMENDED– We highly recommend you create a strong password of your own choosing (using a minimum of 8 characters, including upper case letters, lower case letters, numbers, and special characters) in order to increase the security of your product.
Network Traffic Camera • Quick Start Guide Modify Network Parameters Input the password and click Modify to activate your IP address modification. Activate via Web Browser Power on the camera, and connect the camera to the network. Input the IP address into the address bar of the web browser, and press Enter to enter the activation interface. Activation Interface (Web) Create a password.
Network Traffic Camera • Quick Start Guide STRONG PASSWORD RECOMMENDED– We highly recommend you create a strong password of your own choosing (using a minimum of 8 characters, including upper case letters, lower case letters, numbers, and special characters) in order to increase the security of your product. And we recommend you reset your password regularly, especially in the high security system, resetting the password monthly or weekly can better protect your product. Confirm the password.
UD18302B