
Quick Start Guide


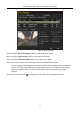


Table Of Contents
- Chapter1 Panels Description
- Chapter 2 Installation and Connections
- Chapter 3 Menu Operation
- 3.1 Menu Structure
- 3.2 Startup and Shutdown
- 3.3 Activating Your Device
- 3.4 Using the Unlock Pattern for Login
- 3.5 Login and Logout
- 3.6 Using the Setup Wizard
- 3.7 Configuring Signal Input Channel
- 3.8 Network Settings
- 3.9 General Settings
- 3.10 Adding IP Cameras
- 3.11 Configuring Custom Protocols
- 3.12 Live View
- 3.13 ATM Settings
- 3.14 Smart ATM Settings
- 3.15 Recording Settings
- 3.16 Playback
- Chapter 4 Accessing by Web Browser

ATM Digital Video Recorder Quick Start Guide
31
3.13 ATM Settings
Step 1 Enter the ATM settings interface.
Menu > Configuration > ATM
Figure 3-27 ATM Settings
Step 2 Check the checkbox of Enable ATM to enable ATM function.
Step 3 Select the input mode to Network Interception, Serial Port Interception, Network Protocol,
or Serial Port Protocol, which refers to the connection type of the ATM DVR.
Step 4 Click Setting to enter the settings interface of the input mode you select.
The following steps give the settings of Serial Port Interception as the example.
Figure 3-28 Serial Port Interception
Step 5 Select the protocol for the input mode you select. And if the Network Interception or Serial
Port Interception connection type is used, you can also click Setting to enter the settings
interface to set the parameters.