
Quick Start Guide


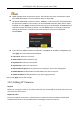


Table Of Contents
- Chapter1 Panels Description
- Chapter 2 Installation and Connections
- Chapter 3 Menu Operation
- 3.1 Menu Structure
- 3.2 Startup and Shutdown
- 3.3 Activating Your Device
- 3.4 Using the Unlock Pattern for Login
- 3.5 Login and Logout
- 3.6 Using the Setup Wizard
- 3.7 Configuring Signal Input Channel
- 3.8 Network Settings
- 3.9 General Settings
- 3.10 Adding IP Cameras
- 3.11 Configuring Custom Protocols
- 3.12 Live View
- 3.13 ATM Settings
- 3.14 Smart ATM Settings
- 3.15 Recording Settings
- 3.16 Playback
- Chapter 4 Accessing by Web Browser

ATM Digital Video Recorder Quick Start Guide
23
Menu > Shutdown
Figure 3-17 Logout
Step 2 Click Logout.
After you have logged out the system, menu operation on the screen is invalid. It is required to
input a user name and password to unlock the system.
3.6 Using the Setup Wizard
The Setup Wizard can walk you through some important settings of the device. By default, the
Setup Wizard starts once the device has loaded.
Check the checkbox to enable Setup Wizard when device starts. Click Next to continue the setup
wizard. Follow the guide of the Setup Wizard to configure the system resolution, system date/time,
network settings, HDD management, record settings, etc.
Figure 3-18 Wizard
3.7 Configuring Signal Input Channel
Purpose
You can configure the analog and IP signal input types and the connectable maximum IP camera
number.