
User Manual
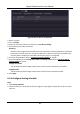
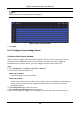
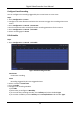
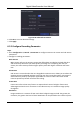
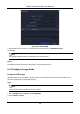
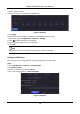
Table Of Contents
- Chapter 1 Startup
- Chapter 2 Live View
- Chapter 3 Playback
- Chapter 4 File Search
- Chapter 5 Configuration (Easy Mode)
- Chapter 6 Configuration (Expert Mode)
- 6.1 System Configuration
- 6.2 Network Configuration
- 6.3 Camera Management
- 6.4 Event Configuration
- 6.5 Recording Management
- 6.6 RS-232 Settings
- 6.7 Face Picture Library Management
- Chapter 7 Maintenance
- Chapter 8 Alarm
- Chapter 9 Web Operation
- Chapter 10 Appendix

Digital Video Recorder User Manual
76
3. Select a group number.
4. Select IP cameras to record on the HDD group.
Figure 6-28 Group
5. Click Apply.
6. Restart the video recorder to activate the new storage mode settings.
7. After restart, go to Configuration → Record → Storage.
8. Click of desired HDD to set the group.
9. Select a group number for the current HDD.
10. Click OK.
Note
Regroup the cameras for HDD if the HDD group number is changed.
Configure HDD Quota
Each camera can be configured with an allocated quota for storing videos.
Steps
1. Go to Configuration → Record → Storage Mode.
2. Set Mode as Quota.
3. Select a camera to set quota in Camera.
4. Enter the storage capacity in Record Capacity.
Figure 6-29 Quota