
User Manual
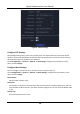
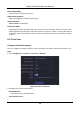
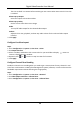
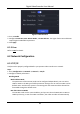
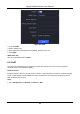

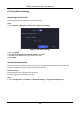
Table Of Contents
- Chapter 1 Startup
- Chapter 2 Live View
- Chapter 3 Playback
- Chapter 4 File Search
- Chapter 5 Configuration (Easy Mode)
- Chapter 6 Configuration (Expert Mode)
- 6.1 System Configuration
- 6.2 Network Configuration
- 6.3 Camera Management
- 6.4 Event Configuration
- 6.5 Recording Management
- 6.6 RS-232 Settings
- 6.7 Face Picture Library Management
- Chapter 7 Maintenance
- Chapter 8 Alarm
- Chapter 9 Web Operation
- Chapter 10 Appendix

Digital Video Recorder User Manual
45
Steps
1. Go to Configuration → Network → General → Wi-Fi.
Note
The Wi-Fi setting interface will automatically pop up when you insert the Wi-Fi dongle for the
first time.
2. Connect to a wireless network.
Connect to an
Automatically
Searched Wireless
Network
1. Double click the wireless network from the list as you desired.
2. Set wireless network parameters.
3. Click OK.
Connect to a
Customized Wireless
Network
1. Click Custom Adding.
2. Set wireless network parameters.
3. Click OK.
Connect to a
Wireless Network
with WPS (Wi-Fi
Protected Setup)
1. Click WPS Settings.
2. Check Enable WPS.
3. Set wireless network parameters.
4. Click Apply.
Note
If you requires to edit or forget the network, double click the connected network, and edit it as
your desire.
After connecting to an available wireless network, you can view the connection result in
Connection Status.
3. Go to Configuration → Network → General → TCP/IP.
4. Set Select NIC and Default Route as WLAN0.
5. Check Enable Wi-Fi.
6. Set other network parameters.
7. Click Apply.