
User Manual
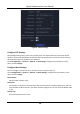
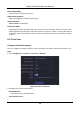
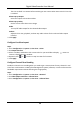
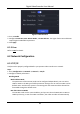
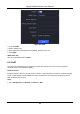
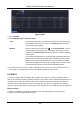

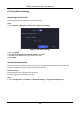
Table Of Contents
- Chapter 1 Startup
- Chapter 2 Live View
- Chapter 3 Playback
- Chapter 4 File Search
- Chapter 5 Configuration (Easy Mode)
- Chapter 6 Configuration (Expert Mode)
- 6.1 System Configuration
- 6.2 Network Configuration
- 6.3 Camera Management
- 6.4 Event Configuration
- 6.5 Recording Management
- 6.6 RS-232 Settings
- 6.7 Face Picture Library Management
- Chapter 7 Maintenance
- Chapter 8 Alarm
- Chapter 9 Web Operation
- Chapter 10 Appendix

Digital Video Recorder User Manual
40
The time to dwell in a camera before switching to next camera when auto-switch in live view
is enabled.
Alarm Pop-up Output
Select the output to show alarm video.
Alarm Pop-up Delay
Set the time to show alarm event image.
Audio
Turn on/off audio output for the selected video output.
Volume
Adjust the live view, playback, and two-way audio volume for the selected video output
interface.
3. Click Apply.
Configure Live View Layout
Steps
1. Go to Configuration → System → Live View → View.
2. Set Output Interface.
3. Select a window, and double click a camera the list you would like to display. means no
camera is displayed on the window.
4. Optional: Click or to start or stop live view of all cameras.
5. Click Apply.
Configure Channel-Zero Encoding
Enable the channel-zero encoding when you need to get a remote view of many channels in real
time from a web browser or CMS (Client Management System) software, in order to decrease the
bandwidth requirement without affecting the image quality.
Steps
1. Go to Configuration → System → Live View → General.
2. Set Video Output Interface as Channel-Zero.
3. Go to Configuration → System → Live View → Channel-Zero.