
User Manual


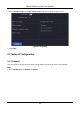
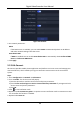
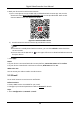
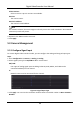
Table Of Contents
- Chapter 1 Startup
- Chapter 2 Live View
- Chapter 3 Playback
- Chapter 4 File Search
- Chapter 5 Configuration (Easy Mode)
- Chapter 6 Configuration (Expert Mode)
- 6.1 System Configuration
- 6.2 Network Configuration
- 6.3 Camera Management
- 6.4 Event Configuration
- 6.5 Recording Management
- 6.6 RS-232 Settings
- 6.7 Face Picture Library Management
- Chapter 7 Maintenance
- Chapter 8 Alarm
- Chapter 9 Web Operation
- Chapter 10 Appendix

Digital Video Recorder User Manual
23
6. Bind your device with a Hik-Connect account.
1) Use a smart phone to scan the QR code, and download Hik-Connect app. You can also
download it from https://appstore.hikvision.com, or the QR code below. Refer to Hik-
Connect Mobile Client User Manual for details.
Figure 5-5 Download Hik-Connect
2) Use Hik-Connect to scan the device QR, and bind the device.
Note
● If the device is already bound with an account, you can click Unbind to unbind with the
current account.
● You can also use the QR code in at the upper-left corner to download Hik-Connect and
bind your device.
7. Click Apply.
Result
● If your device is connected with Hik-Connect platform, Connection Status will be Online.
● If your device is bound with a Hik-Connect account, Bind Status will be Yes.
What to do next
You can access your video recorder via Hik-Connect.
5.2.3 Email
Set an email account to receive event notification.
Before You Start
● Ensure SMTP service is available for your email.
● Configure your network parameters. Refer to General for details.
Steps
1. Go to Configuration → Network → Email.