
User Manual
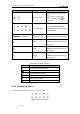
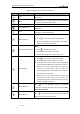
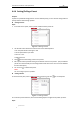
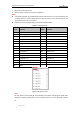
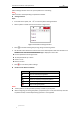
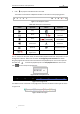
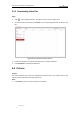
Table Of Contents
- Chapter 1 Overview
- Chapter 2 Network Connection
- Chapter 3 Accessing to the Network Speed Dome
- Chapter 4 Basic Operations
- Chapter 5 ITS Configuration
- 5.1 Set Enforcement
- 5.2 Set Vehicle Detection
- 5.3 Set Basic Configuration
- 5.4 Set Advanced Parameters
- 5.5 Pictures
- 5.6 Set FTP Host
- 5.7 Set Blocklist & Allowlist
- Chapter 6 Speed Dome Configuration
- 6.1 Storage Settings
- 6.2 Basic Event Configuration
- 6.3 Smart Event Configuration
- 6.4 PTZ Configuration
- 6.4.1 Configuring Basic PTZ Parameters
- 6.4.2 Configuring PTZ Limits
- 6.4.3 Configuring Initial Position
- 6.4.4 Configuring Park Actions
- 6.4.5 Configuring Privacy Mask
- 6.4.6 Configuring Scheduled Tasks
- 6.4.7 Clearing PTZ Configurations
- 6.4.8 Prioritize PTZ
- 6.4.9 Configuring Position Settings
- 6.4.10 Configuring Rapid Focus
- Chapter 7 System Configuration
- 7.1 Configuring Network Settings
- 7.2 Configuring Video and Audio Settings
- 7.3 Configuring Image Settings
- 7.4 Configuring System Settings
- Appendix

User Manual of Network Traffic Speed Dome
© Hikvision
23
Button
Name
Description
Iris close/open
When the image is too dark, click
to open the iris. When the
image is too bright, click to
close the iris.
Auxiliary Functions
Refer to Section 4.4.3 Auxiliary
Functions for detailed information of
auxiliary functions.
Speed Adjustment
Adjust speed of pan/tilt movements.
Preset
Refer to section 4.4.4 Setting/Calling
a Preset for detailed information of
setting preset.
Patrol
Refer to section 4.4.5 Setting/Calling
a Patrol for detailed information of
setting patrol.
Pattern
Refer to section 4.4.7 Setting/Calling
a Pattern for detailed information of
setting pattern.
Buttons on the Preset/Patrol/Patterns interface:
Table 4-3 Descriptions of Buttons
Buttons
Description
Start the selected patrol/pattern.
Stop current patrol/pattern.
Set the selected preset/patrol.
Delete the selected preset/patrol/pattern.
Start recording a pattern.
Stop recording the pattern.
4.4.3 Auxiliary Functions
The Auxiliary functions panel is shown in the figure below:
Figure 4-5 Auxiliary Functions