
Quick Start Guide


1 6 A C C E S S I N G B Y W E B B R O W S E R ( c o n t i n u e d )
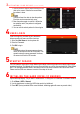
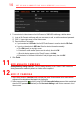
4.
Log
in to the device.
• If the device has not been activated, you must
first activate the device by setting the admin
user account password.
• If device is activated, enter user name and
password in login interface, and click Login.
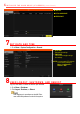
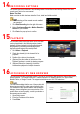
5. Follow the prompts to install the installation plug-in
before viewing live video and managing camera.
Close the Web browser to finish the plug-in
installation.
After login, you can operate and configure
the device, including using live view,
playback, log search, configuration, etc.
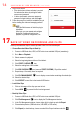
17 B A C K U P V I D E O R E C O R D I N G S A N D C L I P S
Back up recorded video clips to ensure important video is not lost or destroyed.
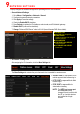
• Choose Recorded Video Clips to Back Up
1. Connect a USB flash drive, HDD, or DVD writer to an available USB port (mandatory).
2. Go to Menu > Playback.
3. Select cameras for playback.
4. Select the beginning date and time of the incident.
5. Click START CLIPPING icon.
6. Select the ending time of the incident.
7. Click END CLIPPING icon (same as START CLIPPING). Clip will be marked.
8. Repeat steps 1-6 as many times as required.
9. Click FILE MANAGEMENT icon to display a new window containing all marked clips.
10. Select the desired clips.
11. Click EXPORT to save files to the inserted USB device.
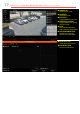
• Lock Video Clips
1. Click on the images of the clips you want to lock.
2. Press LOCK to prevent the file from being erased.
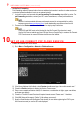
• Back Up Video Clips
1. Connect a USB flash drive, HDD, or DVD writer to an available USB port.
2. Click File Management icon to display the File Management window.
3. In the File Management window, choose video clip(s) to back up and click Export.
4. Choose backup device (USB flash drive, USB HDD, or DVD writer).
5. Click Export (to check backup, choose recorded file in Export interface and click ).